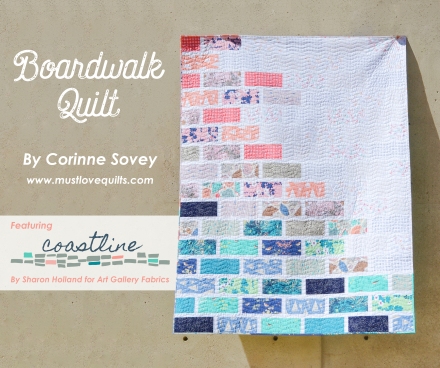
Boardwalk Quilt

new banner

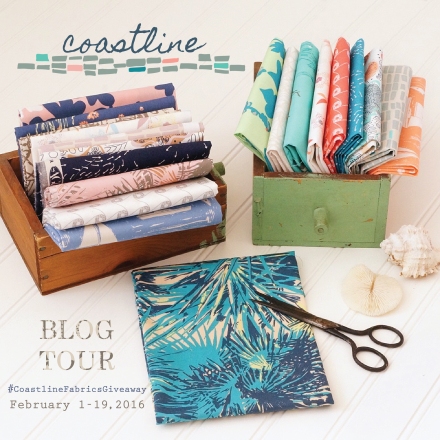
If you follow my blog you already know I’m a nut when it comes to the beach. So when Sharon Holland put out a call for makers on Instagram for her new fabric collection, Coastline, I jumped at the chance to be part of it. I’m thrilled to be part of such a talented group and have loved seeing everyone’s projects so far, with many more to come! Yesterday, Lisa Mabey posted the cutest outfit she made from the fabrics, and she even included an awesome tutorial. I’m already looking forward to what Raedene Averitt has in store for tomorrow. You can check out the full line-up for the blog-hop here

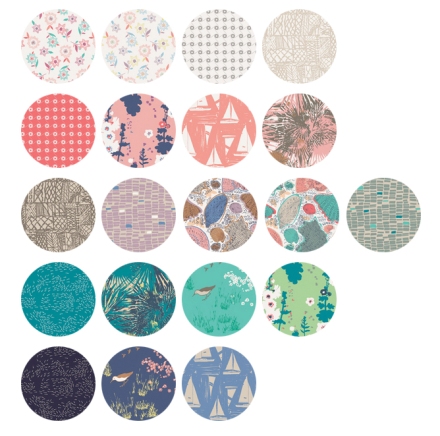
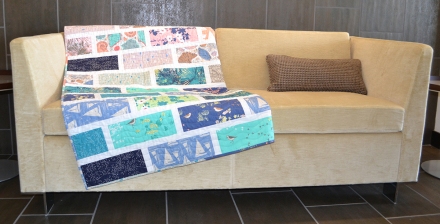
I guess I should share my project! Obviously, I HAD to make a quilt. I’ve been a huge fan of Art Gallery Fabrics for a while, they are so soft, and I have loved every line they’ve produced. I looked to Sharon’s fabric for inspiration and noticed the colors would look really great fading into one another. I grouped the fabric into small color groups, “fading”
from blue-teal-beige-pink-white, and set out to come up with a design.

blog swatches

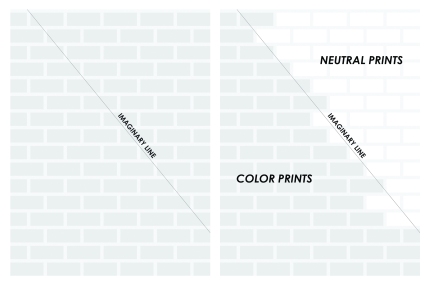
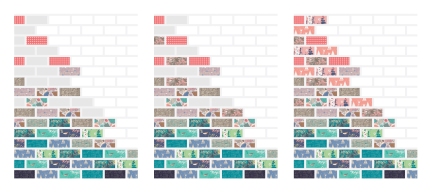
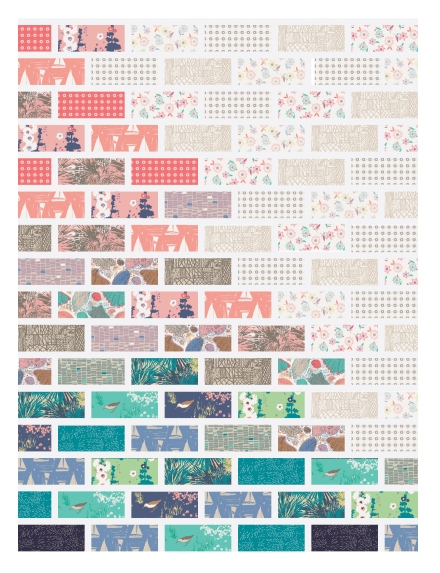
I decided to go with a brick layout so I mocked one up in Illustrator. Since I was fading from one color to another, I thought it would also be fun to split the quilt into color and “neutrals.”  I pictured an imaginary line diagonally up the quilt and filled in the bricks I knew I wanted to have color.

IMAGINARY LINE

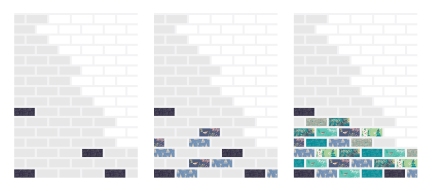
I already had my colors separated, so I started filling in random bricks with each print. I started off scattering the same print in 1-3 spots, starting with the dark blue. I kept the angle of the imaginary line in mind while placing my fabrics. I then added more of the blue prints.

blue

As I got toward the center I switched over to the beige/in-between prints.

beige

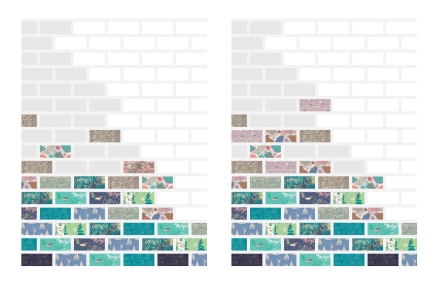
I then started working my way down from the bottom with the pinks in the same way.

pink

Finally, I scattered the low-volume neutrals as best I could without grouping too many of the same print together. I ended up needing two fat quarters of each neutral to make it work.

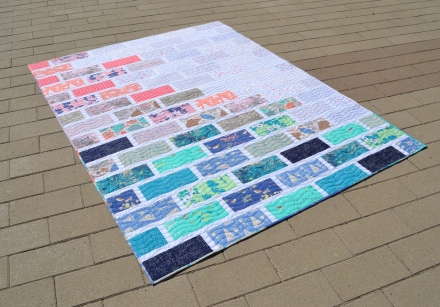
Boardwalk

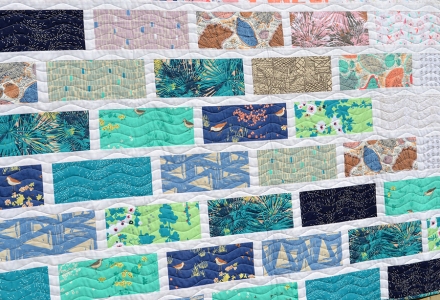
I ended up mixing up a few rows when piecing, but I think it still worked out! I backed the quilt with the teal sand piper print and asked my long-armmer to quilt a wavy pattern to mimic the coastal theme.

pic2

pic5

pic4

I hope you enjoyed a little glimpse into my “design process.”  Don’t forget, Sharon is hosting an awesome giveaway at the end of the blog-hop via Instagram. Check out the details on her blog. You could win a fat quarter bundle of your own! Thank you so much for checking out my quilt.

Coastline Blog Tour Giveaway-01

Piece out!

Corinne

Fat Quarter Shop Firecrackers Quilt Blog Hop

Firecrackers by Must Love Quilts

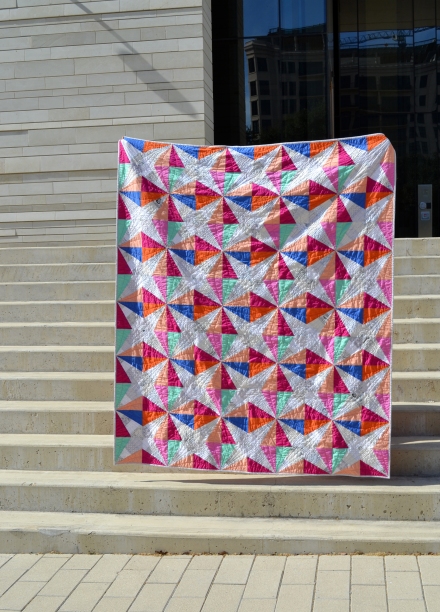
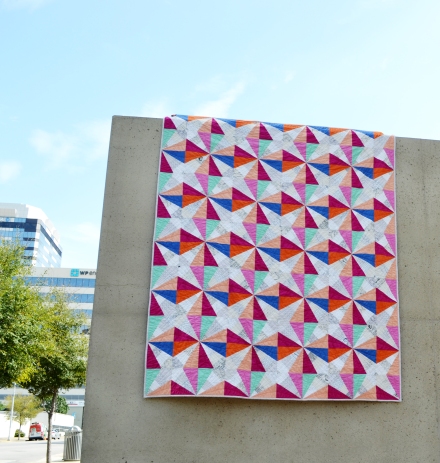
Howdy! I’m super excited to share my version of the Firecrackers Quilt, pattern designed and available via Fat Quarter Shop. One of my favorite parts of the online quilting community is seeing the different ways people interpret a pattern. Fabric choice and placement plays such an important part of quilting! I knew I wanted to offer a different voice with this pattern, and ultimately I decided it might be fun to use Zen Chic’s Modern Background Paper as the print, and a variety of solids as my “neutral.”

Firecrackers

My quilty friends know that I prefer regular piecing to paper piecing. Another thing that is great about this quilt is that it is traditionally pieced using jelly rolls and the ever fantastic Creative Grids rulers. Followers of my blog know I can’t get enough of those. Fat Quarter Shop also has super helpful tutorials so that any skill level can take this quilt on! Here are a few helpful links for folks who are interested:

PDF Pattern

Quilt Kit

Backing Set

Video Tutorial

Firecrackers Closeup

Make sure you check out the other awesome bloggers who have their own gorgeous versions of Firecrackers. I’m honored to have been included with such talent. 🙂

Ants to Sugar by Daisy

Silly Mama Quilts by Brooke

On the Windy Side by Adrianne

Happy Quilting by Melissa

627 Handworks by Julie

Must Love Quilts by Corinne

Mommy Sew by Jenn

Little Bunny Quilts by Alison

Fly Away Quilts by Lauren

Last but not least, Fat Quarter Shop was generous enough to provide an awesome surprise giveaway to one lucky follower! Comment below for a chance to win. Comments close Monday, November 16th at 5pm Central. Good Luck!

Piece Out!

Corinne

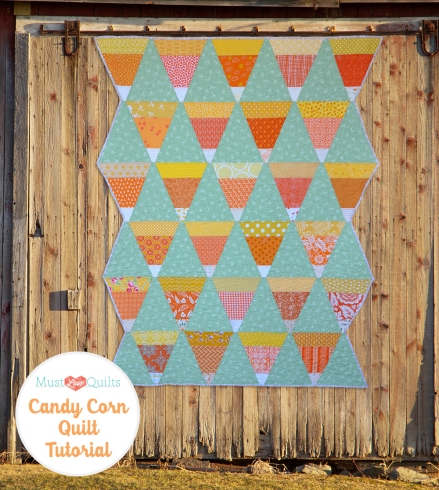
Candy Corn Quilt Tutorial

Candy Corn Tutorial | Must Love Quilts

Happy October!

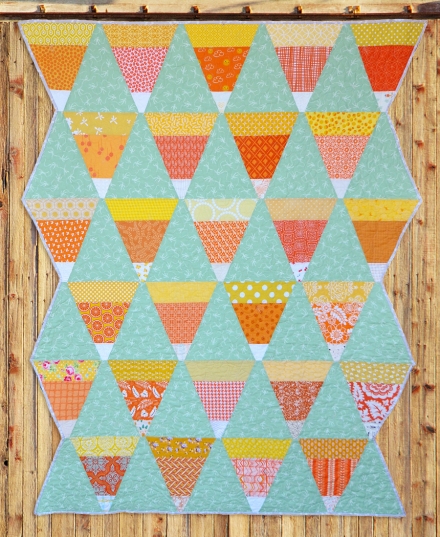
Autumn is my favorite season and this year I felt like it would never get here. In fact, it still doesn’t feel like fall here in Austin. Despite the hot weather, I’m in full Halloween mode and I’m actually done with my Halloween quilt! A couple of weeks ago I was brainstorming Halloween quilt ideas, and after glancing at my GIANT stash of orange and yellow fabric sitting on my shelves, the idea of a Candy Corn quilt seemed like a no-brainer. I googled Candy Corn quilts in various places (google, pinterest, instagram) and found SO many lovely versions. I honestly was hoping I’d find someone who could tell me exactly what size fabric pieces to cut and assemble, but none of them were exactly what I was looking for. I decided to figure out “my own” version of a Candy Corn quilt.

I love my Creative Grids rulers, so I took out my 60 degree equilateral triangle ruler and my 30 degree triangle ruler. I felt like I was in the fairy tale Goldilocks and the Three Bears. The 60 degree triangle was TOO wide, the 30 degree triangle wasn’t wide enough. I wanted a candy corn shape that was JUST right. I ultimately decided a 45 degree triangle would be perfect for the candy corn shape I was hoping to achieve. I hopped online to see if Creative Grids produced a large/long 45 degree triangle ruler. Sadly, the only one they offer is their 8.5 inch long Dresden 45 degree ruler. That just wasn’t going to be long enough to get the shape I wanted. Below you’ll find detailed instructions for how I used my cutting mat to help me get the perfect 45 degree triangle.

Throw Size Scrappy Candy Corn Quilt (Approximately 69 inches long and 54 inches wide)

Materials

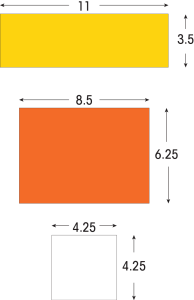
(27) 11″ x 3.5″ Yellow Rectangles

(27) 8.5″ x 6.25″ Orange Rectangles

(27) 4.25″ x 4.25″ White Squares

2 yards of fabric for between the pieced candy corns (will refer to these as your “solid” triangles) I used the fabulous Cotton + Steel Mint Mummies print.

Step 1


Instructions

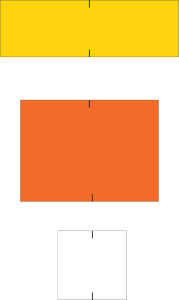
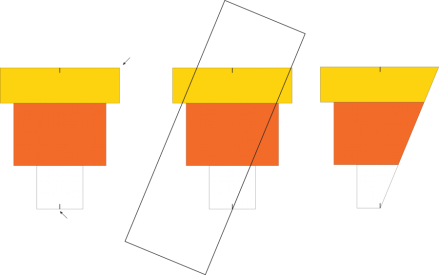
Step 1: First you’ll want to mark the center of both sides of each candy corn piece. Some people mark a small line on either end of the rectangle, I prefer to iron my pieces in half because it is quick and easy. I’ve used a “pencil mark” on the images below so that you can easily follow along.

1


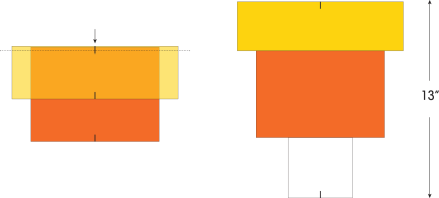
Step 2: Line up the center of your yellow piece and the center of your orange piece, right sides together. Sew 1/4 inch down the edge. Do the same with your white piece along the other side of your orange piece. It doesn’t matter which way you iron your seams. What is important is that you matchup the centers of your pieces. Your end unit should be 13″ from top to bottom.

2

Step 3: Align your ruler starting at the bottom center of your white piece, all the way up to the top right corner of your yellow piece. Cut along this edge to produce one side of your triangle.

3


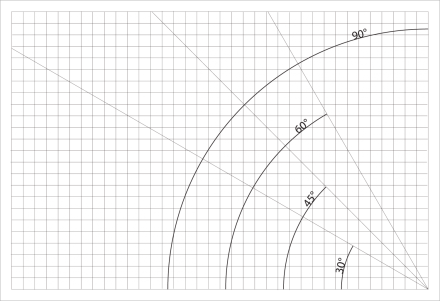
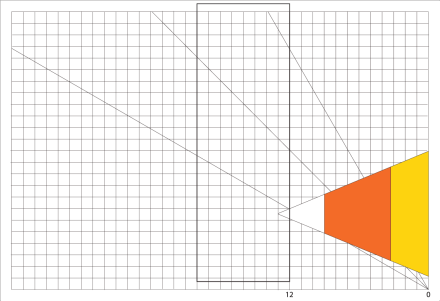
Step 4: Here is where your cutting mat enters the picture. First let’s take a look at the way a cutting mat is setup. They may differ based on manufacturer, but the idea is the same. I use a Fiskars Self-Healing 24 x 36 cutting mat. See image below for how the different angles are broken down. We will be using the 45 degree angle.

4a

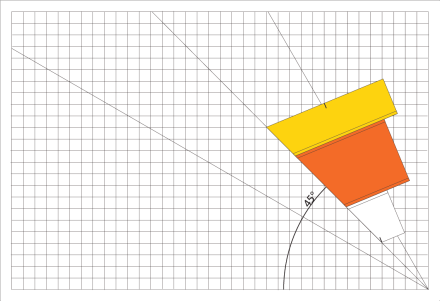
First, flip your candy corn so that the wrong side is facing you. Line the straight edge you just cut up along the 45 degree angle line, making sure the center of your white piece ends up along one of your cutting mats grid lines, as seen below.

4b

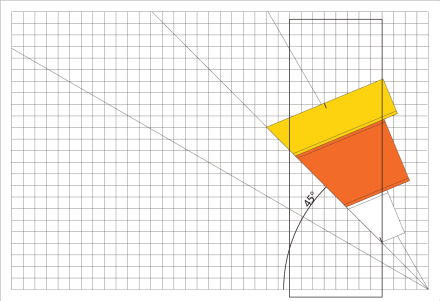
Take your ruler and line it up along the gridline where the white center is. Cut along the edge. You are almost done with your candy corn unit!

4c


Step 5: I didn’t want my candy corn pieces to have pointy tips, so I trimmed the point off of the pieces. Line the yellow edge of your candy corn piece up along the side of your cutting mat. Trim at the 12 inch mark.

5


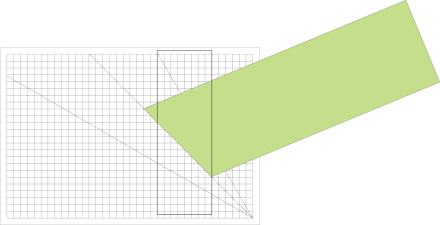
Step 6: You will cut your solid triangles the same way you trimmed down your candy corn pieces. First, take your fabric and cut it into large strips that are 13″ x Width of Fabric (wof). You can get 6 solid triangle units from ever 13″ x wof large strip. Since you need (27) solid triangles for this size quilt, you will need (5) 13″x wof large strips.

I “cheat” on the first step. I take an untrimmed candy corn unit, lay it on top of my fabric, and then I use my ruler to cut the first 45 degree line.

6a

Next, flip your fabric and line it up the same way you did in Step 4 for the candy corn pieces. Keep flipping your fabric until you’ve cut out 6 triangles. Trim the pointy ends off like you did in Step 5.

6b

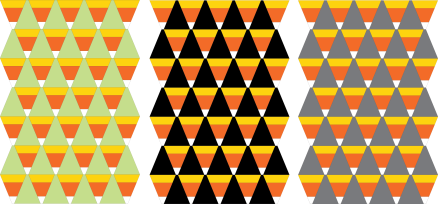
Step 7: Arrange your candy corns and sew together. I think this quilt could also be really fun with other colors, as seen below. I’m in love with the mummy print, so it was a natural choice for me. Others might prefer something more traditional with black, grey, purple or lime green.

color options


Candy Corn Quilt | Must Love Quilts | By Corinne Sovey


Tropical Punch Tutorial for Moda Bake Shop

I’m back with another tutorial for Moda Bake Shop!

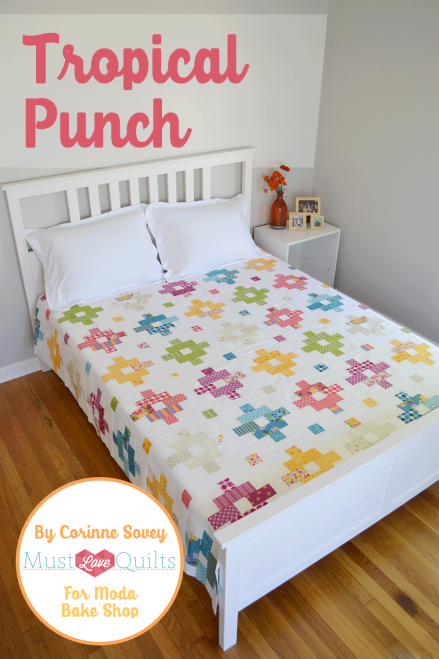
tropical-punch-cover

I am so thrilled with how this quilt turned out. Meadowbloom is seriously gorgeous and I think it was the perfect collection for this pattern. Since it is the Summer of Bella Solids, and you know I love my solids, I thought it would be fun to mockup a version of the quilt in various solid colors.

If I were to make a throw quilt I would have 6 rows of 5 blocks, so 30 blocks total. With sashing the end quilt would measure 58″ x 70.”  I think this palette is perfect for summer.

Tropical Punch | Must Love Quilts

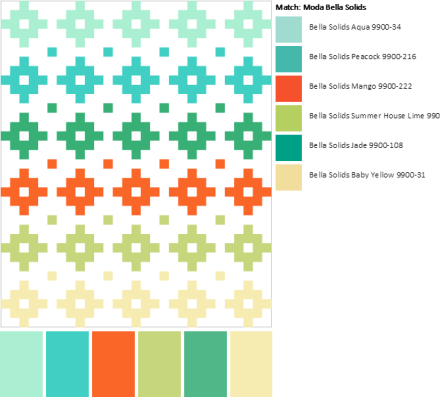
I used Moda’s nifty Palette Builder by Play Crafts to figure out which Bella Solids would work best. It was so simple and I didn’t even have to whip out my Bella Color Card!

bella solids-palette (1)

Aqua 9900-34

Peacock 9900-216

Mango 9900-222

House Lime 9900-173

Jade 9900-108

Baby Yellow 9900-31

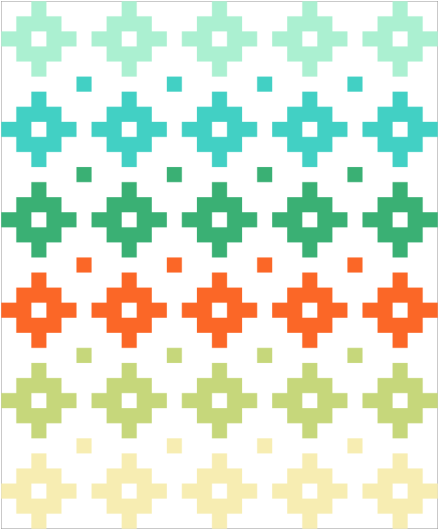
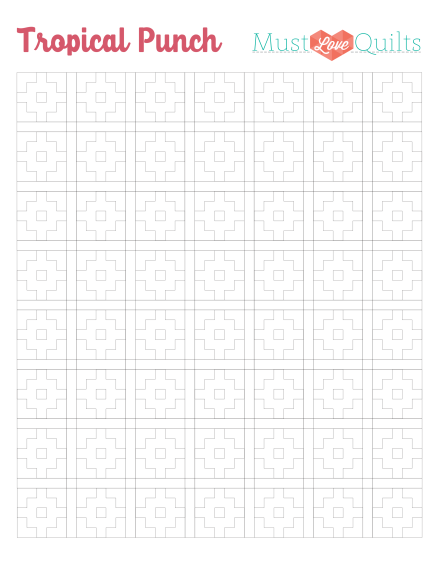
Last but not least, here is a coloring page for y’all so you can play around with color placement for your own quilts! Just click on the image to bring it up to full size in your browser, and print from there. Easy peasey.

coloring

Thanks for checking out my alternative version of Tropical Punch!

Piece Out,

Corinne

Mid-Summer Progress

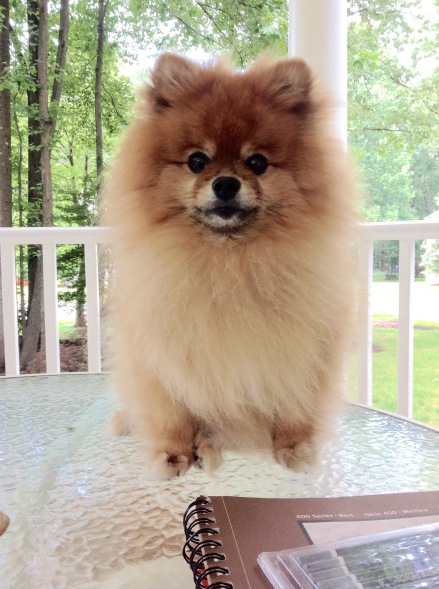
I hope y’all have been having a wonderful summer! My summer has been rather uneventful, but I’ve been keeping busy. My office was nice enough to let me work remotely from my parent’s house in Virginia for a few weeks, so I spent the bulk of July in Fairfax County, enjoying a break from the Texas heat. I only took my hand-piecing with me, so I made good progress on it while there. It was so nice sitting on my parents’ front porch with my pups, hand sewing! My pom poms love visiting grammy and especially love her porch. My Itsy bear is content wandering the porch inspecting things, but Miss Liberty thinks she is a human and insists she either be on the table (seen below), on a lap, or on her own chair. With that face, who could say no?!

Miss Liberty


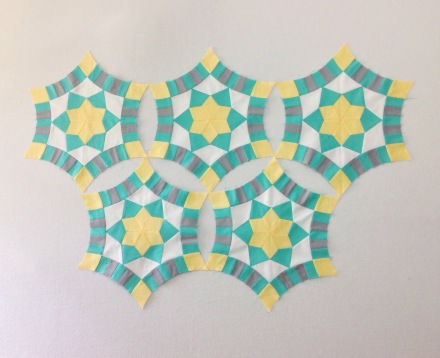
Here is a look at the progress I’ve made on the Golden Wedding Ring. Five down, a zillion more to go!

Golden Wedding Ring | Must Love Quilts

This summer I also participated in my very first craft swap on Instagram. If you don’t follow me yet you can find me @mustlovequilts. I have several friends who are big swappers and I honestly never thought I’d get into it, I have so many projects going on at once it just wasn’t in the cards. I realized though that I’m always so busy with my own projects I don’t take enough time to interact with folks outside of my local guilds, so I figured swapping would be another way to get to know other crafty folks around the country. I joined “The Animal In You” swap, where participants would swap three crafty items based on their partner’s favorite animals. My partner listed a handful of animals in her mosaic so I set out to create a diverse mix of gifts for her. She has received the package so I can share my creations with you!

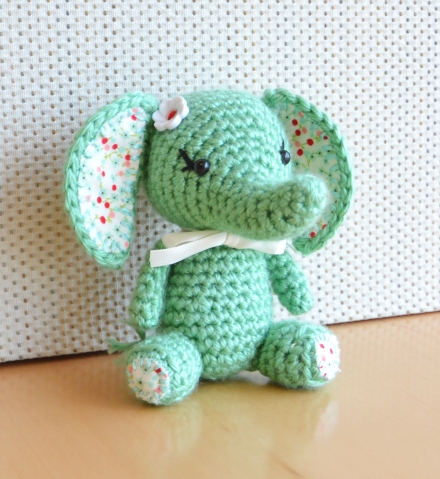
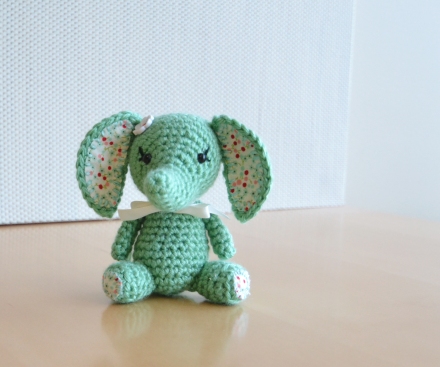
First up is a little crochet elephant. The pattern is by Mari-Liis Lille and you can find it on Ravelry. I just love how the designer uses fabric on the inside of the ears. I busted out some of my Bonnie & Camille fabric that I thought paired well with the teal I chose for the body color. She is pretty small and fits in the palm of your hand. I haven’t crocheted much since picking up quilting, and it was nice to work on a little crochet project again!

Ellie | Must Love Quilts

Ellie | Must Love Quilts

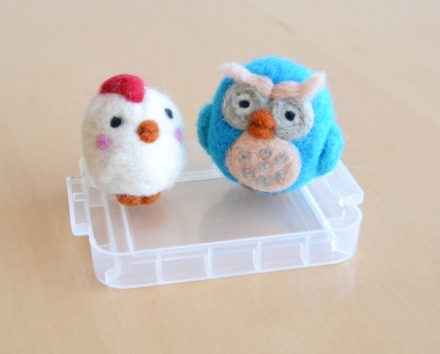
Next up some little buggers I needle-felted. Again, I haven’t needle-felted in ages but it was so fun to jump into again. My full-time job is rather stressful, and there is something about stabbing a little ball of wool 8 million times that relieves a little bit of stress. I’m reobsessed with this and have been breaking out the needle felting in the evenings when I don’t have the mental capacity to quilt. I have a little flamingo I’ve been working on I hope to share soon. The guys below are tiny, less than 2 inches probably. The rooster is based on a clay rooster I saw on pinterest and the owl is just a mixture of various needle felted owls I’ve seen over the years.

Needle Felting | Must Love Quilts


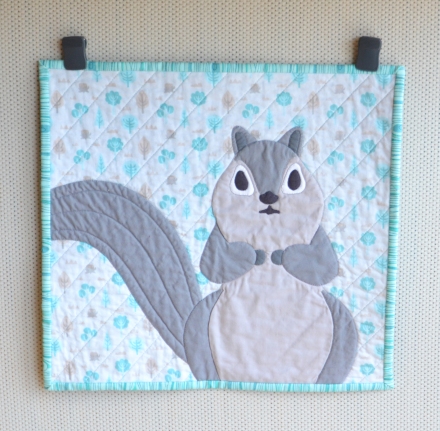
Last but not least is the Squirrel mini-quilt. I found an awesome Japanese advertisement on pinterest by Norito Shinmura and knew I had to recreate it with fiber. Be sure to check out his website for more of his awesome work, he is amazing. I changed his chipmunk into a squirrel and used glue applique and dissolving paper to create the mini. I happened to have some awesome teal woodland fabric in my stash, and really cool teal woodgrain fabric for the binding.

Norito Shinmura Fiber Squirrel | Must Love Quilts

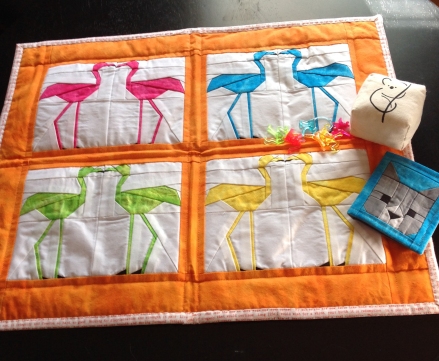
The fun thing about swaps is not only do you get to enjoy making things for another person, you get stuff in return! I was super lucky to receive awesome gifts from @mrslorichandler. I’ve always had a thing for flamingos and her mini is just too fun. I was obsessed with koalas as a child and just love the little koala pin cushion. Don’t even get me started on the kitten needle-book! I’m already getting tons of use out of it. 🙂

Thank you @mrslorichandler !

Some of you will be happy to know I’ve been working on some new patterns and tutorials. I have another Moda Bake Shop tutorial coming up later this month, and a freebie pattern I hope to post soon as well. I also finally got some decent pictures taken of my Sunshine Tiles quilt and I have that pattern in the works. Here is one of the photos that was photo-bombed by my lovely little Annabelle. She doesn’t get to play in the guest room, so she took advantage of the open door, which quickly got shut once I shooed her out!

Sunshine Tiles Pattern Coming Soon | Must Love Quilts


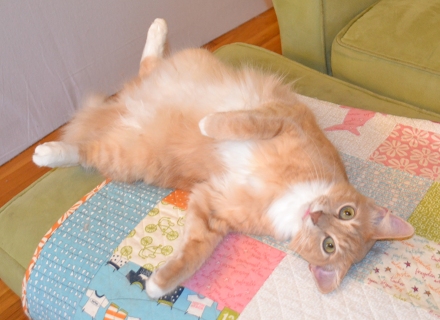
That’s all for now! Thanks for checking out what I’ve been up to this summer. I leave you with a picture of my other cat, enjoying quilts almost as much as I do!

Cats love Quilts

Piece Out,

Corinne

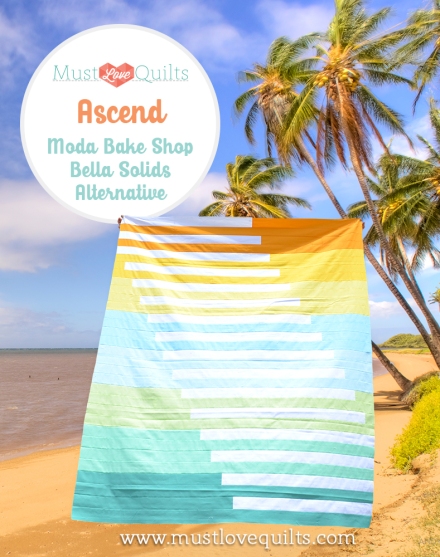
Ascend Quilt – Moda Bake Shop Bella Solids Alternative

Moda Bakeshop Ascend - Must Love Quilts

I’m super excited to announce I have my first ever Moda Bake Shop tutorial this week! You can hop over to http://www.modabakeshop.com to check it out. Moda is releasing several new Christmas lines over the next couple months, giving you plenty of time to make some Christmas quilts before the holiday season gets here. On the opposite end of the spectrum, the Moda Bake Shop is also doing a “Summer of Solids” series where their chefs whip up projects using Bella Solids. I knew the quilt I designed would look super fun in solids, so I decided to hit up my local quilt shops for some Bella and got to work piecing an alternative version of my Ascend quilt.

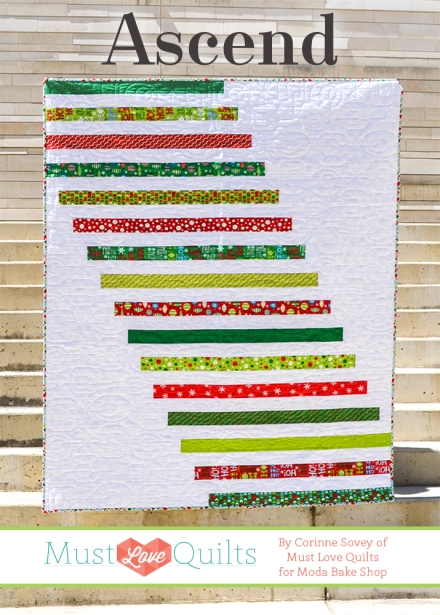
First, here is a picture of the Christmas version, using Deb Strain’s Ho Ho Ho fabric. It was quilted by my favorite long-arm quilter with a fabulously retro pattern.

Ascend Moda Bake Shop Modern Quilt


Moda Bakeshop Ascend - Must Love Quilts

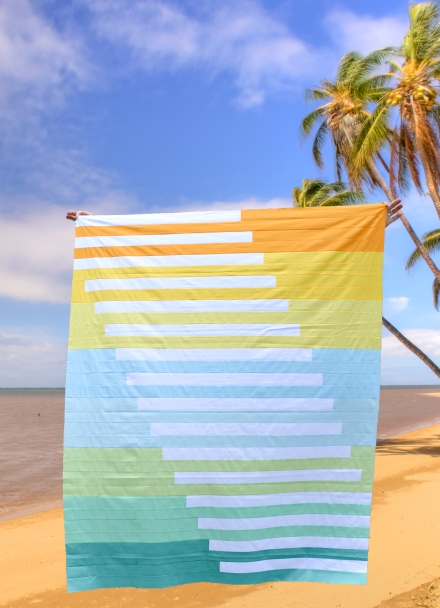
For the solids version I flip flopped the use of color and white. I think it resembles sun rays over a beach, so I did a quick and dirty Photoshop of my final photos onto some beach, somewhere. If only the photos had actually been taken there!

Must Love Quilts | Ascend

Materials:

For this version of the quilt you will need the following materials (Bella solids name followed by color number):

(a) Bella Solid Cheddar (9900 152) – 1/2 yard

(b) Bella Solid Yellow (9900 24) – 1/2 yard

(c) Bella Solid Sunshine (9900 130) – 1/2 yard

(d) Bella Solid Bluebell (9900 141) – 1/2 yard

(e) Bella Solid Tranquil Aqua (9900 186) – 1/2 yard

(f) Bella Solid Light Lime (9900 100) – 1/2 yard

(g) Bella Solid Green (9900 65) – 1/2 yard

(h) Bella Solid Carribean (9900 86) – 1/2 yard

Bella Solid White – 1.25 yards or half of 1 Jelly Roll

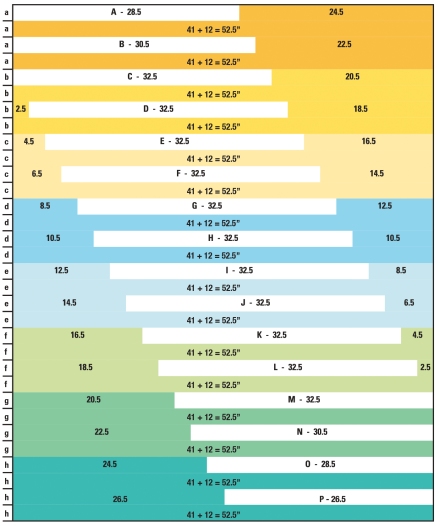
Cutting Instructions (You can click on the diagram below to bring it up much larger in a new window):

Bella Solids Colors: Cut (4) 2.5″ x Width of Fabric (WOF) strips from your colors. Subcut per the diagram below. Note the colors correspond with the lower case letter in the Materials section.

Bella Solids White: Cut (16) 2.5″ x WOF strips from your white. Cut them down per the diagram below.

Ascend Bella Solids


This quilt would also be fun as a gradient quilt with your favorite colors. Thanks for checking out Ascend!

Piece Out,

Corinne

Attention Deficit Quilter

Quilty Confession. I am TERRIBLE at focusing on one project. It has become a common for me to start a project, and mid-way through get completely distracted by another idea that has popped into my head. I’m still making headway on the baby quilts I’d like to eventually sell, but I had an idea for a quilt pattern and I completely abandoned my WIP baby quilts. Before inspiration struck I did manage to finish a few quilts.

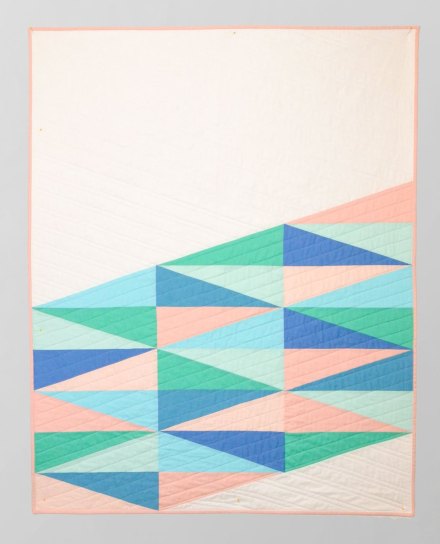
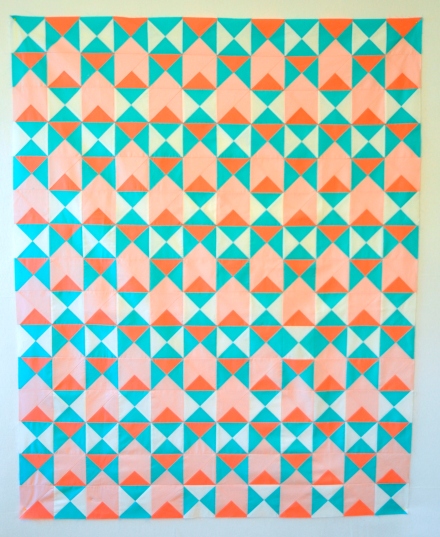
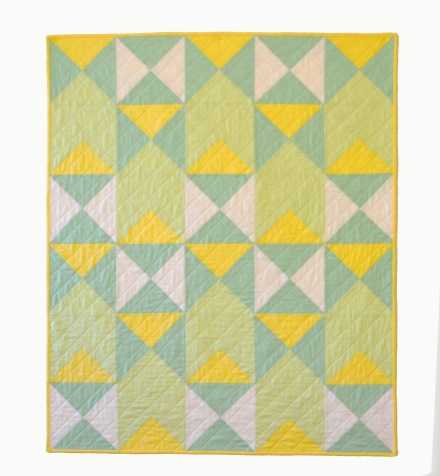
First up is a quilt I designed in order to use my nifty 30 degree creative grid triangle again. It could just as easily be made with half-rectangles. I initially whipped up a nautical version, seen below with the binding only half-sewn, but then saw a palette of solids sitting on my shelf that I thought would be perfect for this design. Both quilts are approximately 40″x60.” I used glue basting and my machine to sew the binding on the pastel version, it didn’t turn out as well as I would have liked so at some point I’m going to cut it off and try again.

Must Love Quilts - Nautical Version


Must Love Quilts - Pastel Version

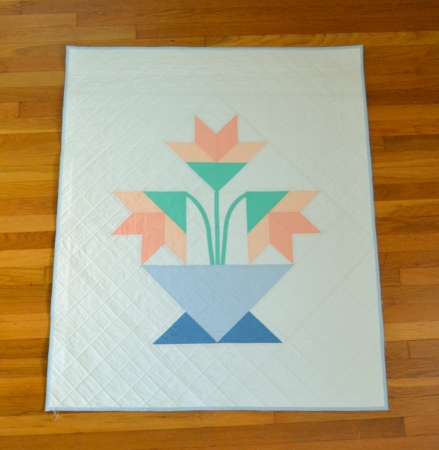
I also managed to get this Carolina Lily Comfort Quilt quilted and bound. The machine binding went MUCH better for this one and I actually like the way it turned out. Again, the size is approximately 40″x60.”

Must Love Quilts - Giant Carolina Lily

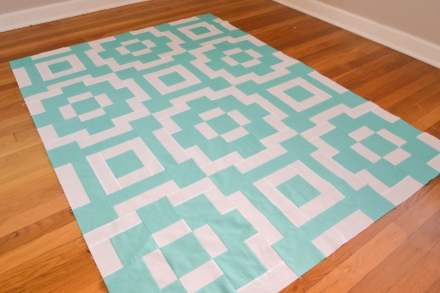
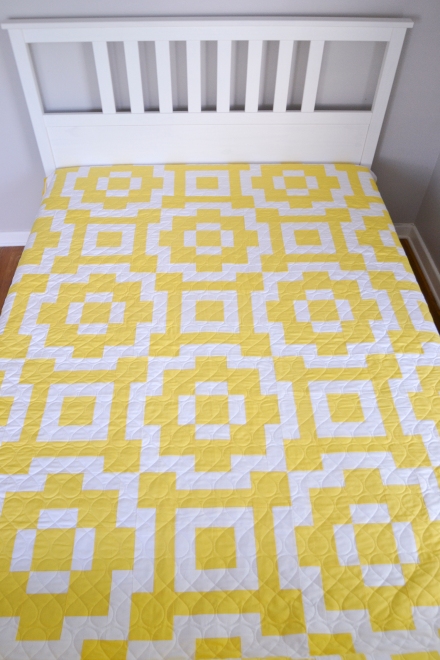
Ok, now for my most recent quilty distraction. My Floor Tile Inspired quilt. I follow an Instagram account called Ihavethisthingwithfloors and it is a neverending source of inspiration. They posted a multi-color tile pattern several weeks ago, I think it had 4 or 5 colors and I thought it would translate beautifully into a two color quilt. I jumped into Illustrator and figured out the math and directions to quickly piece the quilt via strip piecing.

I wanted to test my math before making a bed size quilt, so I decided to make a quick baby quilt in teal and white, seen below.

Must Love Quilts - Baby Floor Tile Quilt

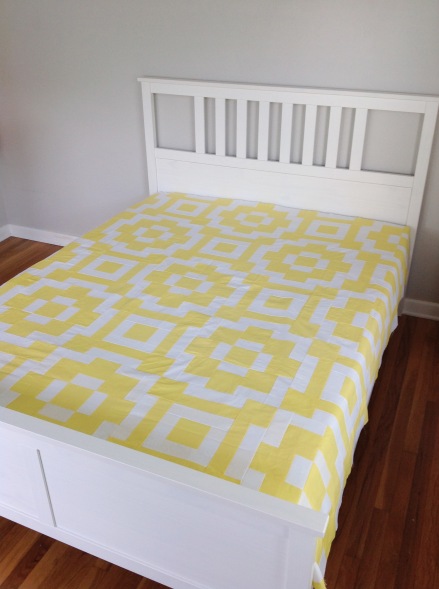
This pattern works up SO FAST. Once I knew my math was correct I ran to my local quilt shop, bought solid yellow yardage, and got to work piecing the queen size yellow and white version. I had the top complete in a matter of days. Here is the quilt before quilting:

Must Love Quilts

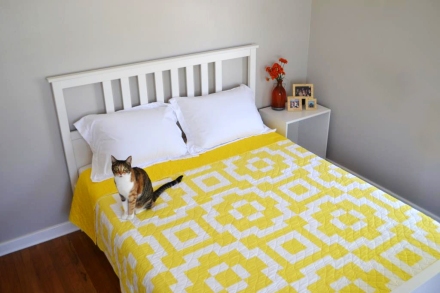
I knew I wanted this quilt in my new guest room, so I sent it to my favorite longarmmer and asked for a nice loopy figure-eight pattern, or what I refer to as “Denyse Schmidt Loops.”  I’m hoping to get the binding on before the Austin Modern Quilt Guild meeting on Thursday. Next up I want to make some simple pillow shams for the bed.

Must Love Quilts

That’s all for now! Stay tuned later this week for my very first Moda Bakeshop Tutorial! I’m super excited about it and can’t wait to share.

Linking up to Freshly Pieced WIP Wednesday 🙂

Til next time, Piece Out!

Corinne

Fantasia Quilt and Tutorial

Striped Quilt Tutorial by Corinne Sovey of Must Love Quilts

A few months ago the amazing Sara Lawson of Sew Sweetness posted an offer on Instagram. She was offering free fabric from her new Fantasia line to folks who promised to post pictures of the things they made. I immediately emailed her that I’d love to make a quilt with her fabric and was lucky enough to receive a beautiful fat quarter bundle. Gorgeous projects have been popping up all over the web with this fabric, and even though I’m not quite done, I wanted to share my quilt and a quick tutorial with you.

The Evolution of a Quilt

This quilt did NOT start out the way it ended up. I had just bought a 30 degree Creative Grids ruler and knew I wanted to use it for this quilt in some way. I decided to sew some strips of the Fantasia fabric together and see how they would look after using the Creative Grid ruler to turn them into triangles. I LOVED the way the Fantasia units turned out but knew I wanted something contrasting in between each print triangle. I originally cut up some dark grey solid  to try between the 4 or 5 Fantasia triangles I had quickly whipped up.

Didn’t work.

So then I moved onto a pretty khaki color fabric I had.

Didn’t work.

Usually this is where I start to get a little discouraged and put the project away while I wait for inspiration. Fortunately, another idea struck and I decided to try it out. I have a large shelf of neutral fabric and I thought it might be fun to piece those together in random strips as the contrast triangle. MAGIC. I was in love. The strip triangles go together SO fast, I had them all done in a matter of days.
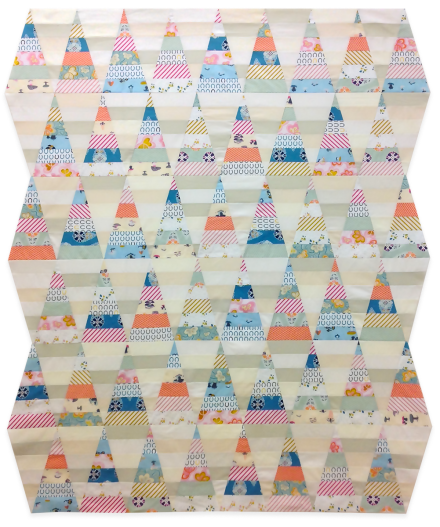
Fantasia Quilt - Must Love Quilts by Corinne Sovey

Lessons Learned

Public Service Announcement: Do NOT, I repeat, DO NOT follow my lead and do equal strips for your print triangles and your contrast triangles, if you have any desire to hold onto your sanity. I would go with an even number of strips for one set, and an odd number for the other. Then you don’t have to match seams on a diagonal. I speak from experience, this is stressful and not-so-fun. I’ve given instructions for even and odd strips below.

I’m planning to order some of the fabric below for the backing, and want to bind in the striped hot pink fabric. I’m going to quilt on both diagonals to achieve a cross-hatch. It might take a while, but I’ll be sure to post more pics once I’m done. The size of the top is lap/couch sized at 60×80.” I’m leaving the angular edges, I think it’s kinda fun.
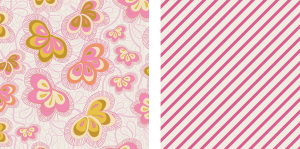
Fantasia Fabric

The Tutorial

I’m going to explain how I made my quilt using 2.5″ strips for the print fabric and 3″ strips for the neutral fabric. I’ll also explain how I put together the print and contrast triangles.

Step One: Make your Triangles

1) Cut 2.5″ strips from your print fabrics. I used fat quarters and cut along the 18″ edge. I was able to get 3-4 triangles out of each strip set.

2) Group your strips into sets of 6 different prints. The key to strip piecing is to sew in opposite directions as you put them together, explained visually below. This is to prevent the strips from bending or forming a large arc due to your feed dogs. I’ve also been known to be a rebel and use my walking foot to piece strips and bias edges.
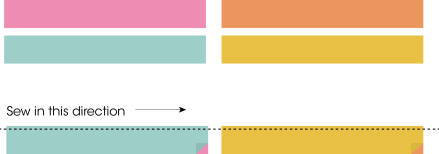
Stripes Tutorial - Must Love Quilts

First I finger-press my seams to one side to avoid stretching or distorting the seams as I use my iron. I then press the seams with my iron. Be careful not to push your iron along your fabric (ironing). Instead, press your fabric by putting the iron down, let it do it’s job, and then lift the iron to move it to the next area. This will help you keep your fabric nice and straight.

When you add the strips together, make sure to sew in the opposite direction, as seen below. Continue to add strips until your unit is comprised of 6 strips. It should measure 12.5.”
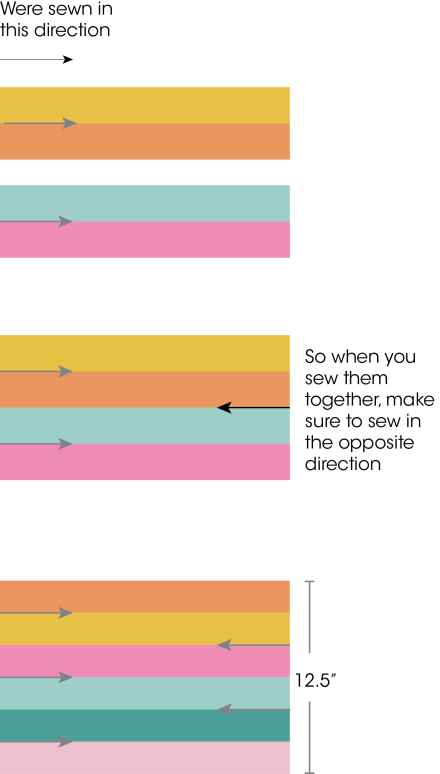
Strip Piecing


Step Two: Cut your Triangles

The Creative Grids 30 degree ruler has a flat tip at the top of the triangle as opposed to a pointy tip. Use this as your guide to align it to the top of your fabric. Your fabric should be 12.5″ from top to bottom.
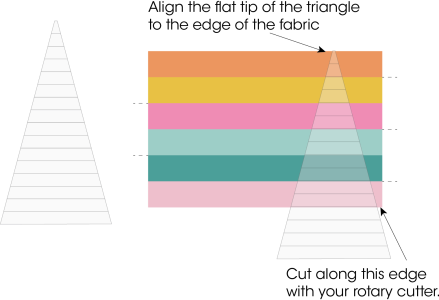
Stripes by Must Love Quilts


Flip your fabric and ruler around, align the ruler again to cut along the edge, as seen below. Continue to flip the ruler to cut your remaining triangles (you only have to flip your fabric once). Keep going until you run out of fabric.

Stripes by Must Love Quilts

Contrast/Neutral Triangles

Do the same with your neutral colors. Since we used an even number of strips for the print fabric, I suggest using an odd number of strips for your contrast triangles. If you use (6) 2.5″ strips of fabric for your print triangles, try using (5) 3″ strips of fabric for your neutrals. IMPORTANT: Once your neutral strips are sewn together they will be 13″ from top to bottom, as opposed to your print strips which are 12.5″ top to bottom. You will need to trim 1/4″ off of the top and bottom so that your neutral strip set is the same size as the print strip set (12.5″).
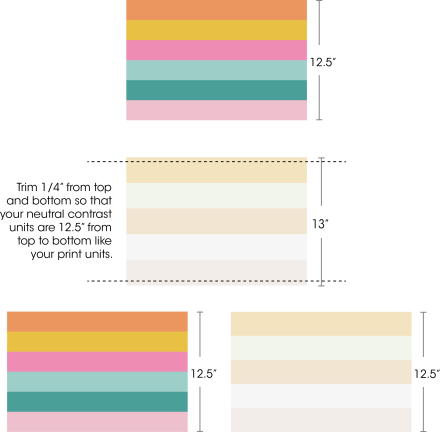
Neutral Strips


Step Three: Sewing your triangles together

I’m going to use solid triangles to show you how to sew your 30 degree triangles together.

1) Take one of your print triangles and one of your neutral triangles. Lay them out as they will appear in the quilt. Place them right sides together and align them along the edge you will be sewing along.
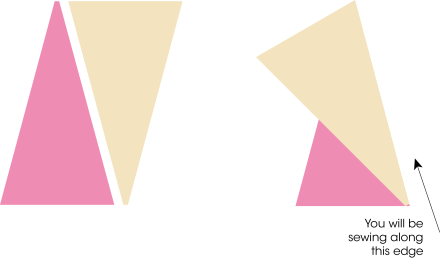
Must Love Quilts

Take a look at the image below. You are going to use the flat tip of your triangle to line up your units.
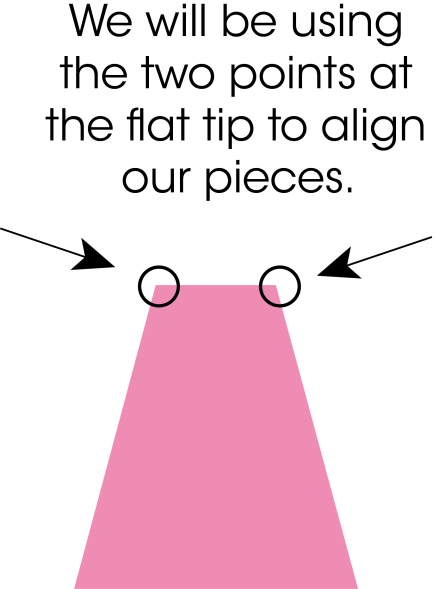
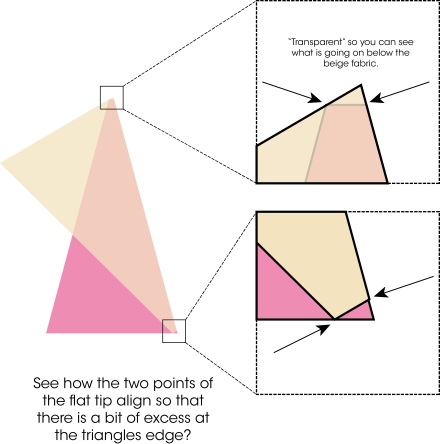
Must Love Quilts


Must Love Quilts

2) Sew your 1/4″ along the edge and then press your seams. Continue to add Triangles using the flat tip to make sure you are properly aligned.


Get your rows together and you’ve got yourself a Striped Triangle Quilt! Thanks again to Sara Lawson for the amazing Fantasia Fabric. Go pick some up today!

Linking up to Freshly Pieced and Bee Social. 🙂

Piece Out!

Corinne


Baby Quilts Everywhere


Must Love Quilts  |  Make All The Quilts


I don’t know about you, but I suffer from wanting to make “all the quilts.”  My list of future quilts is already longer than is feasible. When my mom visited this past winter she mentioned she was going to start making one block of the different quilts she has always wanted to try. I can’t imagine having that many orphan blocks sitting around, and I’m not a big fan of samplers, so I knew that her plan wasn’t something I’d be interested in doing. Her idea did get me thinking though.

I think a common theme among younger, modern quilters, is the desire to turn our “passion” into something that provides income, whether it be full-time or on the side. My generation is fascinated with the idea of “loving what you do,” and I think that idea resonates once we’ve finally found something we are passionate about: Quilting. I’ve dabbled in selling patterns, but found the amount of work that goes into a new pattern is quite overwhelming, and blogging is something that only costs me money. I’ve always been against selling quilts I make because of the amount of time that goes into it. I’m just not interested in working for minimum wage.

That said, I find myself designing more quilts than I’ll ever make or need or be able to give to friends/family. Inspiration hits me, I hop into Illustrator and quickly whip out a design, and then wonder if I’ll ever get around to making it. I seriously have a large book of quilt designs I’ve come up with that I occasionally leaf through, wishing I didn’t have a full-time job. My problem will never be a lack of ideas, only a lack of time.

What am I getting at? I’ve decided to try my hand at selling baby quilts. I’ve come up with a couple of collections I’ve been working on that I’d like to offer via a separate website, to folks who want quality, handmade, modern quilts. My plan is to offer several patterns for people to choose from, in their choice of color palettes. I’m hoping to get that website up and running in the next several months, but while I work on that I’ll be debuting the quilts on this blog, since I just can’t handle secret sewing.

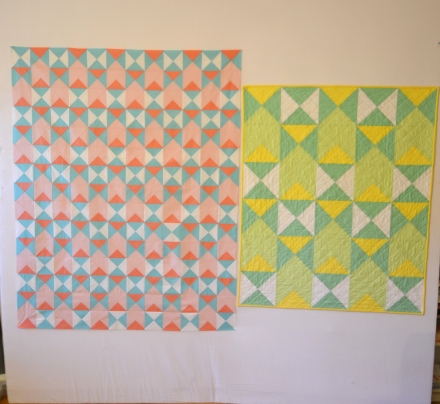
Back in October I designed a quilt I’ve titled “Up We Go.”  I orginally pieced the following lap sized version:

Up We Go  |  Must Love Quilts

The scale of the blocks ended up being way too small. I thin it looks awesome as a lap quilt, but it would be completely overwhelming if I ever want to make a bed size version (which I totally do). I decided to super-size the blocks and make a baby quilt with the same pattern. I chose some happy spring colors that play well together.

Up We Go | Must Love Quilts

Here you can see the two side by side. I have yet to quilt the lap size version, but I’ll get around to it sooner or later.

Side by Side

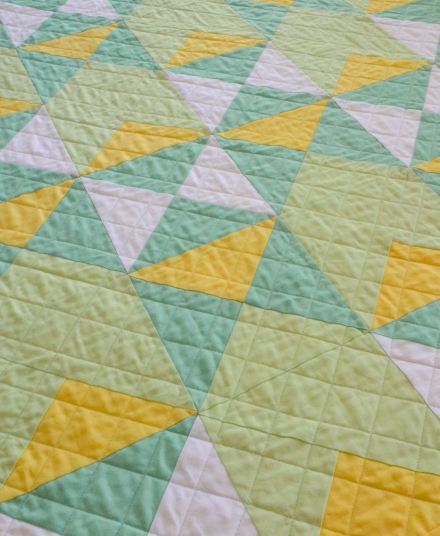
I’m a little obsessed with this pattern and want to make it in #allthecolors. I also think it would look really fun on a bed. Here is a little closeup:

Up We Go | Must Love Quilts

That’s all for today. My mom has told me time and time again I don’t post to my blog enough, so I’m hoping to be better about it.

Side note: If you click on the graphic at the top of my post it should take you to a separate web page where you can print it out as wall art. I thought it was kinda fun and wanted to share.

FREE PRINTABLE  |  Must Love Quilts

Piece Out,

Corinne
WIP Progress!

This past week I had the good fortune to attend Quiltcon, and I’ll be posting some of my favorites later on this week. There was a lot to see, and I had a lot of favorites, so there will likely be a few posts. In the meantime, I’d like to report on some of my WIP list progress.
bee square

My mom is in town for a few weeks, so I’ve put her to work! She is a quilter and enjoys hand-sewing, so I have not-so-casually left un-bound quilts with the binding sewn on laying around the house. In just under a week she got my large queen size Royal Bee quilt AND my lap size Maple quilt bound! I now have her working on my queen size Shelburne Falls quilt. I wouldn’t want her to get bored sitting around my house while I’m at work!

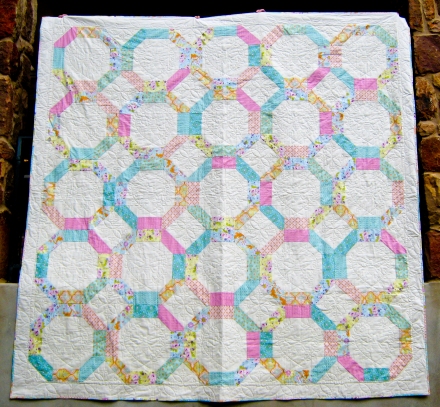
I have a few photos of my Royal Bee quilt, will be crossing it off the WIP list shortly. This quilt is a couple of years in the making. It is one of the first tops I pieced and has been sitting on my shelf, with the backing fabric, for about two years. The pattern is Big City by April Rosenthal of Prairie Grass Patterns. I fell in love with her quilt and worked it up pretty quickly, but wasn’t thrilled with my version when it was done. There was just too much off-white. I knew I needed to do some sort of custom quilt-work in the large white spaces, and I do NOT free motion on my domestic, especially not for a 96 inch square large queen/small king size quilt. This is why is sat and sat on my shelf for two years.

bee full

I’m lucky enough to have a dear friend who owns a Statler Stitcher, Emily Bowers of Happy Me Quilting. She is also kind enough to rent the machine out. She has done several quilts for me, and I asked her a year ago if she’d let me rent the long-arm and do a custom quilt. I love talking to her about the process of the Statler and she has taught me a lot about the work that goes into it. It took me another year to get around to scheduling time with her to actually quilt the darn thing.

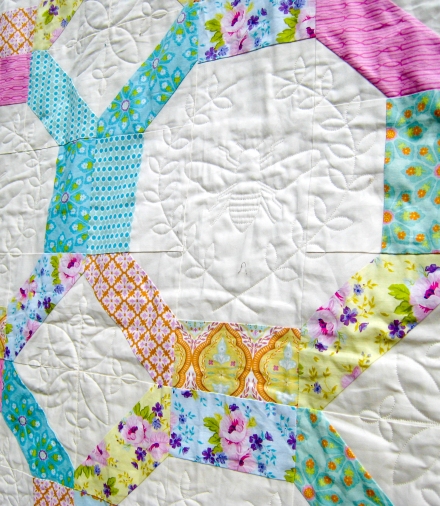
Naturally I thought of a quilt design for the white space a few days before the scheduled quilt time. The floral fabric just screamed “bees” to me. I just picture the bees you find in gardens. I set out to find a bee pattern to purchase for the Statler and COULD. NOT. FIND. ANYTHING.  Aren’t royal bees kind of a popular motif? I could find tons of decor items with royal bees on them, but no Statler pattern. Emily has a million designs on her Statler that aren’t on her website, but sadly she didn’t have one either. Once my heart is set on something I find it hard to let go. I had read somewhere you could convert CAD files to Statler files, so I set out to draw my own bee. Here is what I came up with.

bee

I saved different file types and showed up at Emily’s house ready to quilt. Did the files work? Nope. Luckily her hubby had wanted to learn how to use their Statler pattern program, so he set out to learn how to properly convert the file with the design software while we quilted the square parts of the quilt with a pre-made Statler design. Emily and her husband make a dynamic quilting duo. She is the quilting genius, and he enjoys tinkering with the software side of the Statler. By the time we had finished the easy stuff, he had figured out how to convert the bee pattern and we spent the next day stitching those. I definitely recommend them for any edge-to-edge or custom work you need done. My bee pattern is also now available via Happy Me Quilting if you need a Royal Bee quilt of your own. 🙂

bee closeup

This quilt is the perfect example of the quilting making all the difference. I feel like the quilt went from Blah to Awesome overnight. I hadn’t loved the quilt prior to quilting and now I’m so excited to put it on the queen size bed in my guest bedroom. Its funny how you an love a pattern, and love fabric, but don’t love the two when they are put together. Luckily, the quilting saved the day. I’m forever grateful to Emily and her husband for their help in making this quilt a reality, and to my mom, who was nice enough to bind the enormous thing. Now I’m going to put my mom to work helping me redesign the guest room, so I can get more photos of this quilt in its new natural habitat!

Linking up to Freshly Pieced for WIP Wednesday!