Neptune

First, I want to welcome and thank the handful of folks who have signed up to follow my blog, I find it kinda of exciting, and I hope I don’t disappoint! I have several posts in the works, including some goal setting, tutorials, and quilts that seriously need photos taken, so stay tuned! In the meantime I want to share a quilt I recently finished binding that has been in the works for about a year.

Many, many years ago my mom took my older sister and I to a local quilt show in Virginia. This was long before the quilting bug bit me, but as a crafty person I was happy to go and check out the quilts. At the time my sister and I were big scrapbookers, and paper was our drug. We walked around the vendors and fell in love with MODA right away, discovering our favorite scrapbook designers, Basic Grey, also designed lines for MODA.  Our mom was nice enough to buy each of us a charm pack, and we both chose Neptune by Tula Pink. That charm pack has been on my shelf ever since.

Last year when I finally became all-consumed with quilting, I decided it was time to bust out that charm pack. At first I was going to make a small quilt, but quickly decided I *needed* to make it larger (I have a serious problem making quilts that don’t fit on at least a twin bed). I quickly called my sister and begged my older sister to send me her charm pack, which I knew she hadn’t used, and wouldn’t be using anytime soon considering she was having a baby, and working full time as a teacher. She was nice enough to send it to me and the planning began!

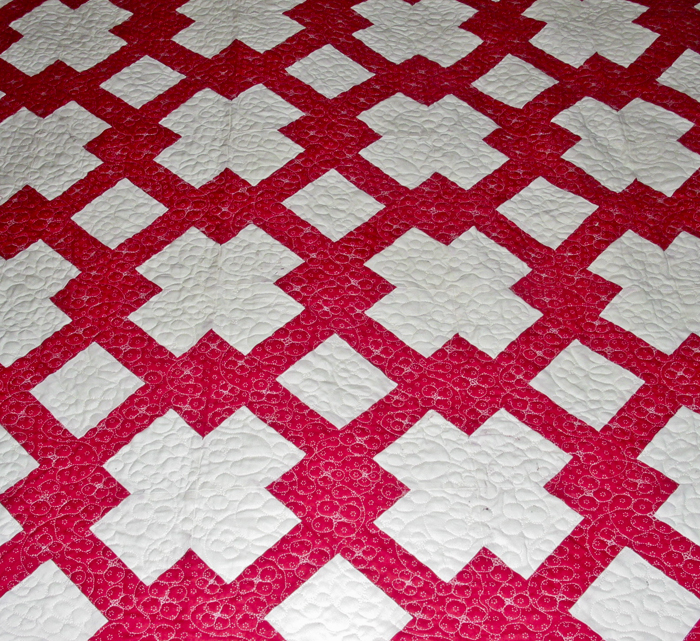
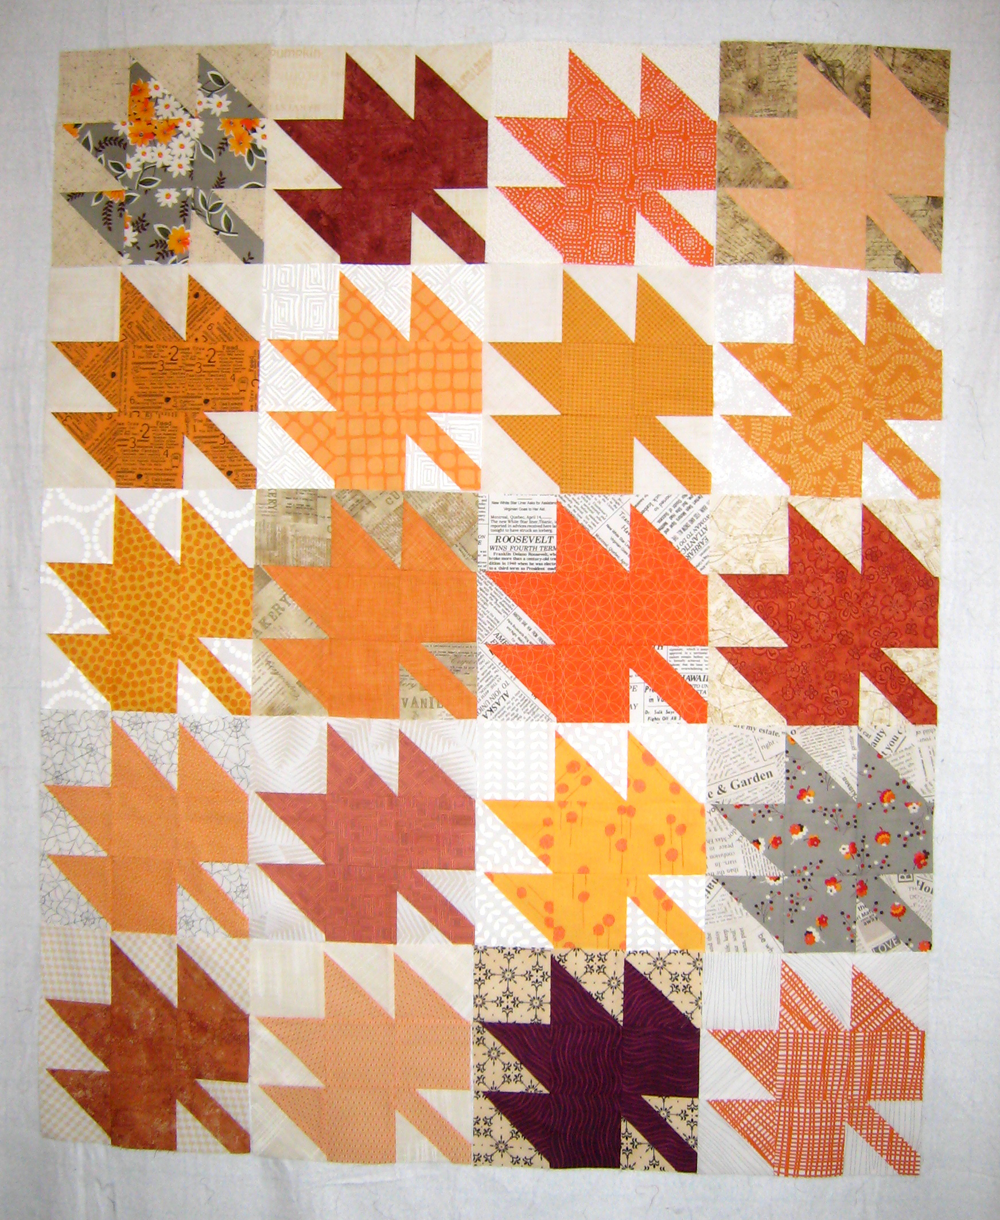
I came across Elizabeth Hartman’s Planetarium Quilt in Neutrals and knew it was the perfect choice for my Neptune. I went to work on the pesky hourglass blocks, naturally doing it the cheating way I found on pinterest via Red Pepper Quilts. After trimming down I ordered a bajillion shades of green and blue to decide on the border colors, knowing whatever I didn’t use would be perfect for my solids stash. I chose three and finally finished putting the top together at the Austin Modern Quilt Guild summer retreat in 2013. I sent it off to be quilted by Jessica at Remnants in the fall and its been sitting on my chair waiting to be bound since then. I finally finished binding it and am so excited with the final product! It fits in perfectly with my beachy obsession.

Must Love Quilts  |  Neptune

Must Love Quilts  |  Neptune

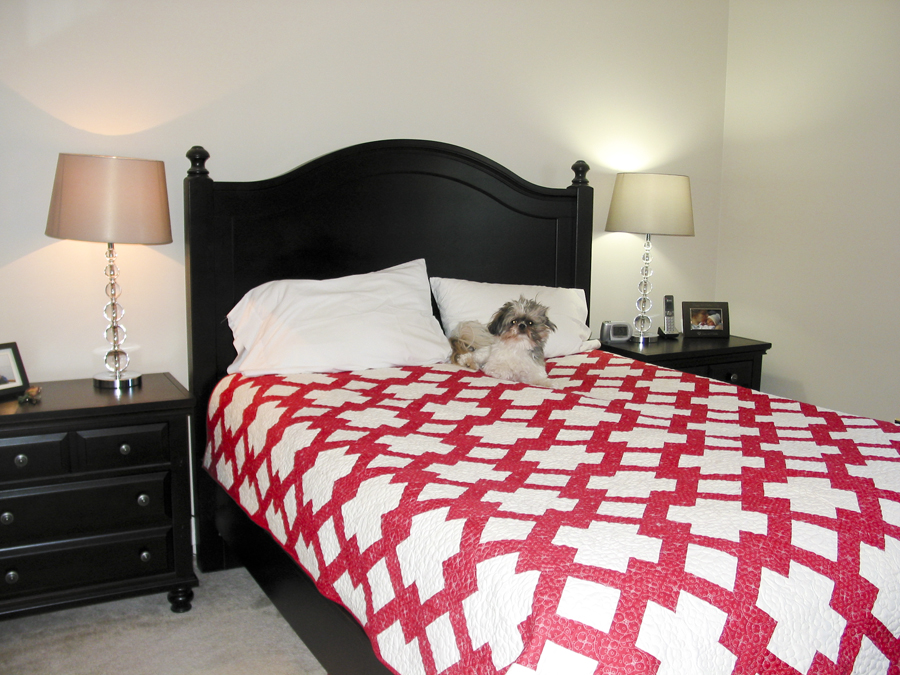
We don’t have snow in Austin, just really ugly brown grass. I’m hoping to take nicer pictures in the spring, but you at least get the idea! 🙂

Linking up to Freshly Pieced WIP Wednesday!

Unveiling Christmas

After spending a week in Virginia with the fam, I’m back in Austin and ready to post some of the presents I gave to my loved ones for Christmas! First up is the red & white queen size quilt I made for my older sister and her hubby. I used the Butter Churn pattern from the American Patchwork & Quilting Magazine, February 2013. The pattern is a churn dash variation. I had it professionally long-armed.  The adorable pooch on the bed is my sister’s dog, Angel-pie.

Must Love Quilts

Must Love Quilts

Next up is the quilt I made for my Mama, who is the original quilter in the family. I figure I’ve been quilting just over a year, a quilt for her is probably overdue! I found some bird fabric I knew she’d love at one of the Austin MQG’s sew-ins, and bought a few fat quarters to match. I then paired it with some random fabric from my stash. I’d been wanting a strip rectangle quilt, and I think the fabrics play nicely with one another. This one is a large lap size.

Must Love Quilts

My brother-in-law is a fan of The Christmas Story, so naturally I had to make my nephew a pink bunny costume this year. Last year I made Jason this felt ornament, which I shamelessly copied from this person on flickr.

Must Love Quilts

The costume turned out okay, I should have tried harder with making the ears stick up, but to be totally honest just wasn’t willing to spend multiple hours on something Nick was only going to wear for 5 minutes. He still looks adorable!

Must Love Quilts

While home I also snapped a few photos of things I’ve made for family over the past year that now reside in Virginia. I designed and embroidered this pillow for my Mom for Christmas last year. Full disclosure, I gave my mom the fabric panel with the wool applique & embroidery, and she made the pillow. 🙂

Must Love Quilts

This is a diaper bag I made for my sister last year:

Must Love Quilts

Must Love Quilts

Must Love Quilts

And finally, I spent a little time needle-felting while home this year and made this lil snowman. I want to work on ornaments throughout the year so that I can have a tree full of handmade ornaments come Christmas 2014.

Must Love Quilts

I leave you with a pic of my doggies hanging out on their favorite couch. Happy New Year!  (Linking up to WIP Wednesday with Freshly Pieced)

Must Love Quilts

Water/Waves Tutorial

Okey Dokey, here is my first attempt at a tutorial…feedback encouraged! Hopefully at least some of this makes sense. 🙂

I’m going to explain the ridiculous way I figured out how to do the gradient water/waves quilt. It is entirely possible there is a better way to do this, but this way worked for me, so hopefully it works for you!

First let’s take a look at the pattern repeat. The quilt is made up of two rows that repeat as many times as you’d like them to. You can use a variety of colors, but for this version I chose a six color version, seen below.

Must Love Quilts Water/Waves Tutorial

Here is a better look at how the blocks are pieced together to make up the rows:

Must Love Quilts Water/Waves Tutorial

As you can see above, there are 2 rows of 6 blocks each. All of those blocks will be made via strip piecing. Each strip set will produce 4 blocks, which is enough for a lap size throw in the end if you do 6 blocks across. To make the quilt shown in this tutorial you end up needing 12 strip sets to produce the 12 blocks above.

Now it is time to figure out the pesky colors and how many strips of each color you need. First, number your chosen colors (I literally pinned a piece of paper with a written number to each color fabric). Next, using the pattern repeat diagram and the colors chosen, number the colors and where they occur in your diagram, like below.

Must Love Quilts Water/Waves Tutorial

Now go through and count the number of times each color appears in the strips (ie; how many times the number 1 appears in the diagram, etc), and presto, the number of strips you need of each color! Write this down by your chosen colors and get to work cutting out your strips. Again, I kept the color number pinned to each stack of strips so I wouldn’t get confused, especially if you are using similar colors!

4

I cut my strips 2.25 inches so that I could end up getting 4 blocks per strip set. You can use 2.5 inches, but you only end up getting 3 blocks per strip set with a bunch of leftover fabric.

Must Love Quilts Water/Waves TutorialAfter you’ve sewn your strips together it is time to cut them down to size. If you used a scant 1/4 inch as your seam allowance you’ll end up with your strip set being 9.25″ from top to bottom, and 42-44″ in length. Measure and cut down to 9.25″ squares.

Must Love Quilts Water/Waves TutorialI next laid out my blocks according to the diagram and the repeat pattern. The lap size quilt is made up of 4 sets of the repeating pattern. See below:

Must Love Quilts Water/Waves Tutorial

Now, piece together your columns:

Must Love Quilts Water/Waves Tutorial

After you are done with your columns, sew them together and you should end up with something like this:

Must Love Quilts Water/Waves Tutorial

I went ahead and put together a diagram you can print and color in, since everyone doesn’t have the luxury of Adobe Illustrator. Works the same way, just color, number, and sew! The diagram includes more rows and columns than the tutorial quilt, just in case you want to try more colors.

Must Love Quilts Water/Waves Diagram

If you end up making one, I’d love for you to comment on this post with a link to your blog post about it! Happy sewing everyone! Here is the blue version I have yet to quilt (Blogged here):

Waves


Waves in the Wind

Falling for Autumn

Autumn has always been my favorite season. Nice weather, orange leaves, football, pumpkin spice, Halloween, what’s not to like?! Now that I live in Austin I enjoy it even more because I know a frigid cold winter no longer follows. This past weekend we finally dipped down into the 80’s and I decided I just HAD to make an autumn quilt. I’ve been ogling the Modern Maples quilts the Emerald Coast Modern Quilt Guild has been working on from the Pretty in Patchwork: Holidays book by Lark Crafts. Maple happens to also be one of my favorite things on the planet, so this is a match made in heaven. If calories didn’t count, I could drink maple syrup straight from the jar like Elf, no joke.

I also happened to stumble upon THIS gorgeous quilt by Karen Black of Bungalow Bay Quilts. I can’t even descibe how in love with this quilt I am. I’d love a replica for myself, but instead decided to incorporate some of this inspiring quilt into a different version of the Modern Maples quilt. I’m going to call it my “Not So Modern Maples” quilt. My layout isn’t at all asymetrical, so I won’t even try to pretend it’s modern. I also picked out a bunch of non-modern fabrics this go round, I think it will be the most traditional quilt I’ve made!

This weekend I sewed up a ton of maple blocks, they work up very fast! I used a variety of oranges, with a few grey and maroon ones worked in. Not quite enough contrast if it were purely going to be maples, but perfect for what I’m ultimately going for.

maples

I’m incorporating the black and white nine-patch blocks from the star quilt to make it a little more “Halloween.” I worked up a bunch of nine-patches last night using the neutrals I used in the background of the maples. I like where it is headed, but I’m not quite there yet. I either need to take out the darker neutrals, or strictly stick with white neutrals. I’m going to work up a few nine-patches following both of those ideas and see what I like best. The leftovers can go on the back.

with-black

See what I mean about some of them being too dark? I only have about half of my maples up on the wall for the photos with the black and white nine-patches.

outlines

This weekend I’m heading to a Sew-in with the Austin Modern Quilt Guild at Honeybee Quilt Shop up in North Austin. I hope to make some more progress then!

Linking up to WIP Wednesday by Freshly Pieced!

Lessons Learned – Experimental Color Play

5

People who know me know I love the water. Beach, lake, river, pond, pool, take your pick. I find it impossible to resist fabric with nautical themes, and in a perfect world I would live at the beach. Alas, I cannot afford that lifestyle so I make do by obsessing over anything beachy.

I have only been quilting for about two years (one of which was spent making just one quilt, so I don’t know if that counts), and I have found that while I love modern quilting, so far I’ve definitely leaned towards traditional quilts with modern fabrics. My most recent quilting goal is to turn some of my modern quilting ideas into reality. I came across this gorgeous quilt a while back on pinterest. The colors are right up my alley, and I thought the design really modernized what I believe is the rail fence pattern. To be entirely honest, I wanted to copy the quilt exactly, the coral orange would be perfect for my bedroom. Ultimately I decided to try something different and quickly picked yellow and grey as my two main colors. I went to work sewing the strips of a light yellow and light grey together, and in a matter of days had enough blocks to make a lap size quilt. I threw the blocks onto my design wall and sadness washed over me. It looked washed-out and I just didn’t like it. I couldn’t put my finger on it until my mom remarked that the colors were both too light, and there wasn’t enough contrast. I have a hard time completing quilts I don’t like, so I put the blocks away to be used another time and set out to come up with another plan.

I played around again in Illustrator and thought it might be neat to use different shades of blue and I arranged them in a way that reminded me of the depth of water, or ocean waves. I choose my pallette, keeping contrast in mind considering my failure with this pattern when I tried my beloved yellow/grey combo. I had so many lovely Kona blues to choose from, and my initial pallette didn’t contrast enough, and I feared the quilt would again look washed out, with the pattern getting lost. I settled on the colors above, worked up a strip-piecing plan, and got to work piecing the blocks.

Overall I think the concept is more successful than the grey/yellow scheme (which I can’t even bear to show you!) but I think the concept would have been conveyed better if there were LESS contrast this time. I can’t win! I still have a ton of Kona blues that I want to use to piece a similar quilt, with less contrast, so that the flow of the “wave” is more gradual. The quilt top works up VERY quickly, thanks to strip piecing, so hopefully within the next couple of weeks I’ll have another version to share. I want to quilt the version above with a water type pattern on one of our local quilt shops’ long-arms. The quilt is slightly smaller than a twin right now, the perfect size to drape over my couch.

3

Linking up to Freshly Pieced for my first WIP Wednesday! Woohoo!

Binding into the night…

Tonight is the September meeting for the Austin Modern Quilt Guild, so I stayed up until 1am last night watching the new season of Hell on Wheels and binding this sucker so I could take it to show and tell. Overall it turned out okay, though I wish I had done the quilting differently. I ultimately thought the design was busy enough, so I just did simple stitch-in-the-ditch quilting around the blocks. I also almost had an anxiety attack when I put in the washing machine, thanks to the red fabric (Thank you Shout Color Catchers!). The red actually didn’t bleed at all, the color catchers were still pretty white after the initial wash.

There are a TON of things I’d do differently the next go round with this pattern. I wouldn’t have thought so hard about color placment on the intial strip sets, and would have varied them more. I also think it might be fun to toss in a print or two throughout. This quilt ended up being a smidge smaller than twin sized, but just large enough to snuggle into! It is by far the most modern quilt I’ve finished, and overall I’m pretty happy. I am hoping to post a little strip-piecing tutorial in the next week or so, stay tuned!

I leave you with a ridiculously cute picture of my Annabelle snuggling into one of my quilts.


Preppy Knee Socks

So I have been obsessed with the idea of making quilts entirely out of solids since the quilting bug bit me two years ago. The main obstacle in my way has been the gorgeous print fabric that screams, BUY ME! USE ME! I’m helpless when it comes to gorgeous print fabric. Nonetheless, last month I decided to tackle a modern quilt with solids. After some pinteresting around, I settled on Preppy Knee Socks by Elizabeth Hartman. I’m a sucker for her quilts, and this one is no exception. I recently sent my Planetarium quilt off for quilting, and I have Rapid City in the works. It seemed only natural to keep following this trend. Plus, knee socks are near and dear to my heart. Check out this picture of me 8 years ago with my company dodgeball team.

After I chose the pattern, it was time for color choices! I’m lucky that I know how to use Adobe Illustrator, so I started by whipping up the quilt template and then started playing around with color schemes. The process was quick and dirty, but here are a few I ended up enjoying.

The Winner

I started this quilt at a recent Austin Modern Quilt Guild Retreat and picked the winning color scheme based on the fabrics a local quilt shop had in stock. Here is my progress so far, sorry for the terrible photo, I’m working on it!

knee-socks-quilt

I’m planning on making the quilt twin-size, only a handful of blocks to go! Elizabeth Hartman’s instructions were based on making the quilt from fabric scraps, but I chose to strip-piece it because A) I’m lazy and B) It is WAY faster. Thinking about doing a tutorial in one of my next posts, we’ll see how ambitious I feel. That is all for now! I leave you with a ridiculously cute picture of a former Austin Pets Alive! foster kitten sleeping on my window.

sleeping-kitten