Happy October!
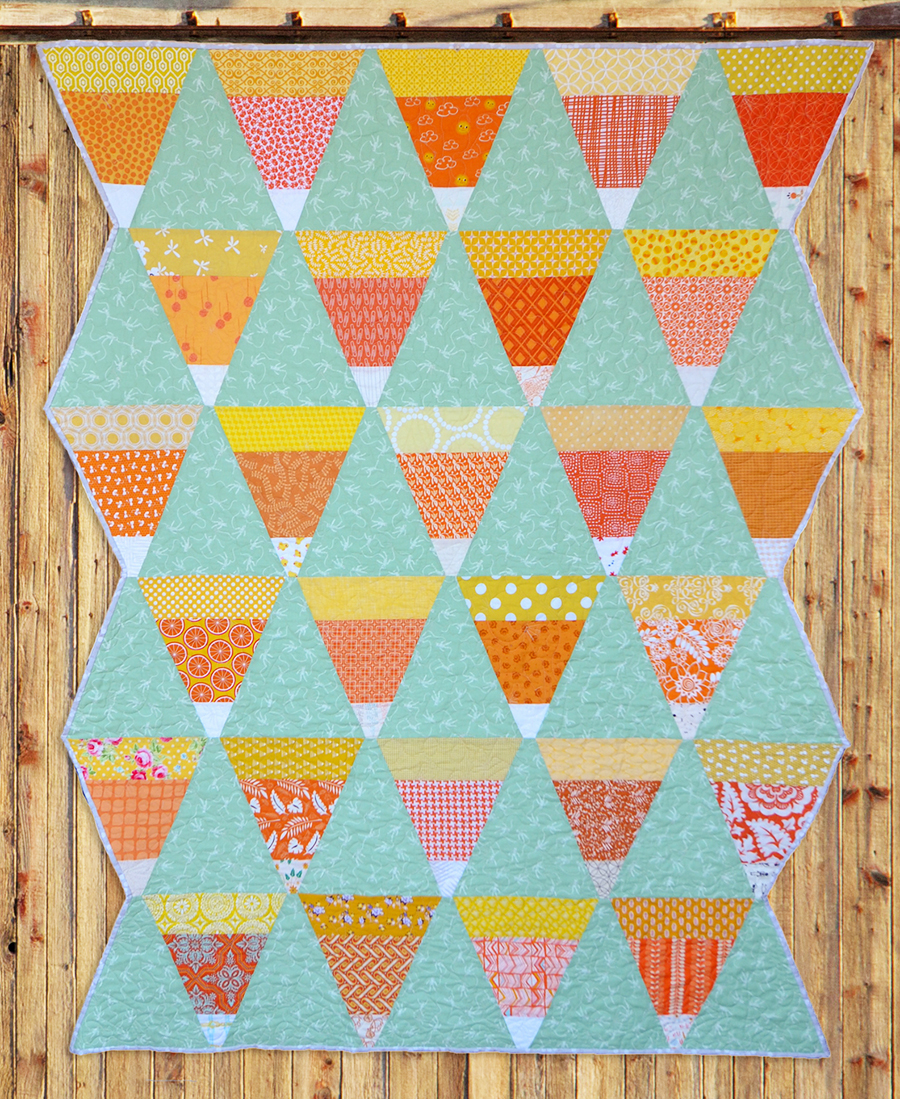
Autumn is my favorite season and this year I felt like it would never get here. In fact, it still doesn’t feel like fall here in Austin. Despite the hot weather, I’m in full Halloween mode and I’m actually done with my Halloween quilt! A couple of weeks ago I was brainstorming Halloween quilt ideas, and after glancing at my GIANT stash of orange and yellow fabric sitting on my shelves, the idea of a Candy Corn quilt seemed like a no-brainer. I googled Candy Corn quilts in various places (google, pinterest, instagram) and found SO many lovely versions. I honestly was hoping I’d find someone who could tell me exactly what size fabric pieces to cut and assemble, but none of them were exactly what I was looking for. I decided to figure out “my own” version of a Candy Corn quilt.
I love my Creative Grids rulers, so I took out my 60 degree equilateral triangle ruler and my 30 degree triangle ruler. I felt like I was in the fairy tale Goldilocks and the Three Bears. The 60 degree triangle was TOO wide, the 30 degree triangle wasn’t wide enough. I wanted a candy corn shape that was JUST right. I ultimately decided a 45 degree triangle would be perfect for the candy corn shape I was hoping to achieve. I hopped online to see if Creative Grids produced a large/long 45 degree triangle ruler. Sadly, the only one they offer is their 8.5 inch long Dresden 45 degree ruler. That just wasn’t going to be long enough to get the shape I wanted. Below you’ll find detailed instructions for how I used my cutting mat to help me get the perfect 45 degree triangle.
Throw Size Scrappy Candy Corn Quilt (Approximately 69 inches long and 54 inches wide)
Materials
(27) 11″ x 3.5″ Yellow Rectangles
(27) 8.5″ x 6.25″ Orange Rectangles
(27) 4.25″ x 4.25″ White Squares
2 yards of fabric for between the pieced candy corns (will refer to these as your “solid” triangles) I used the fabulous Cotton + Steel Mint Mummies print.

Instructions
Step 1: First you’ll want to mark the center of both sides of each candy corn piece. Some people mark a small line on either end of the rectangle, I prefer to iron my pieces in half because it is quick and easy. I’ve used a “pencil mark” on the images below so that you can easily follow along.
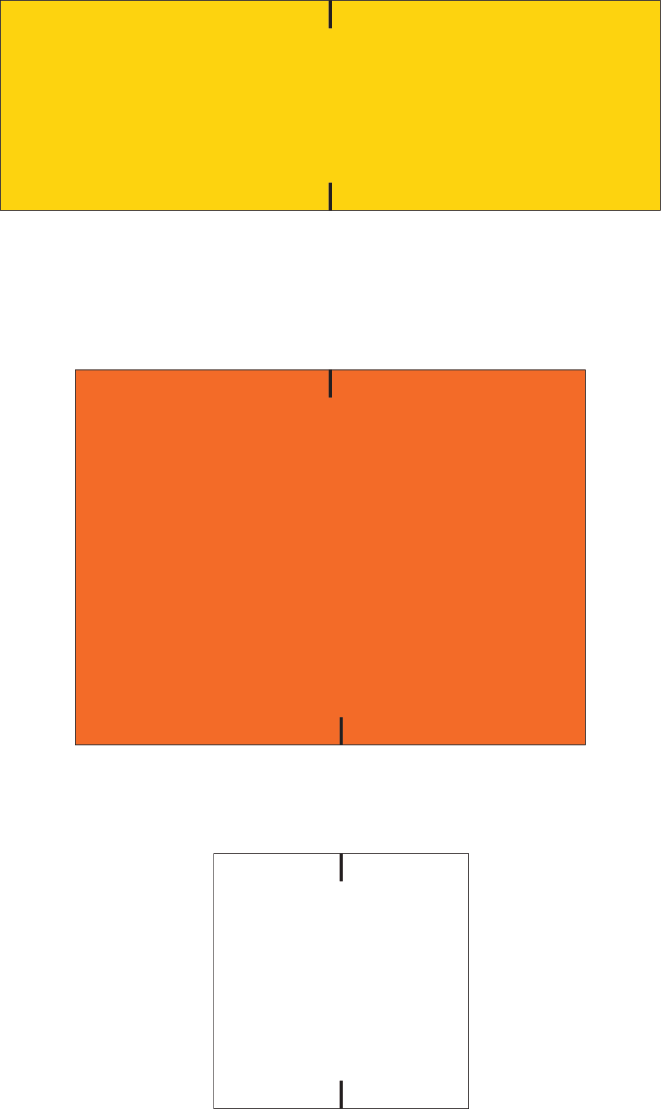
Step 2: Line up the center of your yellow piece and the center of your orange piece, right sides together. Sew 1/4 inch down the edge. Do the same with your white piece along the other side of your orange piece. It doesn’t matter which way you iron your seams. What is important is that you matchup the centers of your pieces. Your end unit should be 13″ from top to bottom.

Step 3: Align your ruler starting at the bottom center of your white piece, all the way up to the top right corner of your yellow piece. Cut along this edge to produce one side of your triangle.

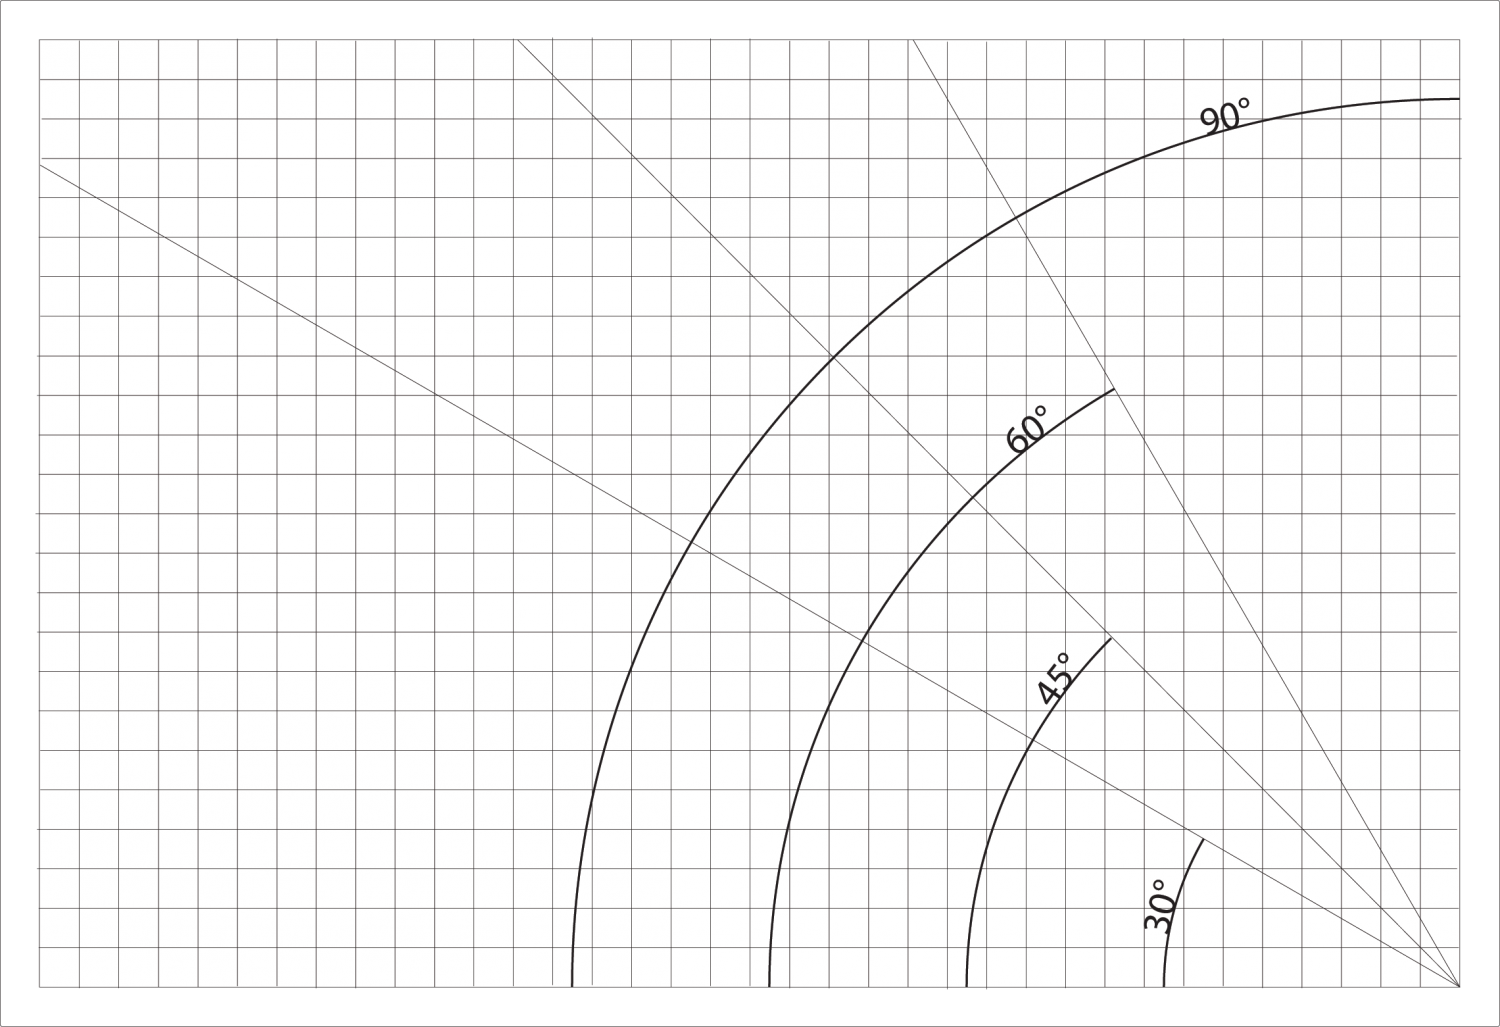
Step 4: Here is where your cutting mat enters the picture. First let’s take a look at the way a cutting mat is setup. They may differ based on manufacturer, but the idea is the same. I use a Fiskars Self-Healing 24 x 36 cutting mat. See image below for how the different angles are broken down. We will be using the 45 degree angle.
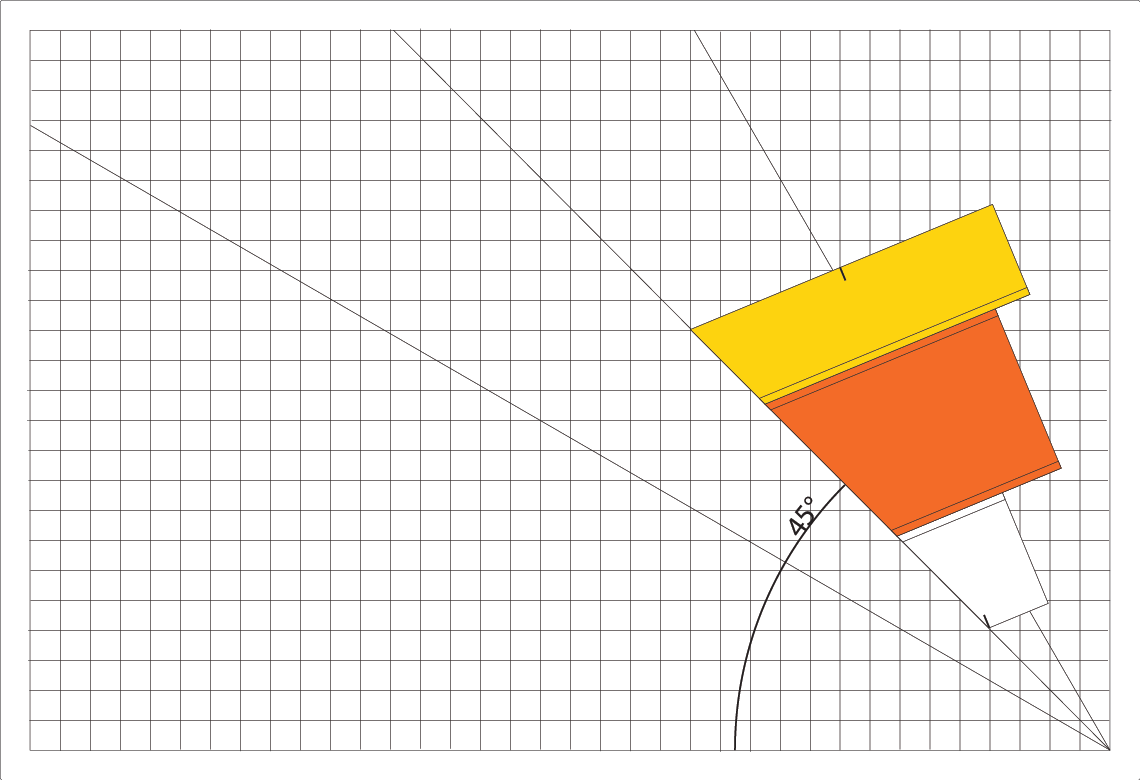
First, flip your candy corn so that the wrong side is facing you. Line the straight edge you just cut up along the 45 degree angle line, making sure the center of your white piece ends up along one of your cutting mats grid lines, as seen below.
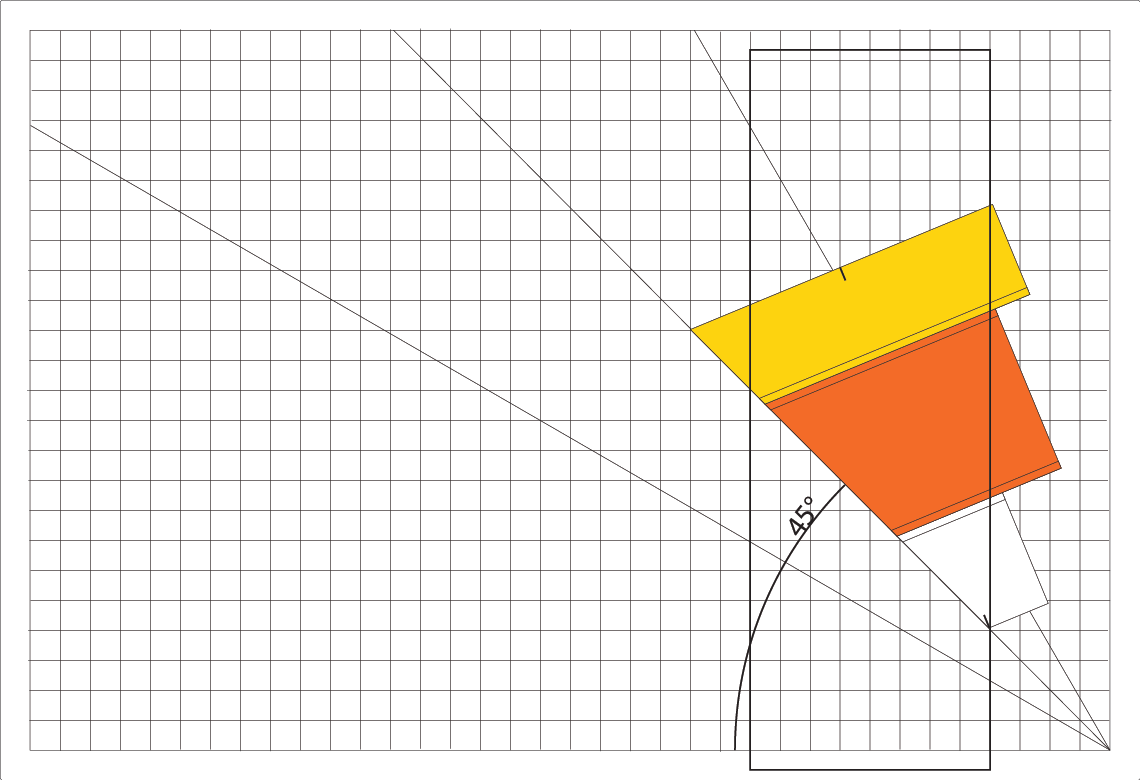
Take your ruler and line it up along the gridline where the white center is. Cut along the edge. You are almost done with your candy corn unit!
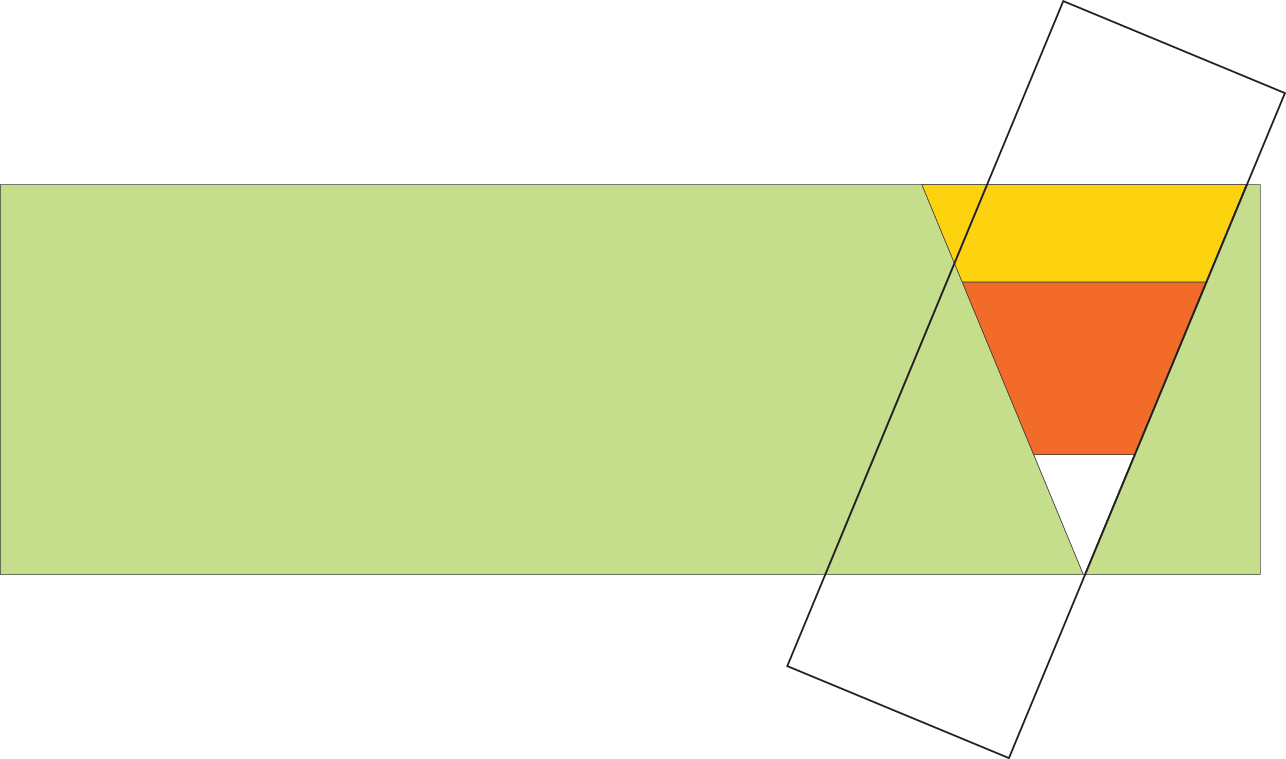
Step 5: I didn’t want my candy corn pieces to have pointy tips, so I trimmed the point off of the pieces. Line the yellow edge of your candy corn piece up along the side of your cutting mat. Trim at the 12 inch mark.

Step 6: You will cut your solid triangles the same way you trimmed down your candy corn pieces. First, take your fabric and cut it into large strips that are 13″ x Width of Fabric (wof). You can get 6 solid triangle units from ever 13″ x wof large strip. Since you need (27) solid triangles for this size quilt, you will need (5) 13″x wof large strips.
I “cheat” on the first step. I take an untrimmed candy corn unit, lay it on top of my fabric, and then I use my ruler to cut the first 45 degree line.
Next, flip your fabric and line it up the same way you did in Step 4 for the candy corn pieces. Keep flipping your fabric until you’ve cut out 6 triangles. Trim the pointy ends off like you did in Step 5.

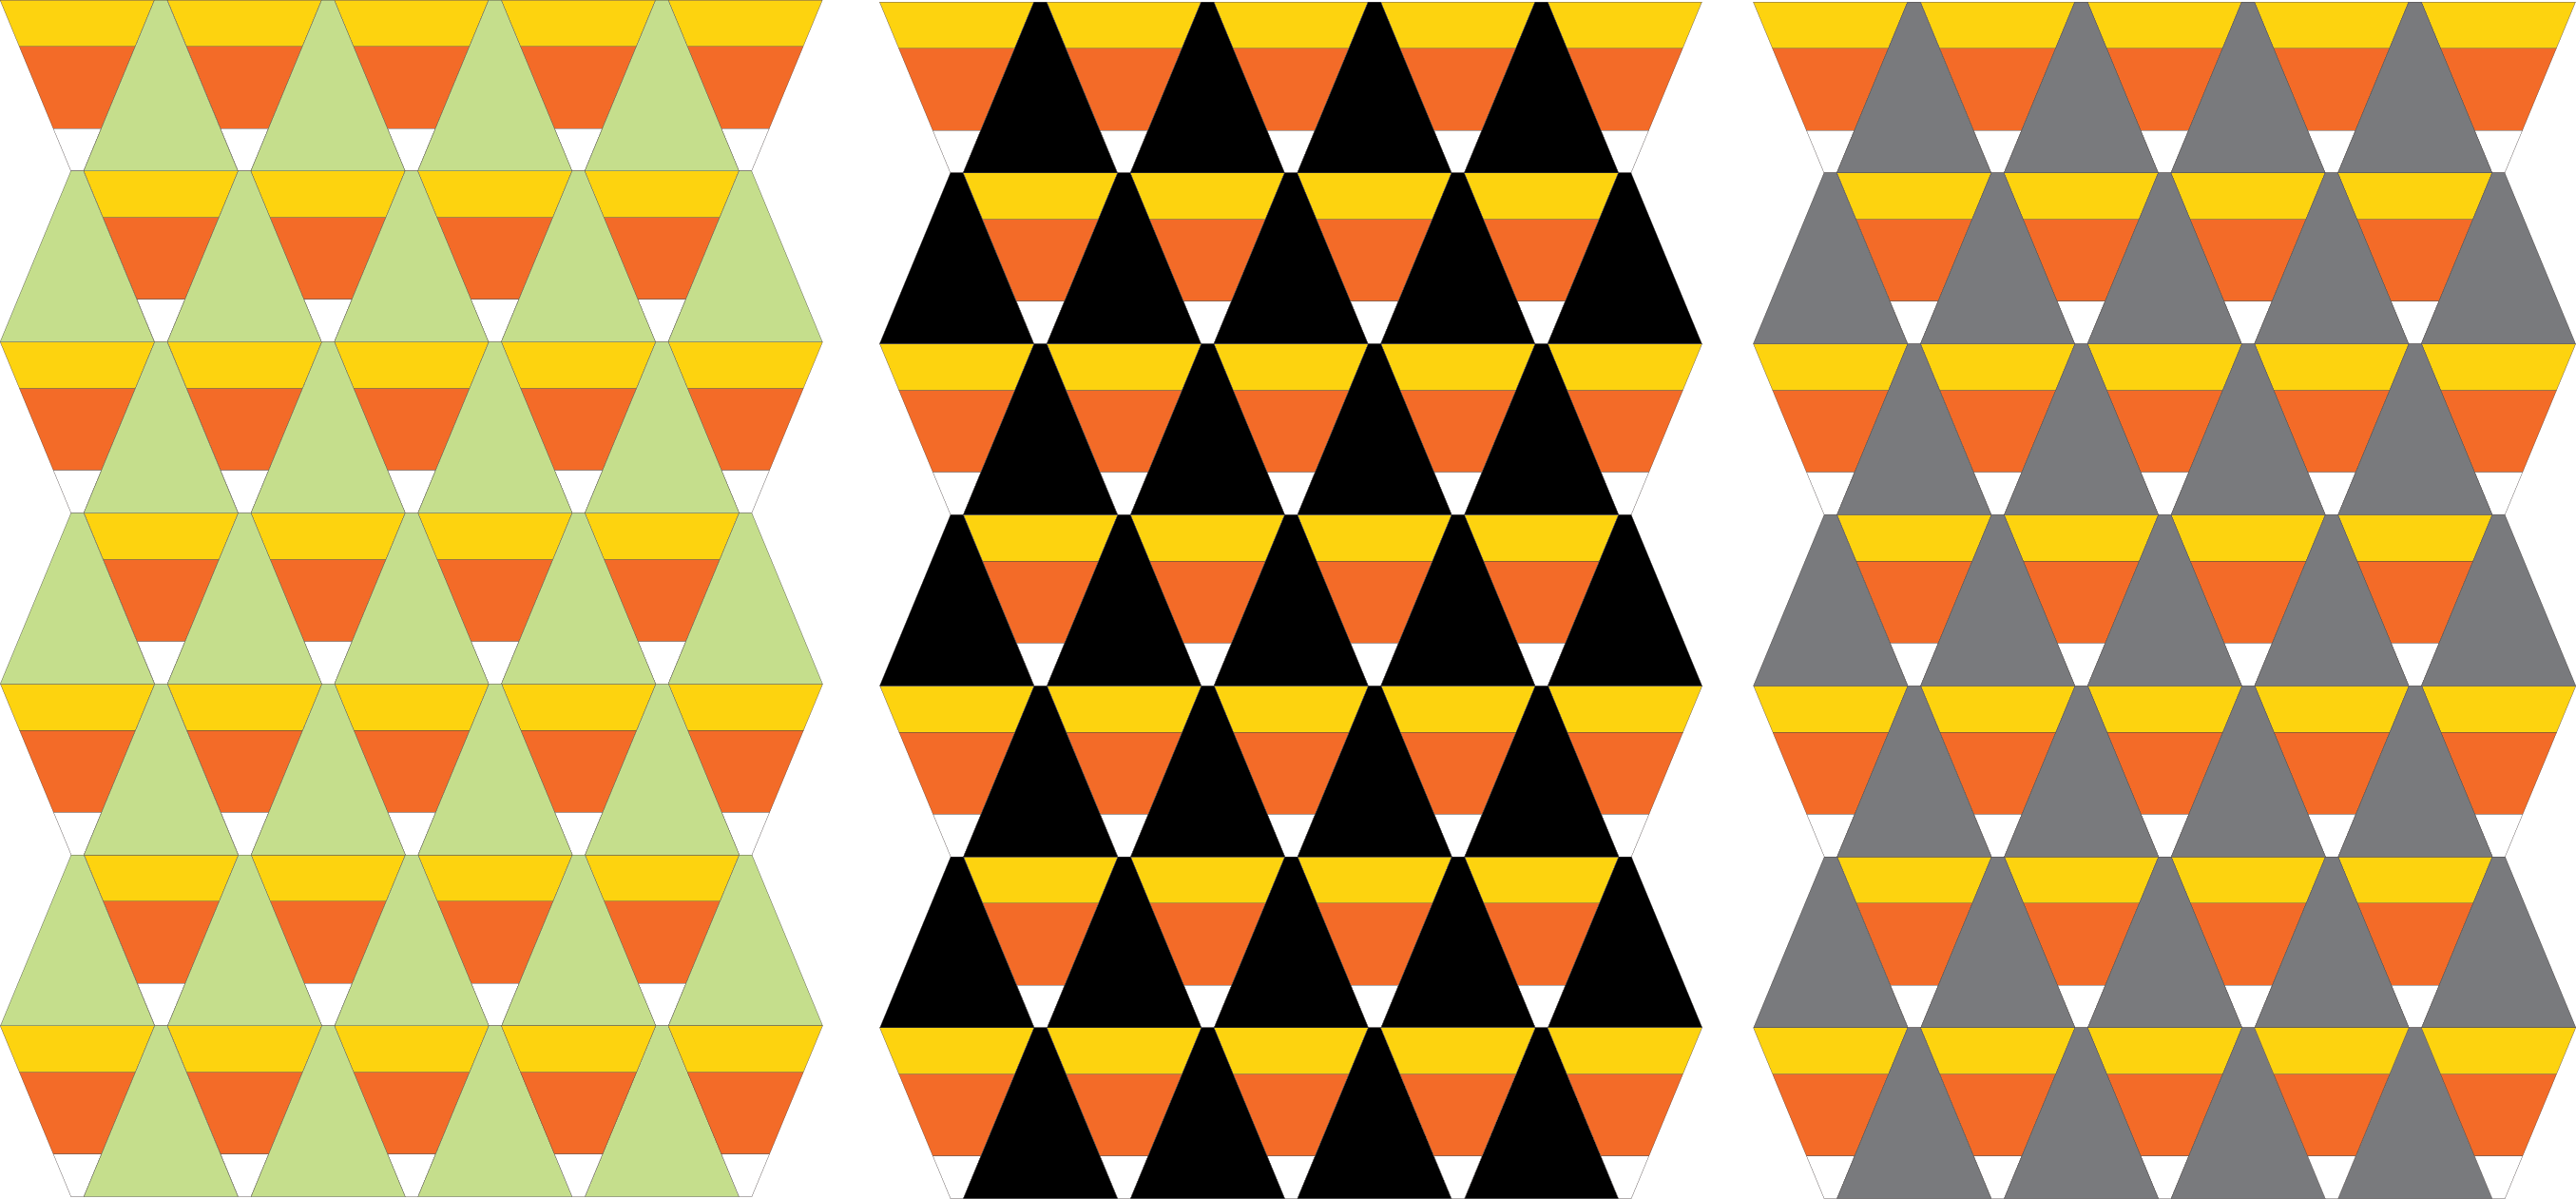
Step 7: Arrange your candy corns and sew together. I think this quilt could also be really fun with other colors, as seen below. I’m in love with the mummy print, so it was a natural choice for me. Others might prefer something more traditional with black, grey, purple or lime green.