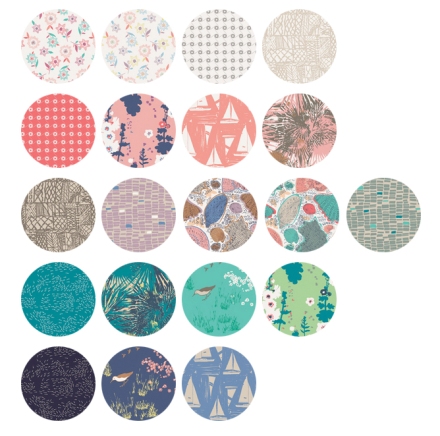
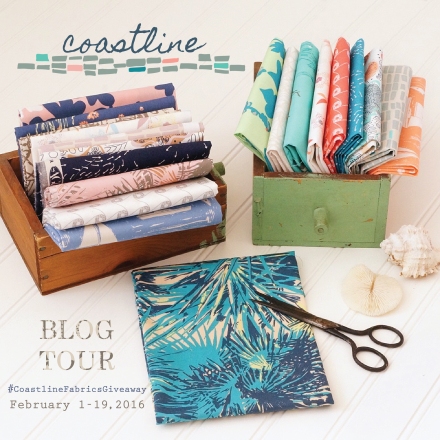
A few months ago the amazing Sara Lawson of Sew Sweetness posted an offer on Instagram. She was offering free fabric from her new Fantasia line to folks who promised to post pictures of the things they made. I immediately emailed her that I’d love to make a quilt with her fabric and was lucky enough to receive a beautiful fat quarter bundle. Gorgeous projects have been popping up all over the web with this fabric, and even though I’m not quite done, I wanted to share my quilt and a quick tutorial with you.
The Evolution of a Quilt
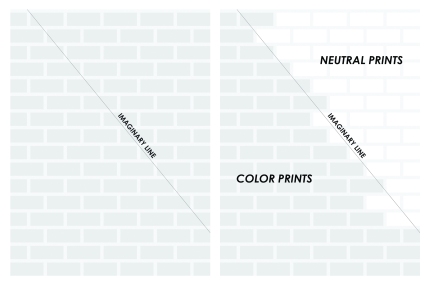
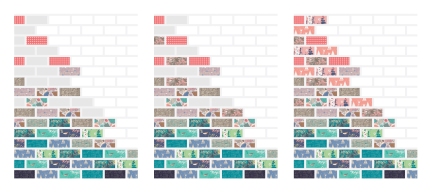
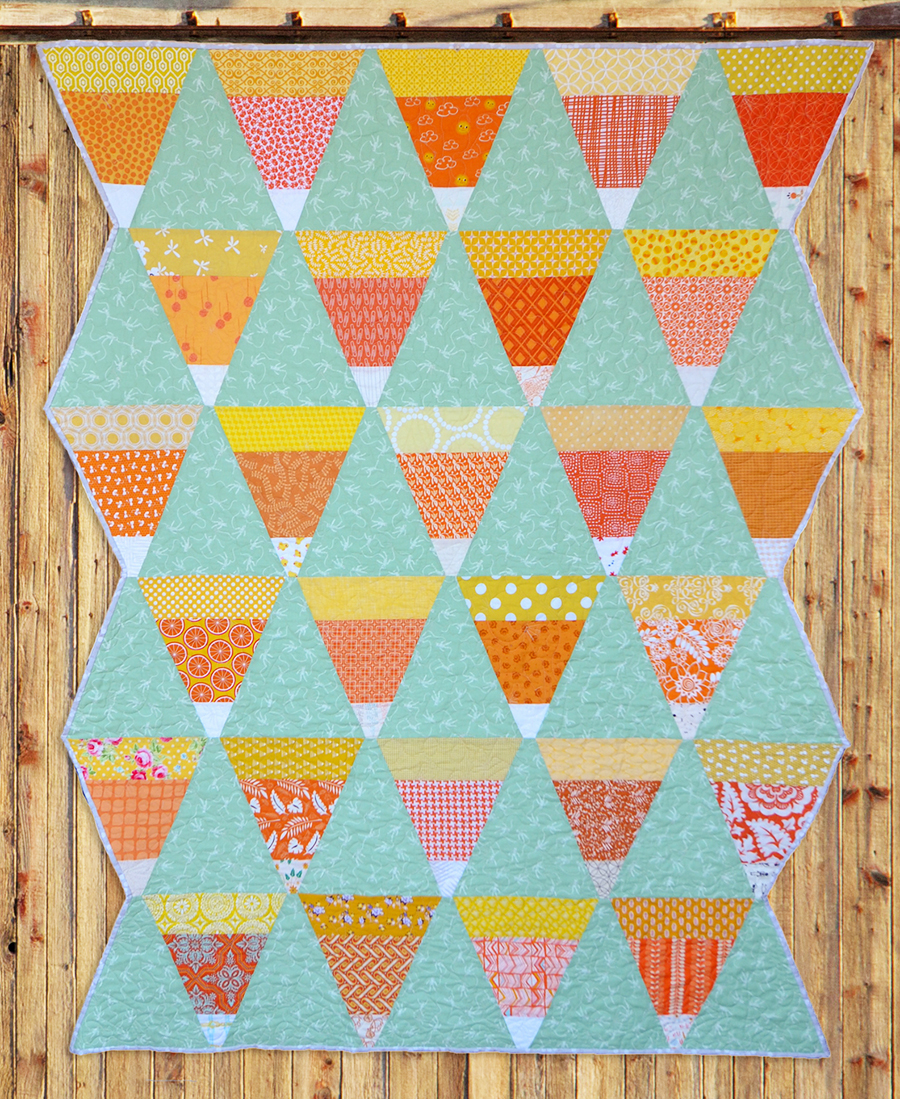
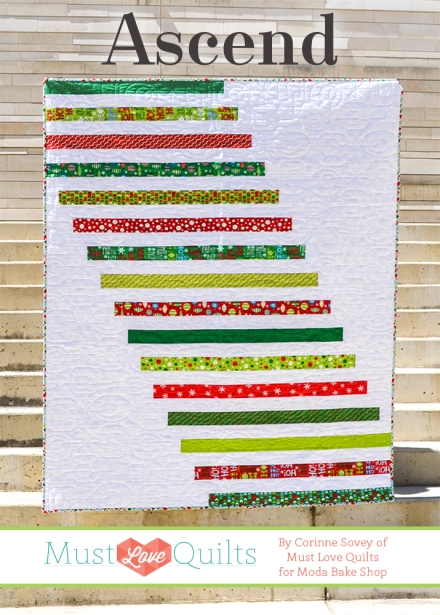
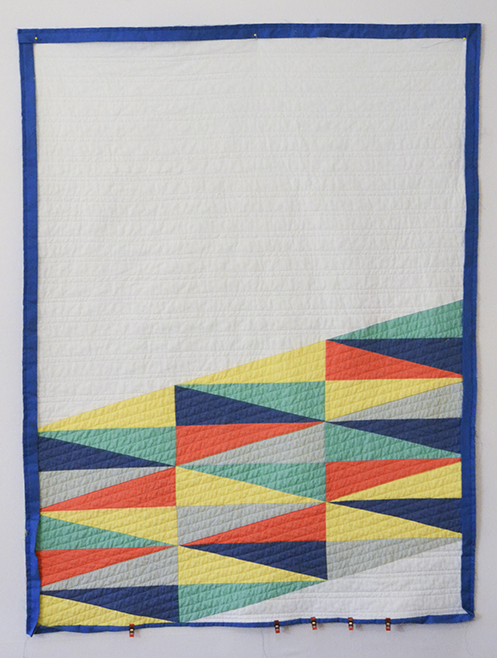
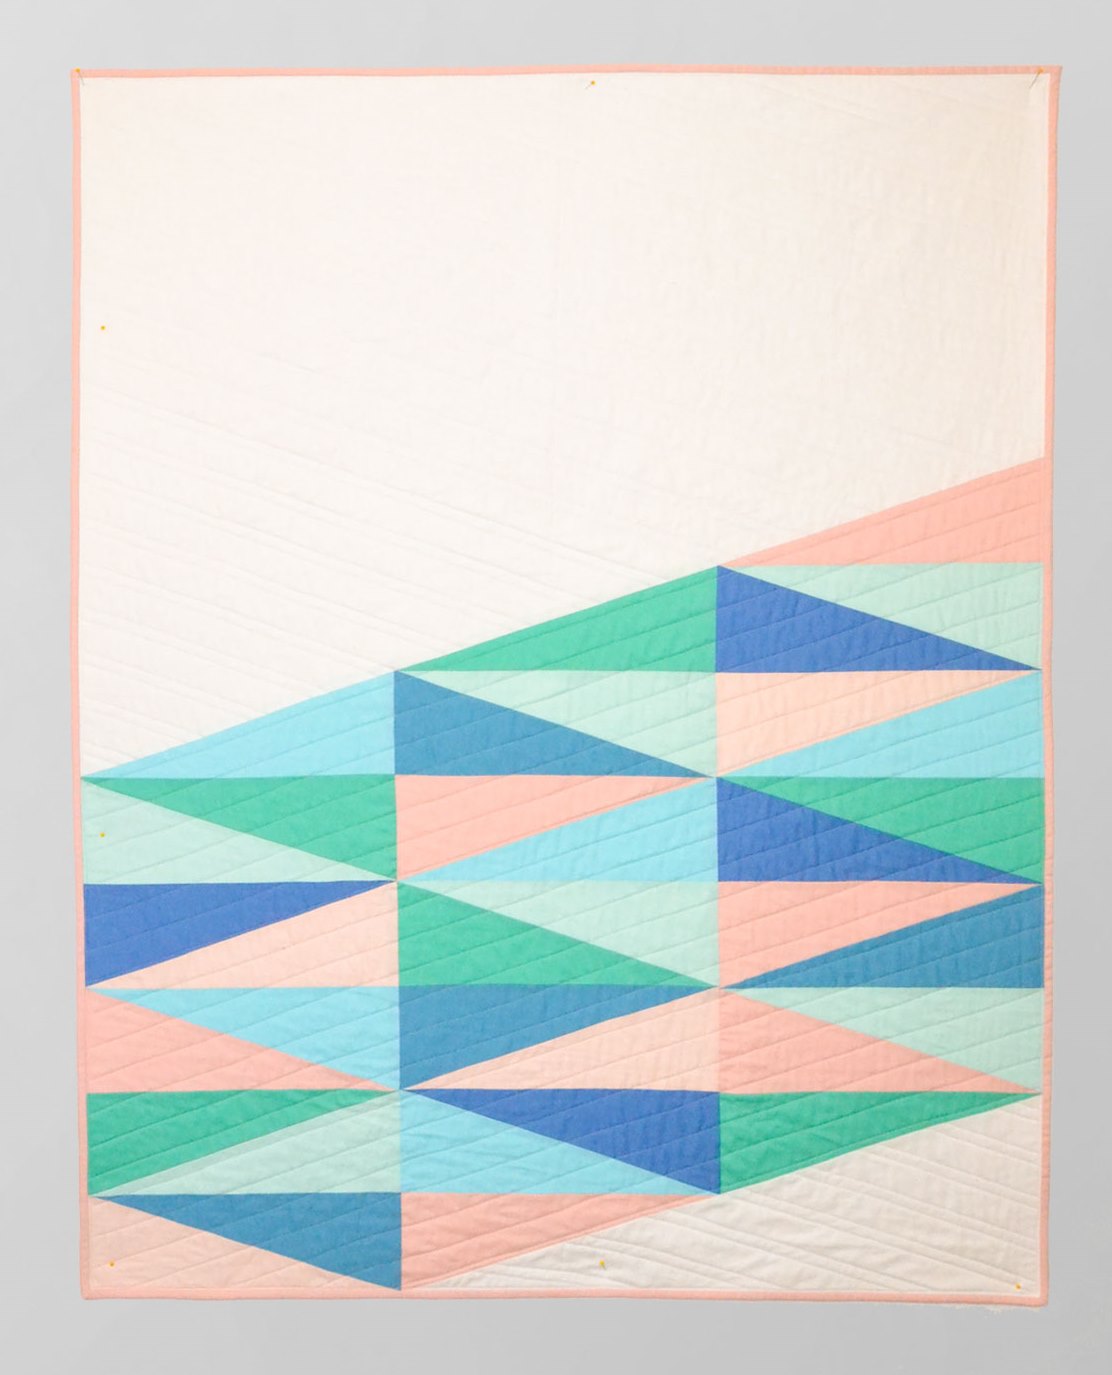
This quilt did NOT start out the way it ended up. I had just bought a 30 degree Creative Grids ruler and knew I wanted to use it for this quilt in some way. I decided to sew some strips of the Fantasia fabric together and see how they would look after using the Creative Grid ruler to turn them into triangles. I LOVED the way the Fantasia units turned out but knew I wanted something contrasting in between each print triangle. I originally cut up some dark grey solid to try between the 4 or 5 Fantasia triangles I had quickly whipped up.
Didn’t work.
So then I moved onto a pretty khaki color fabric I had.
Didn’t work.
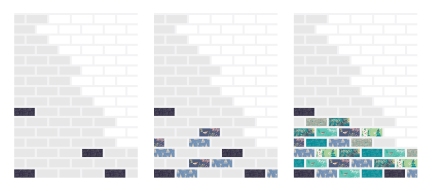
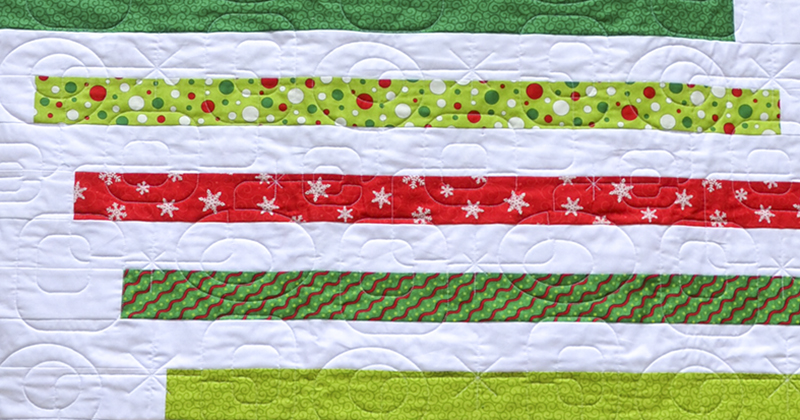
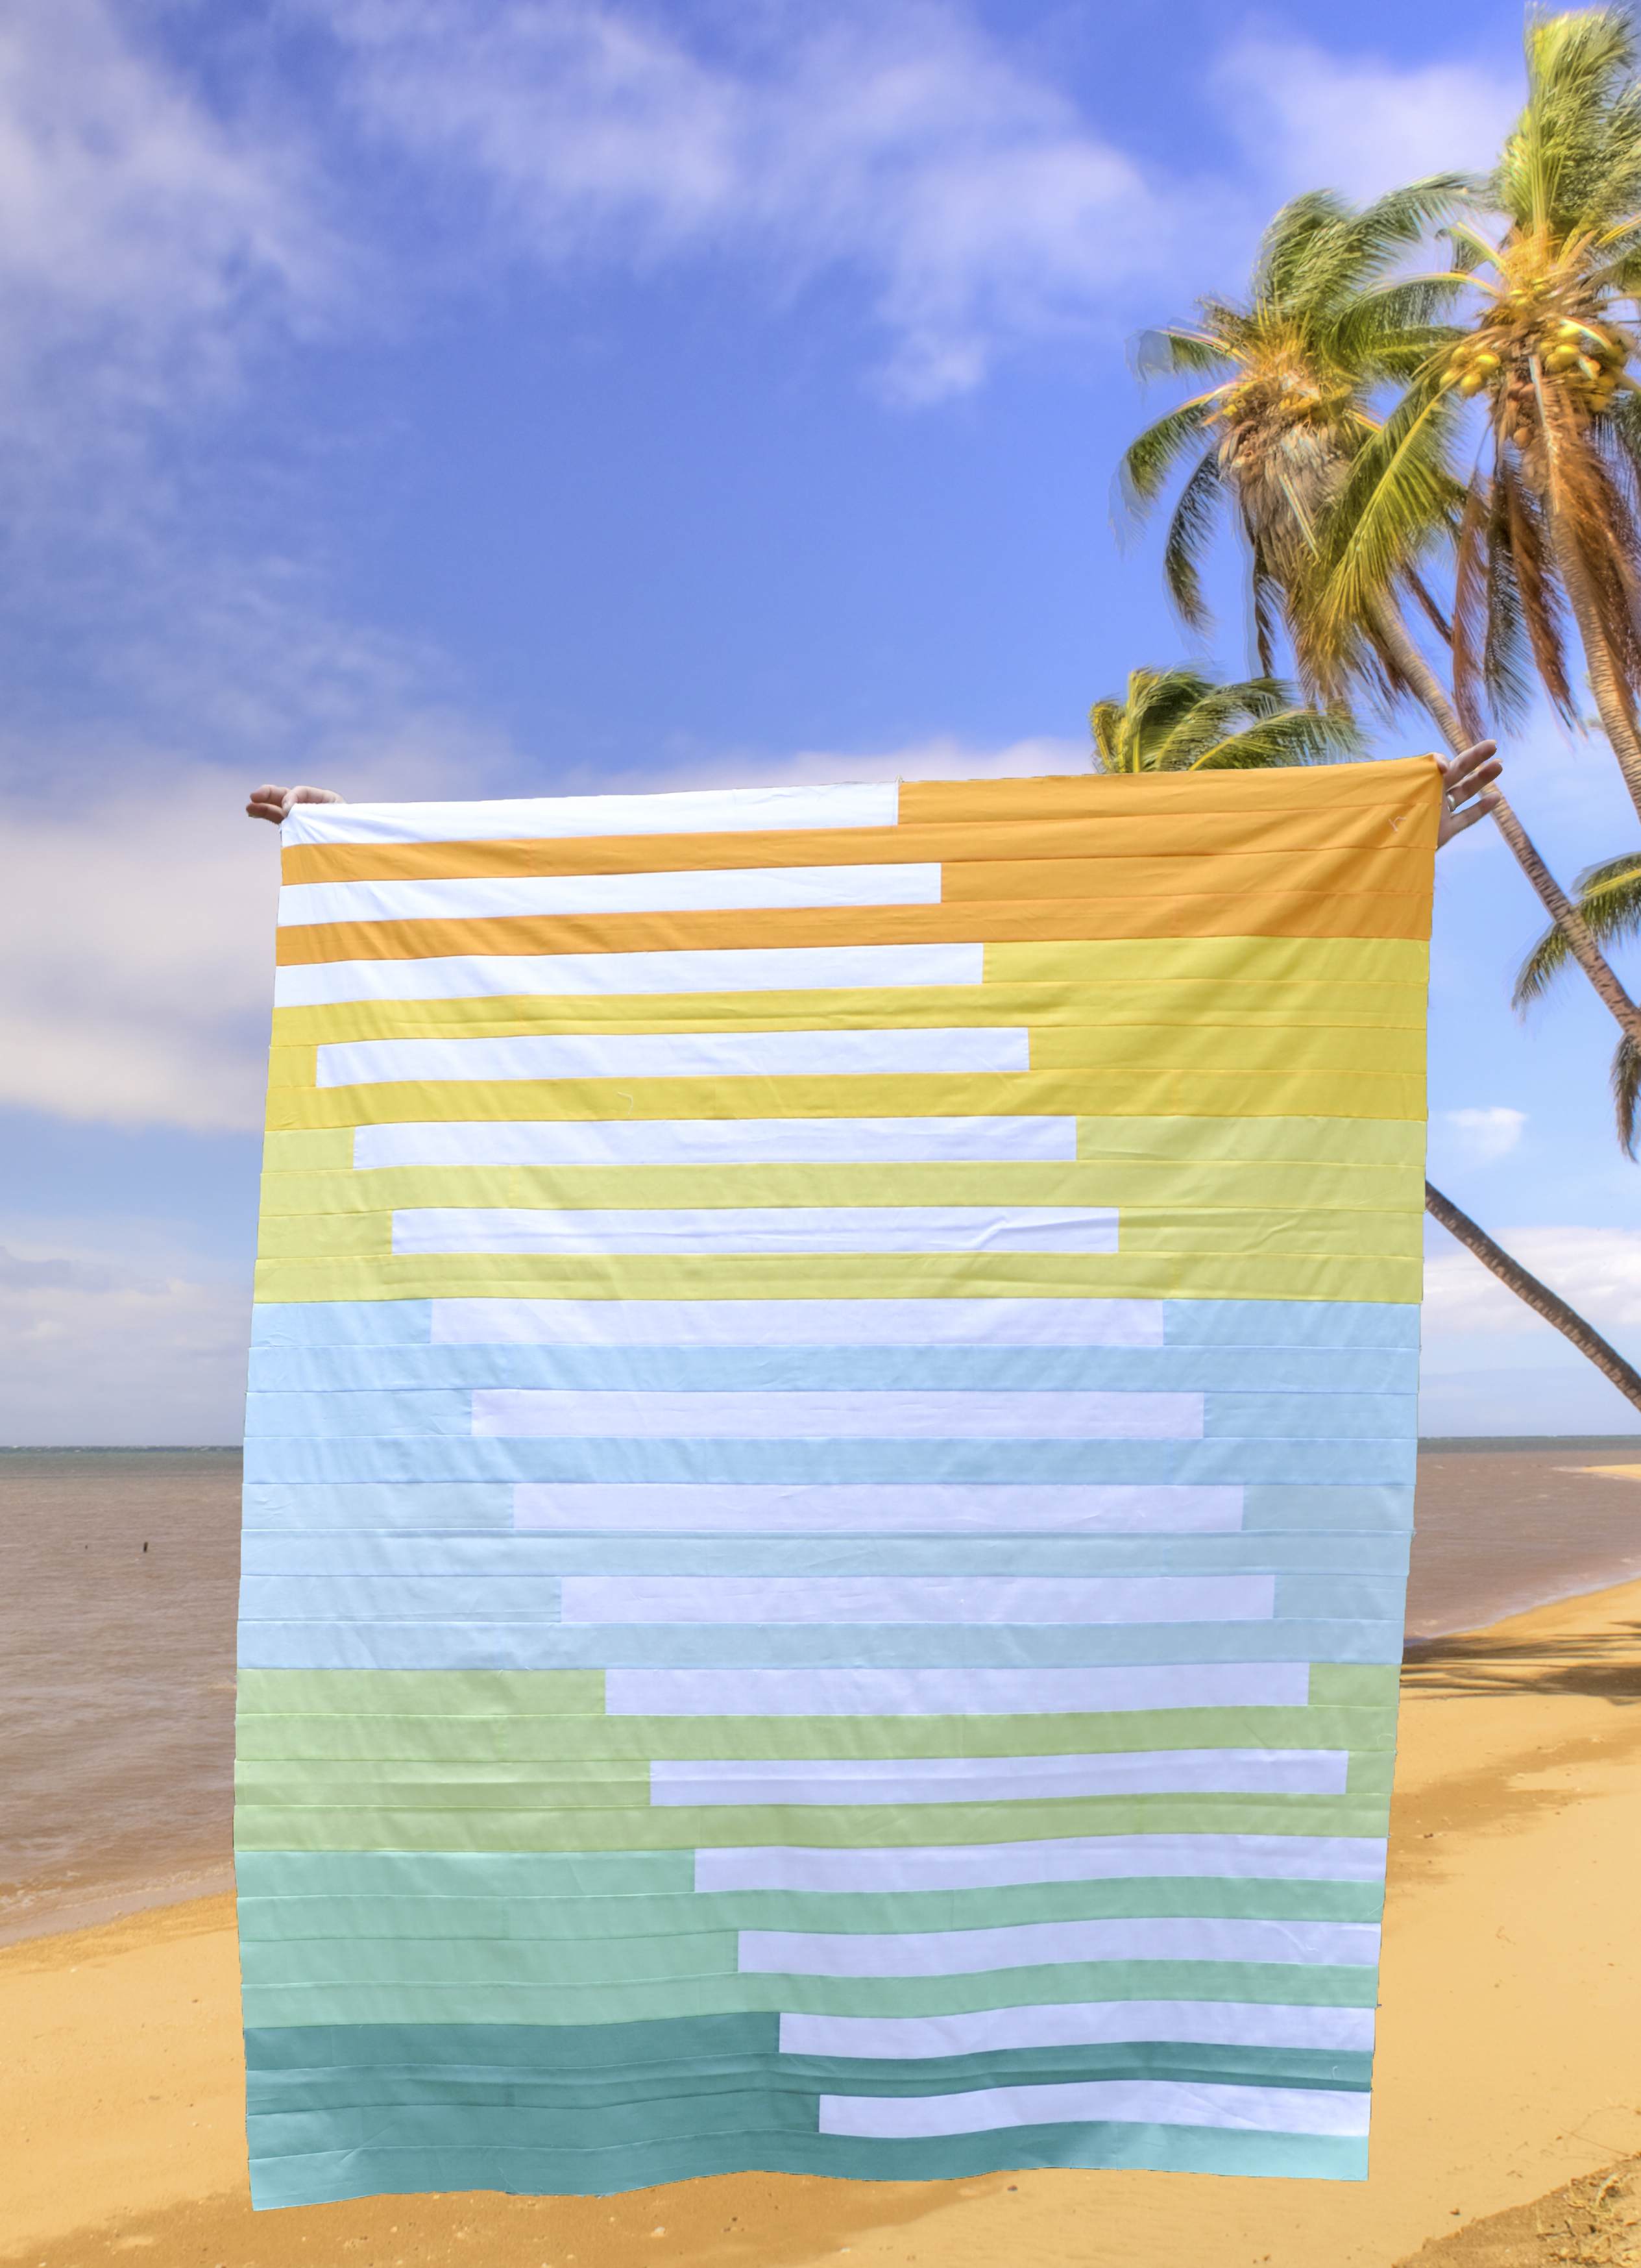
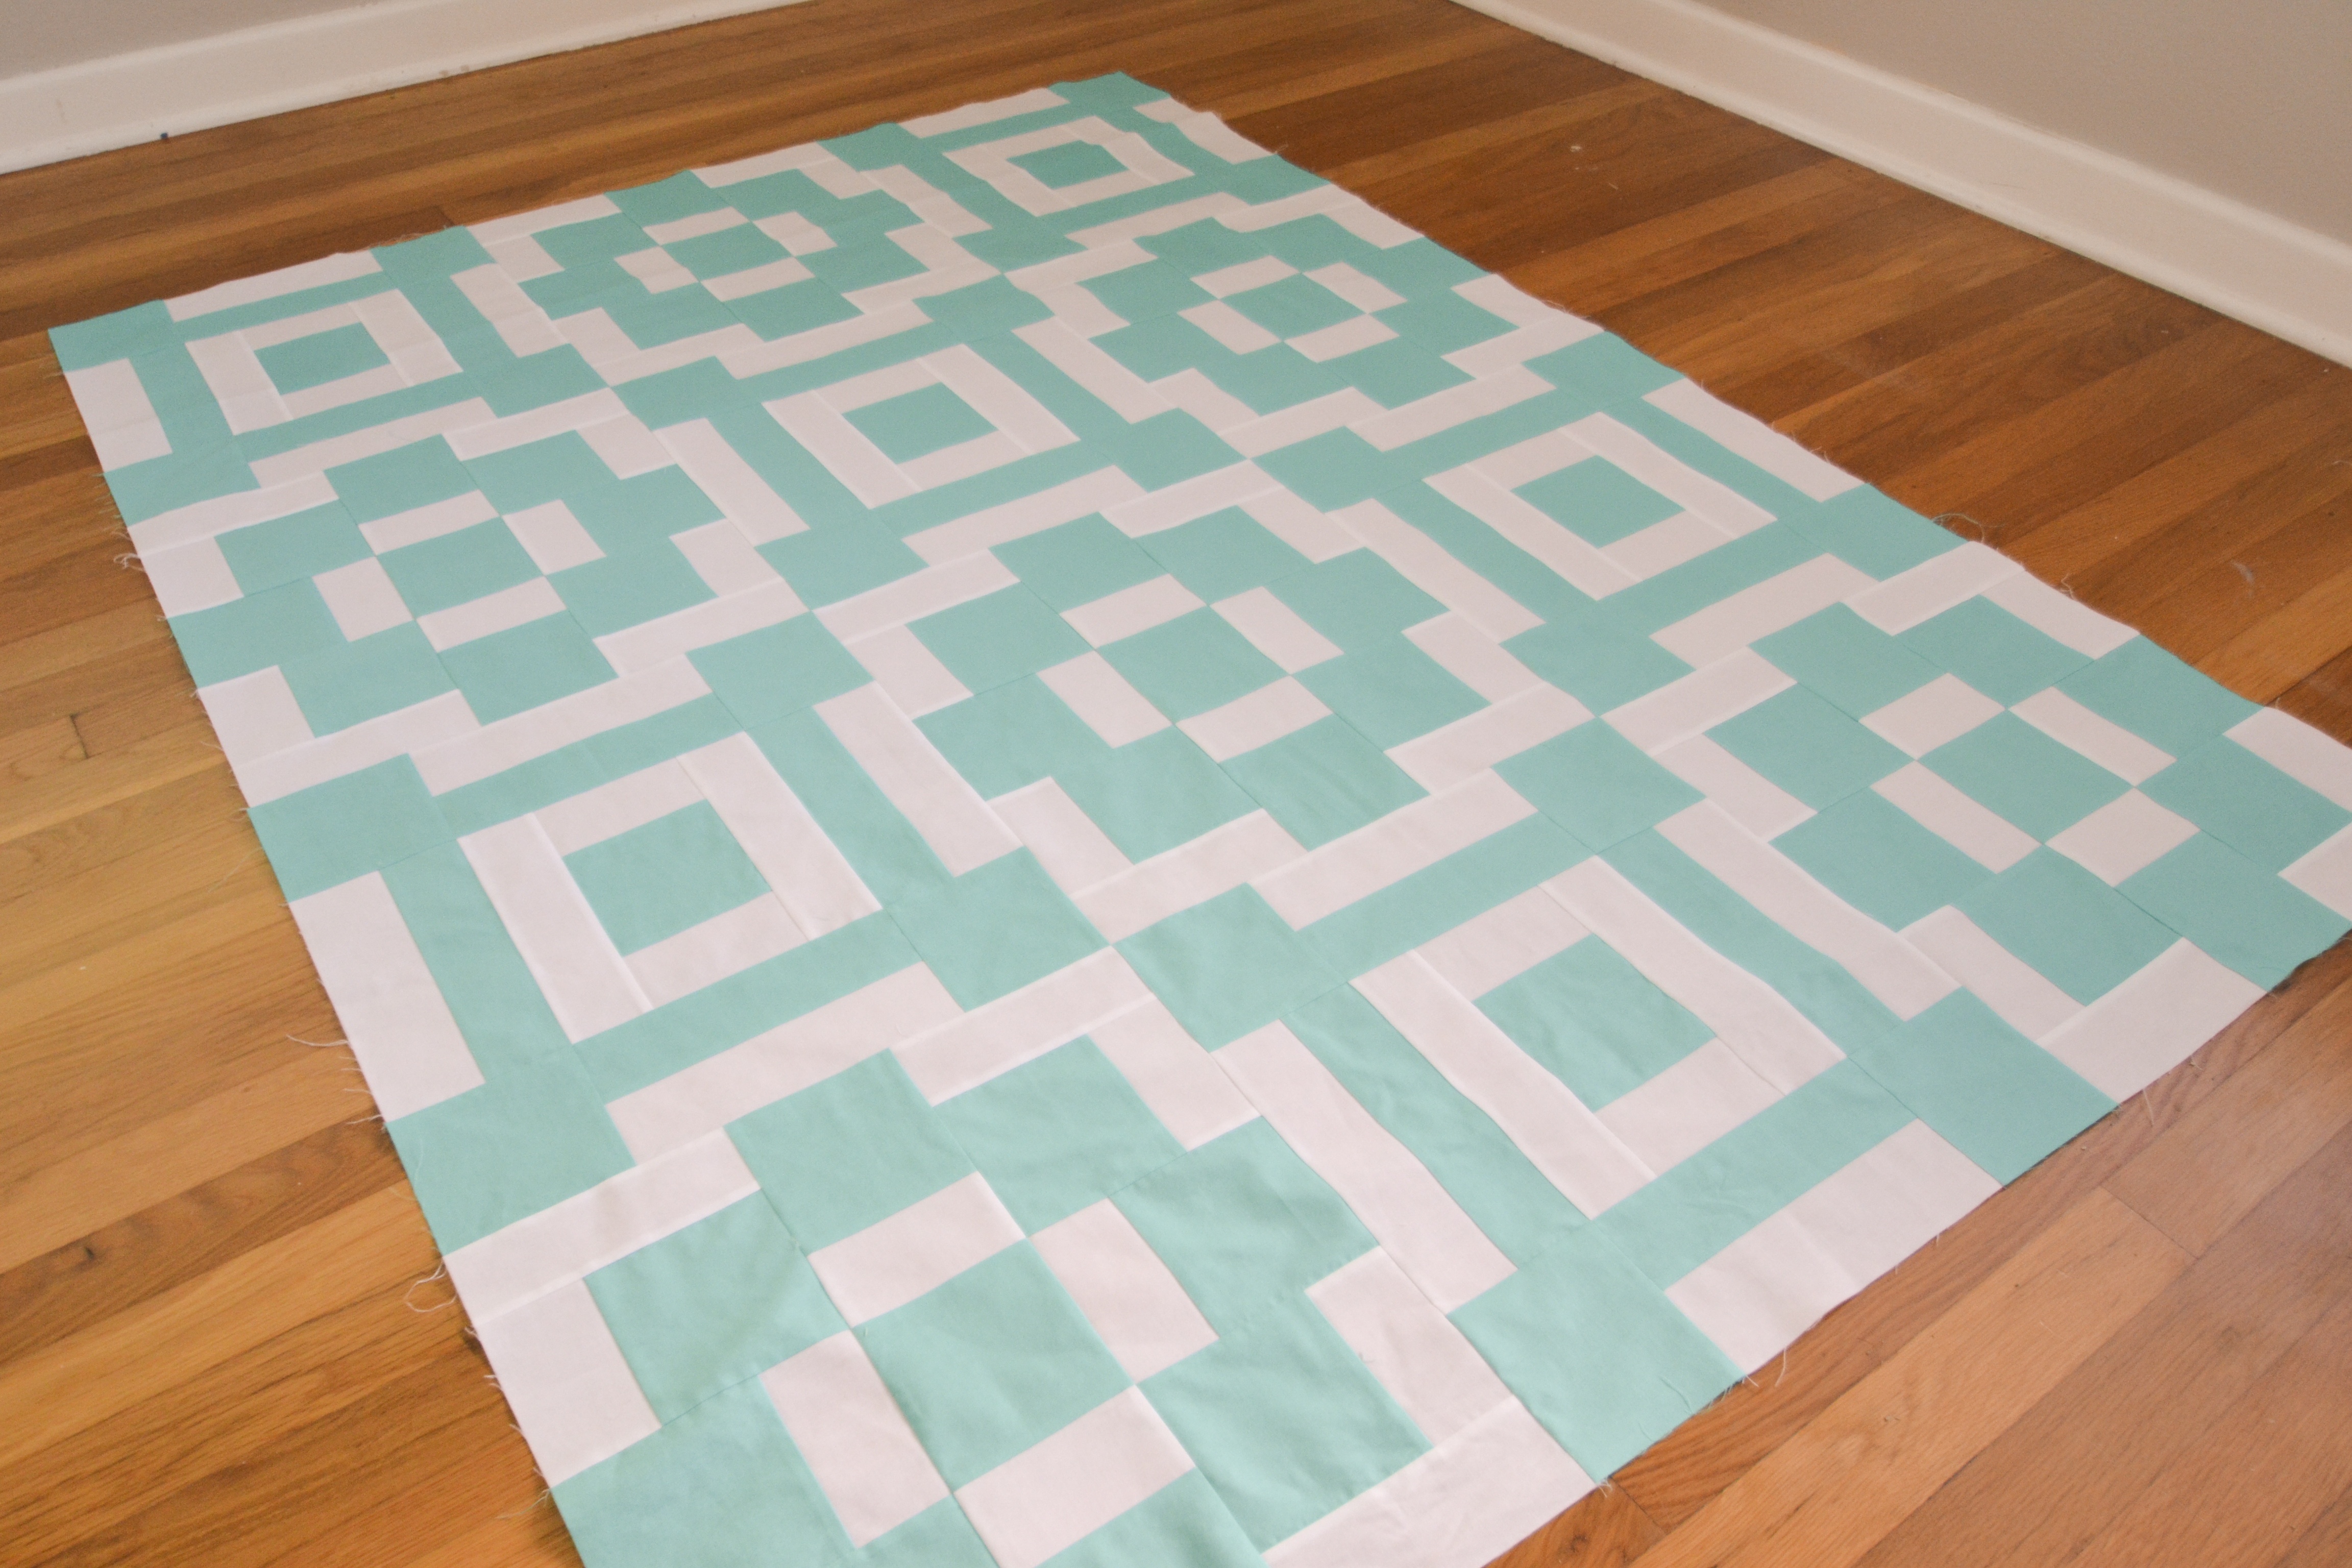
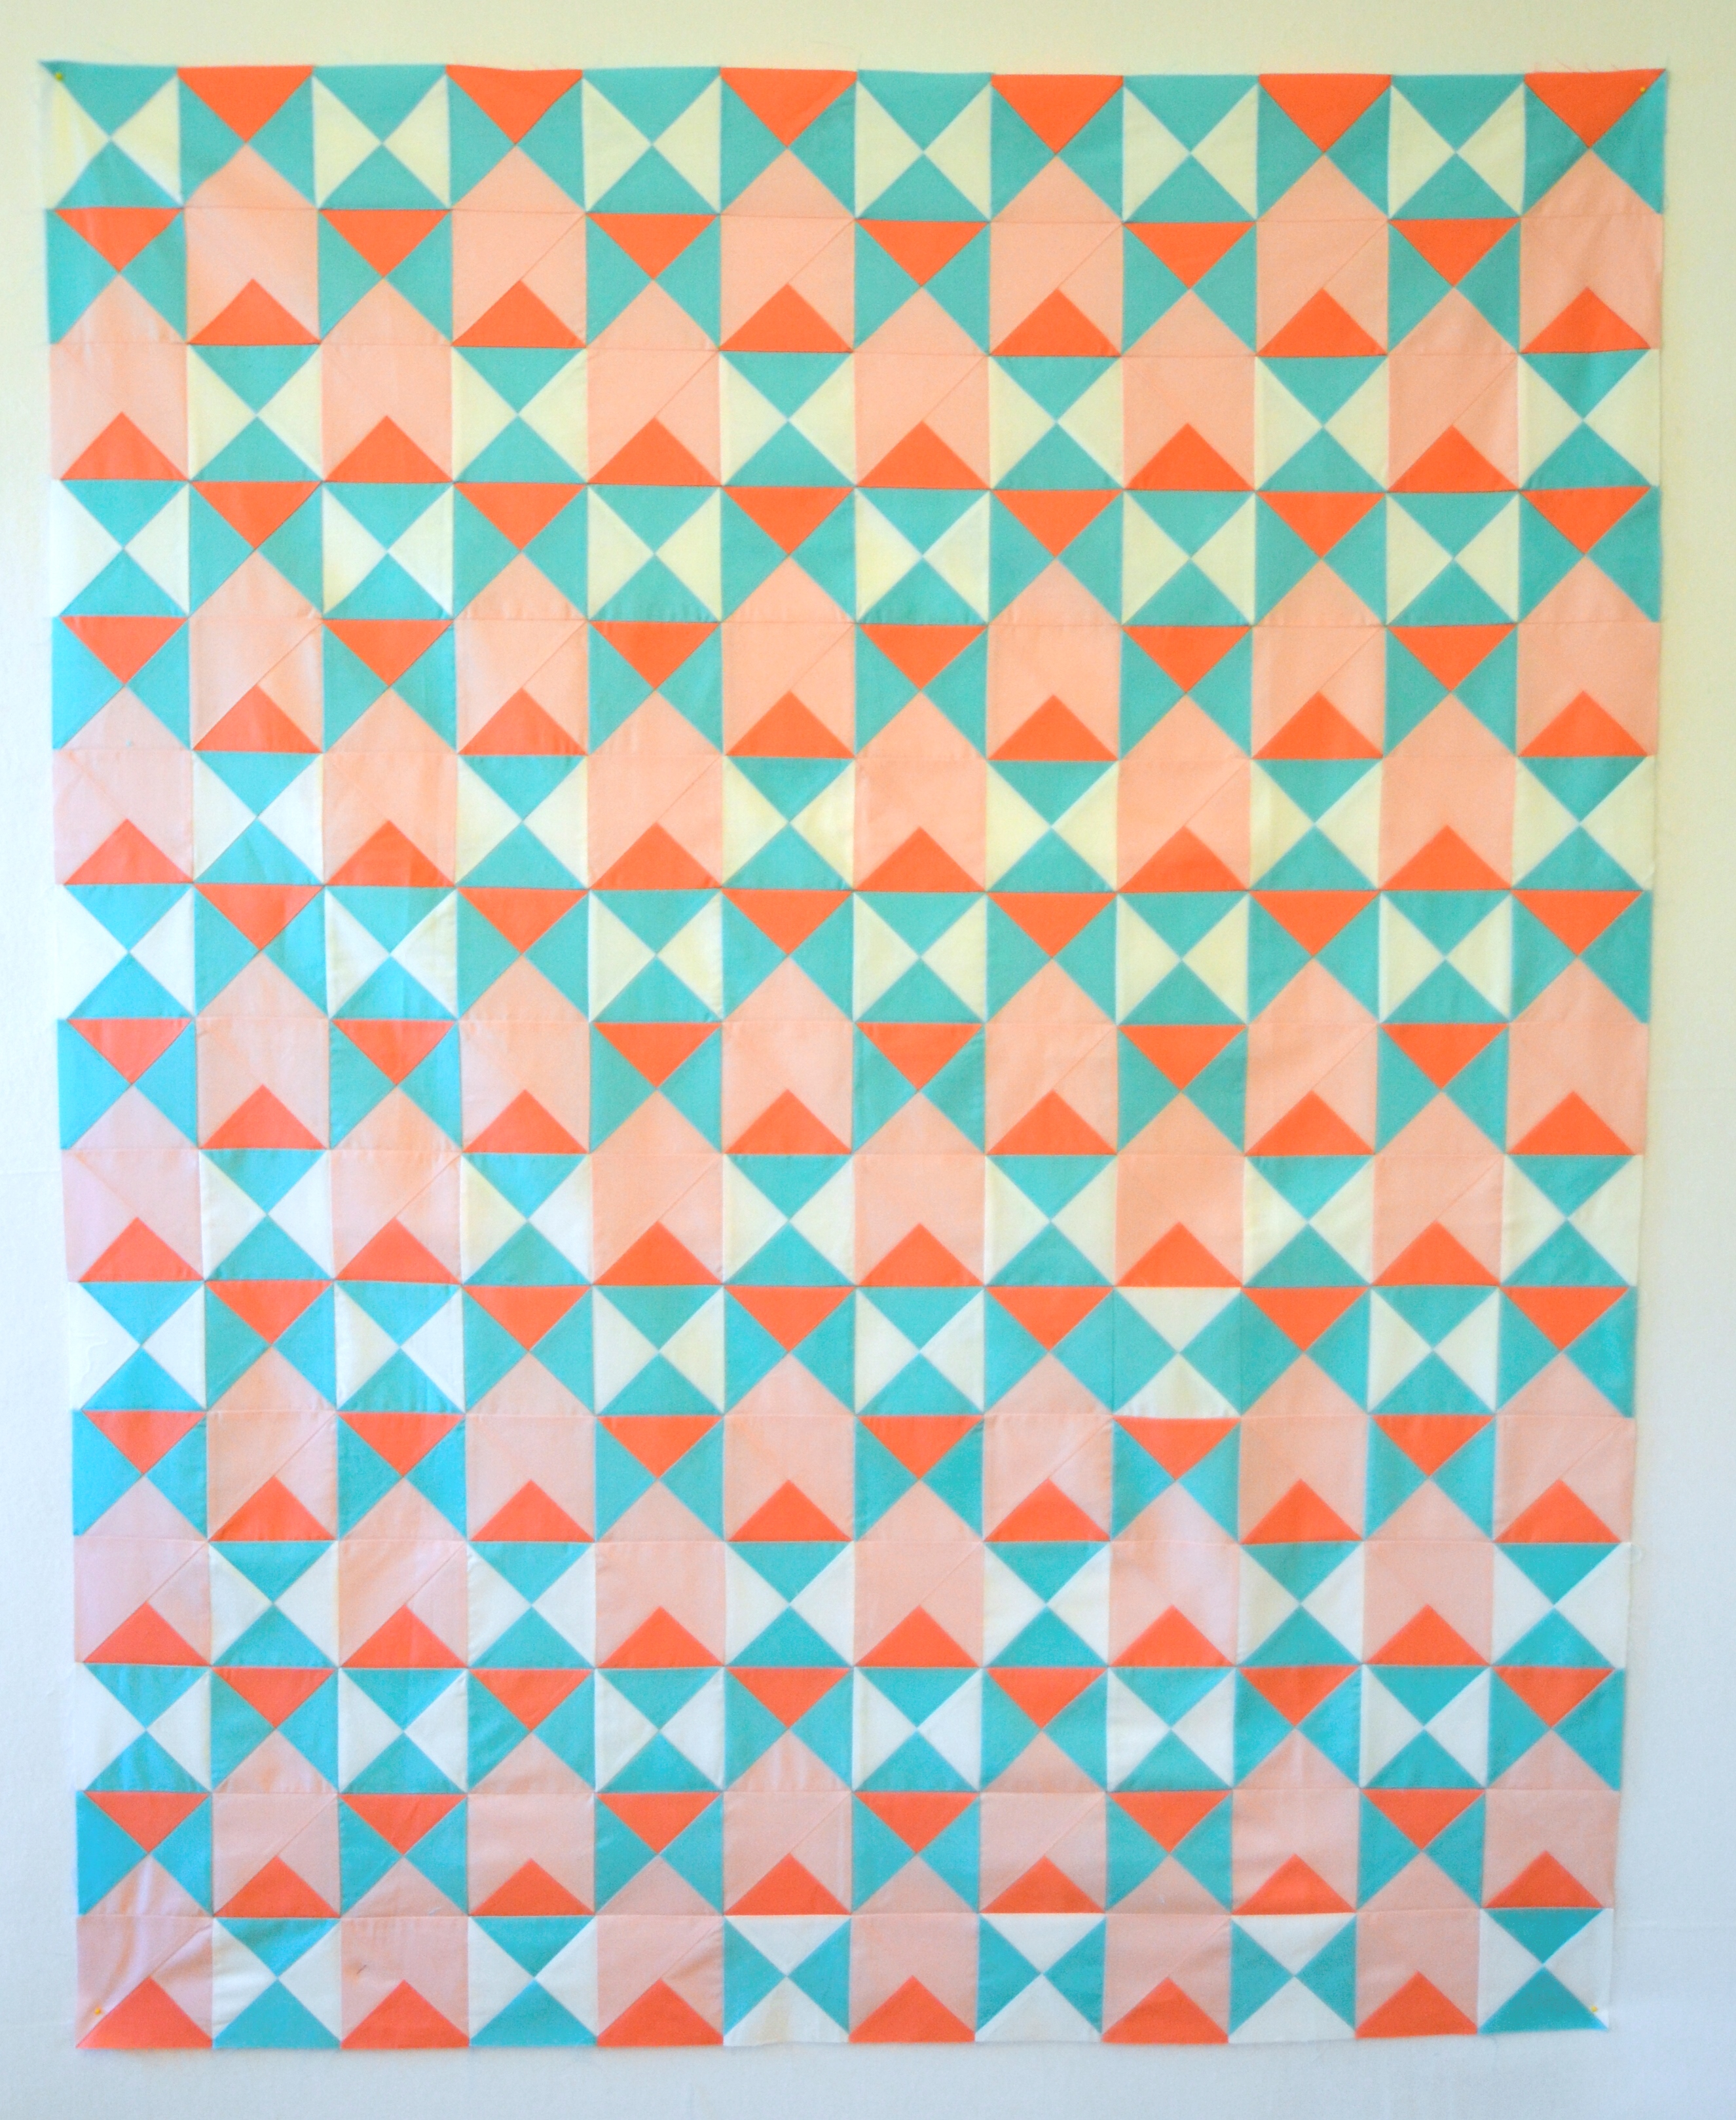
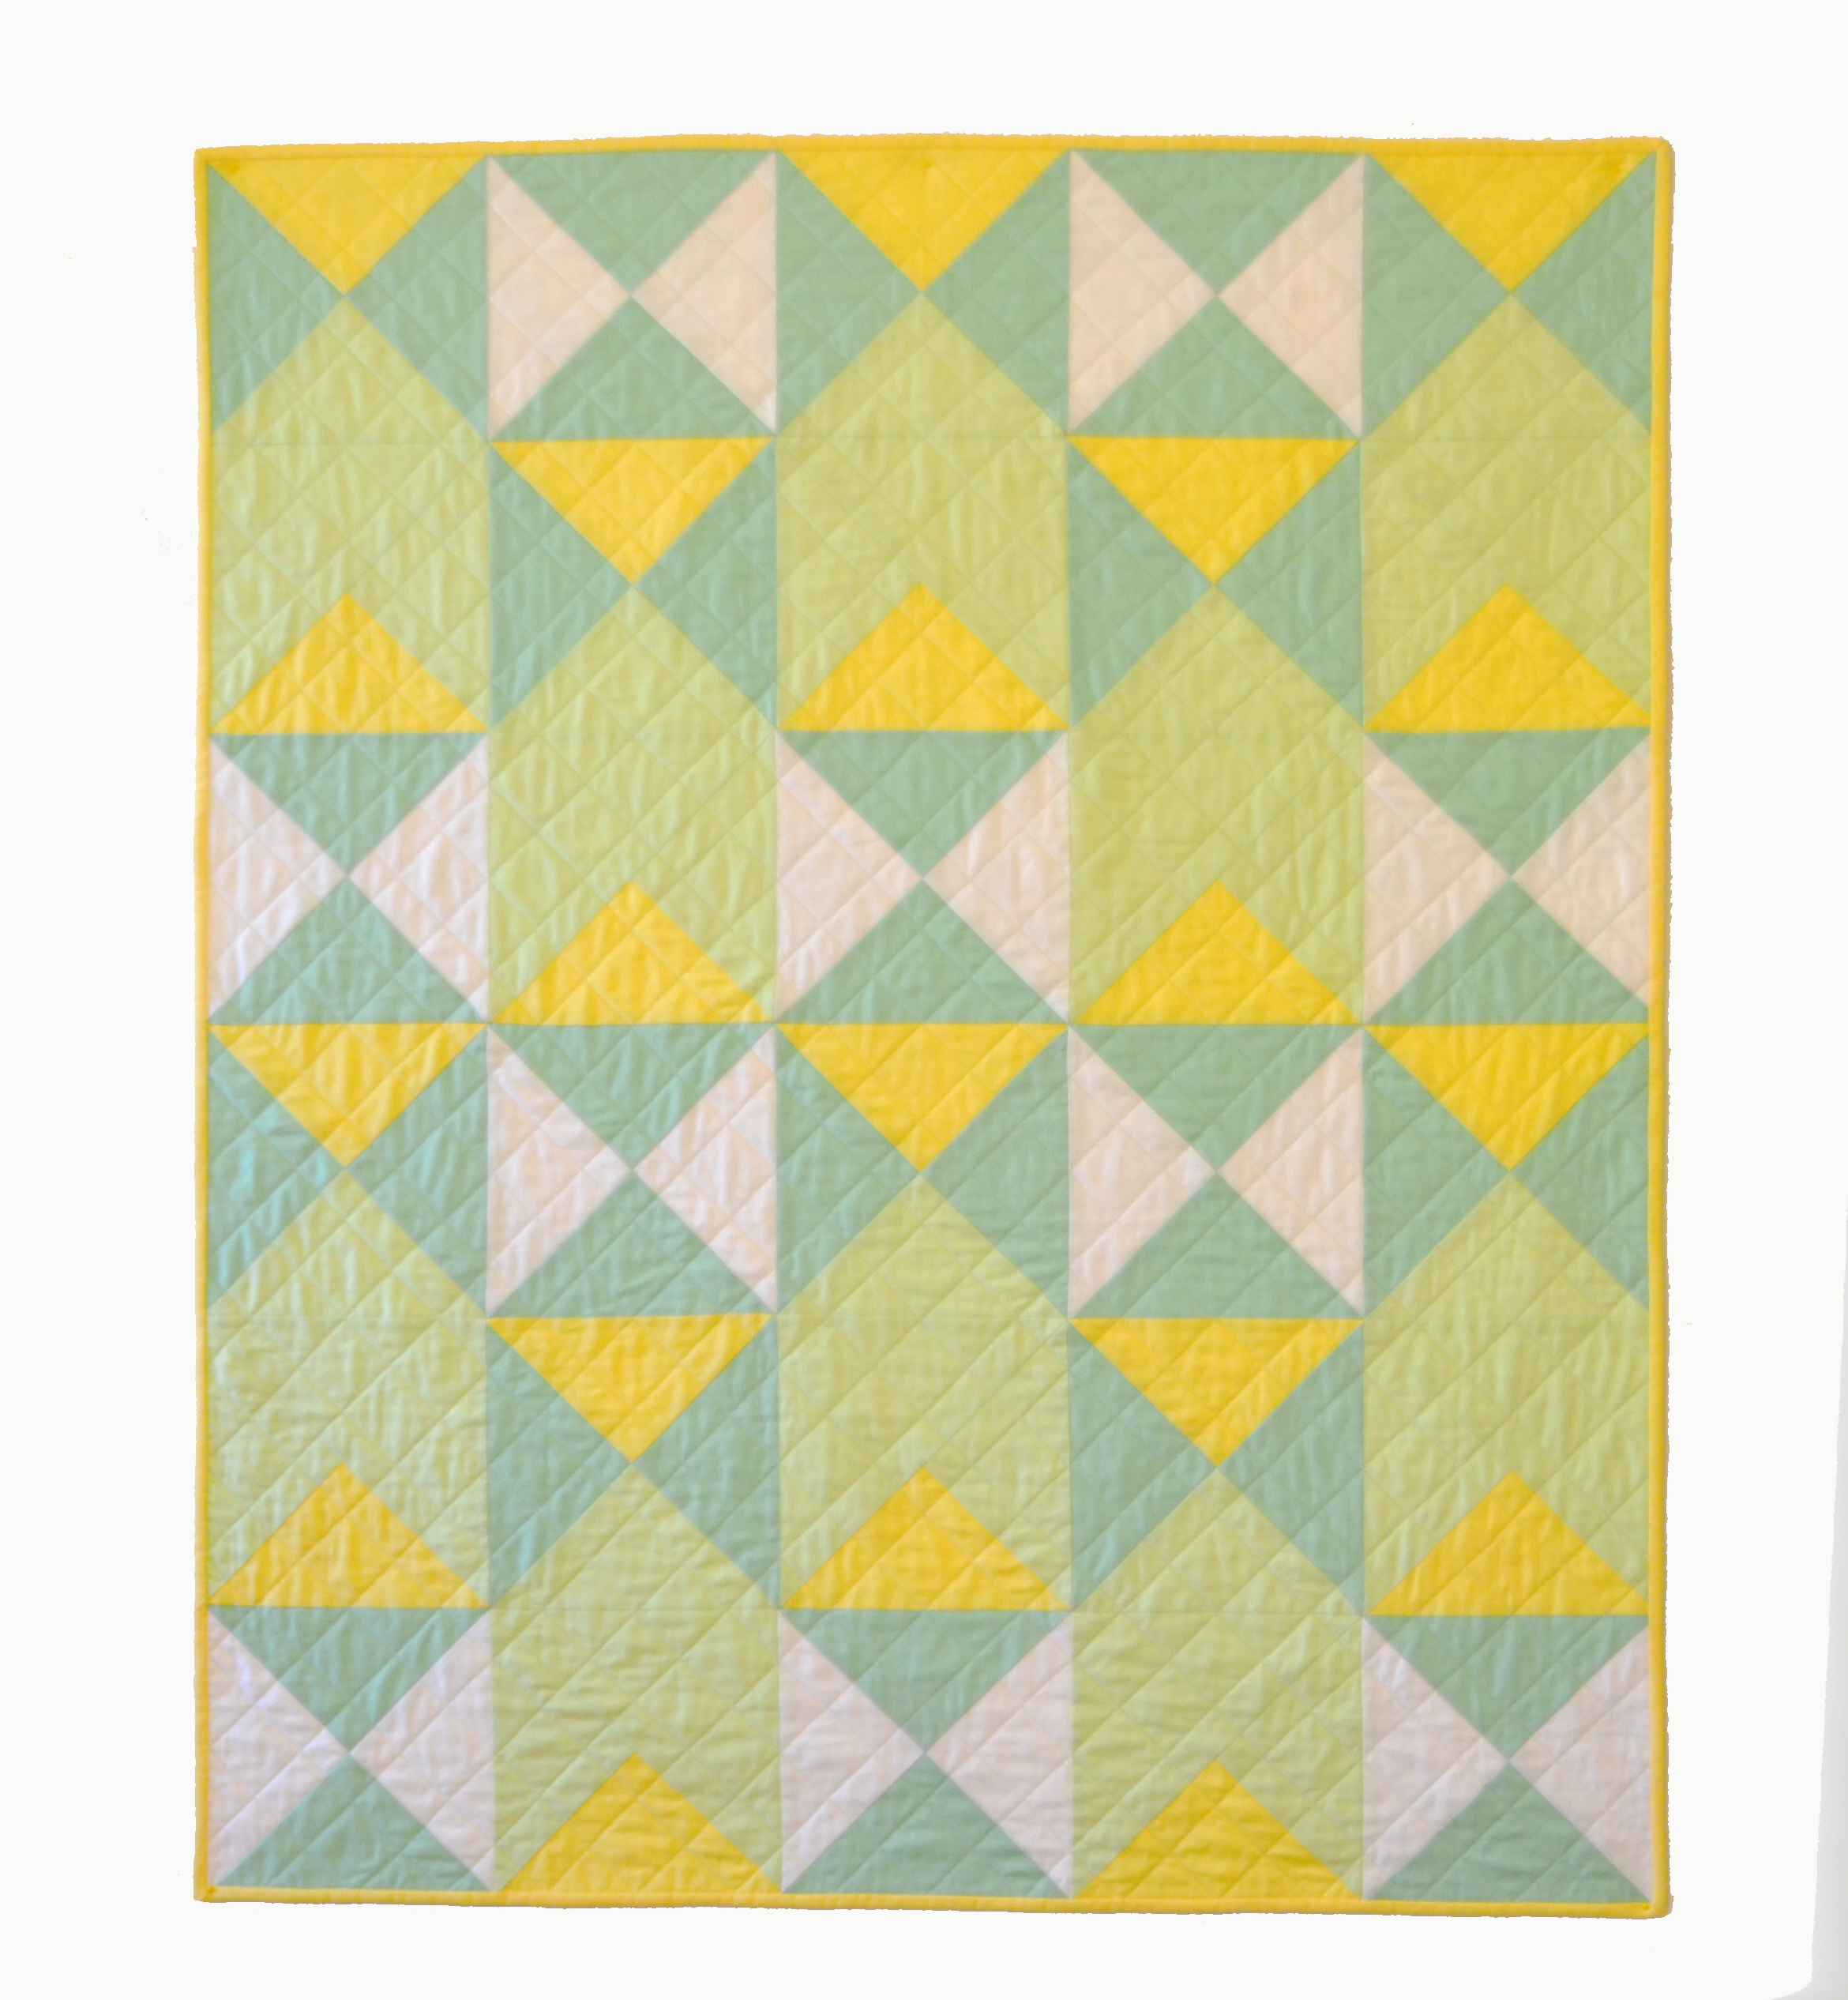
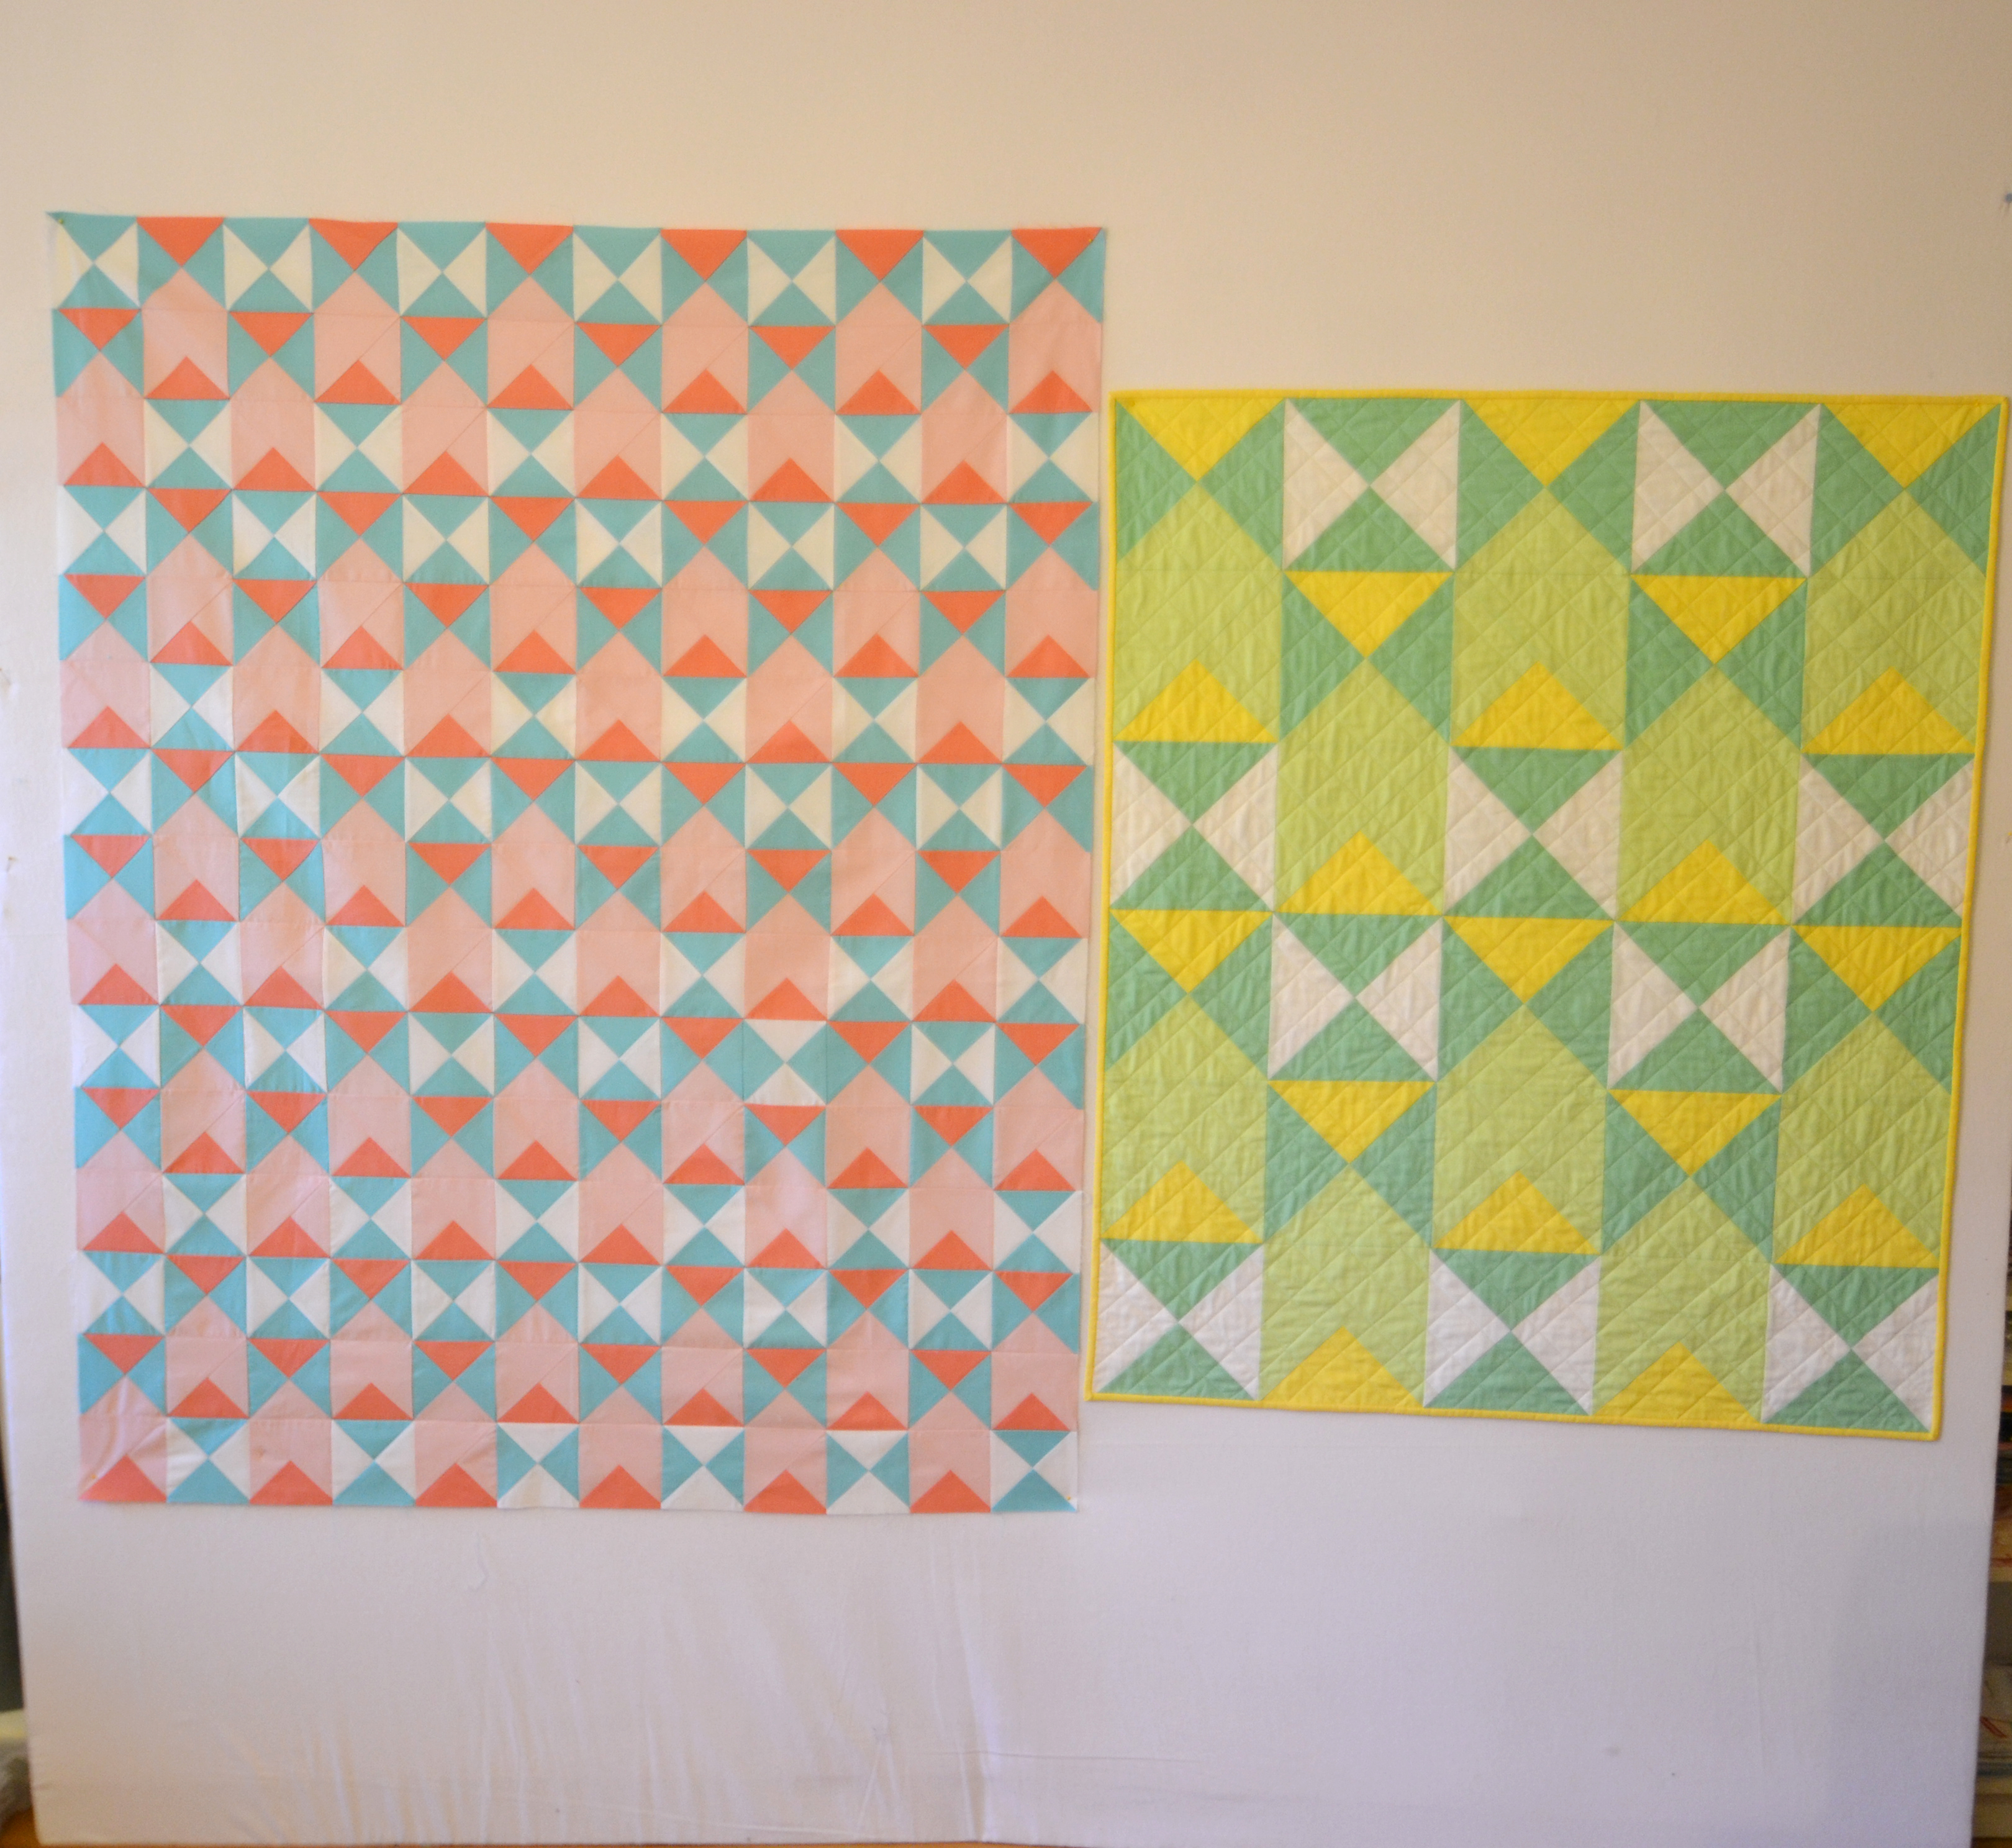
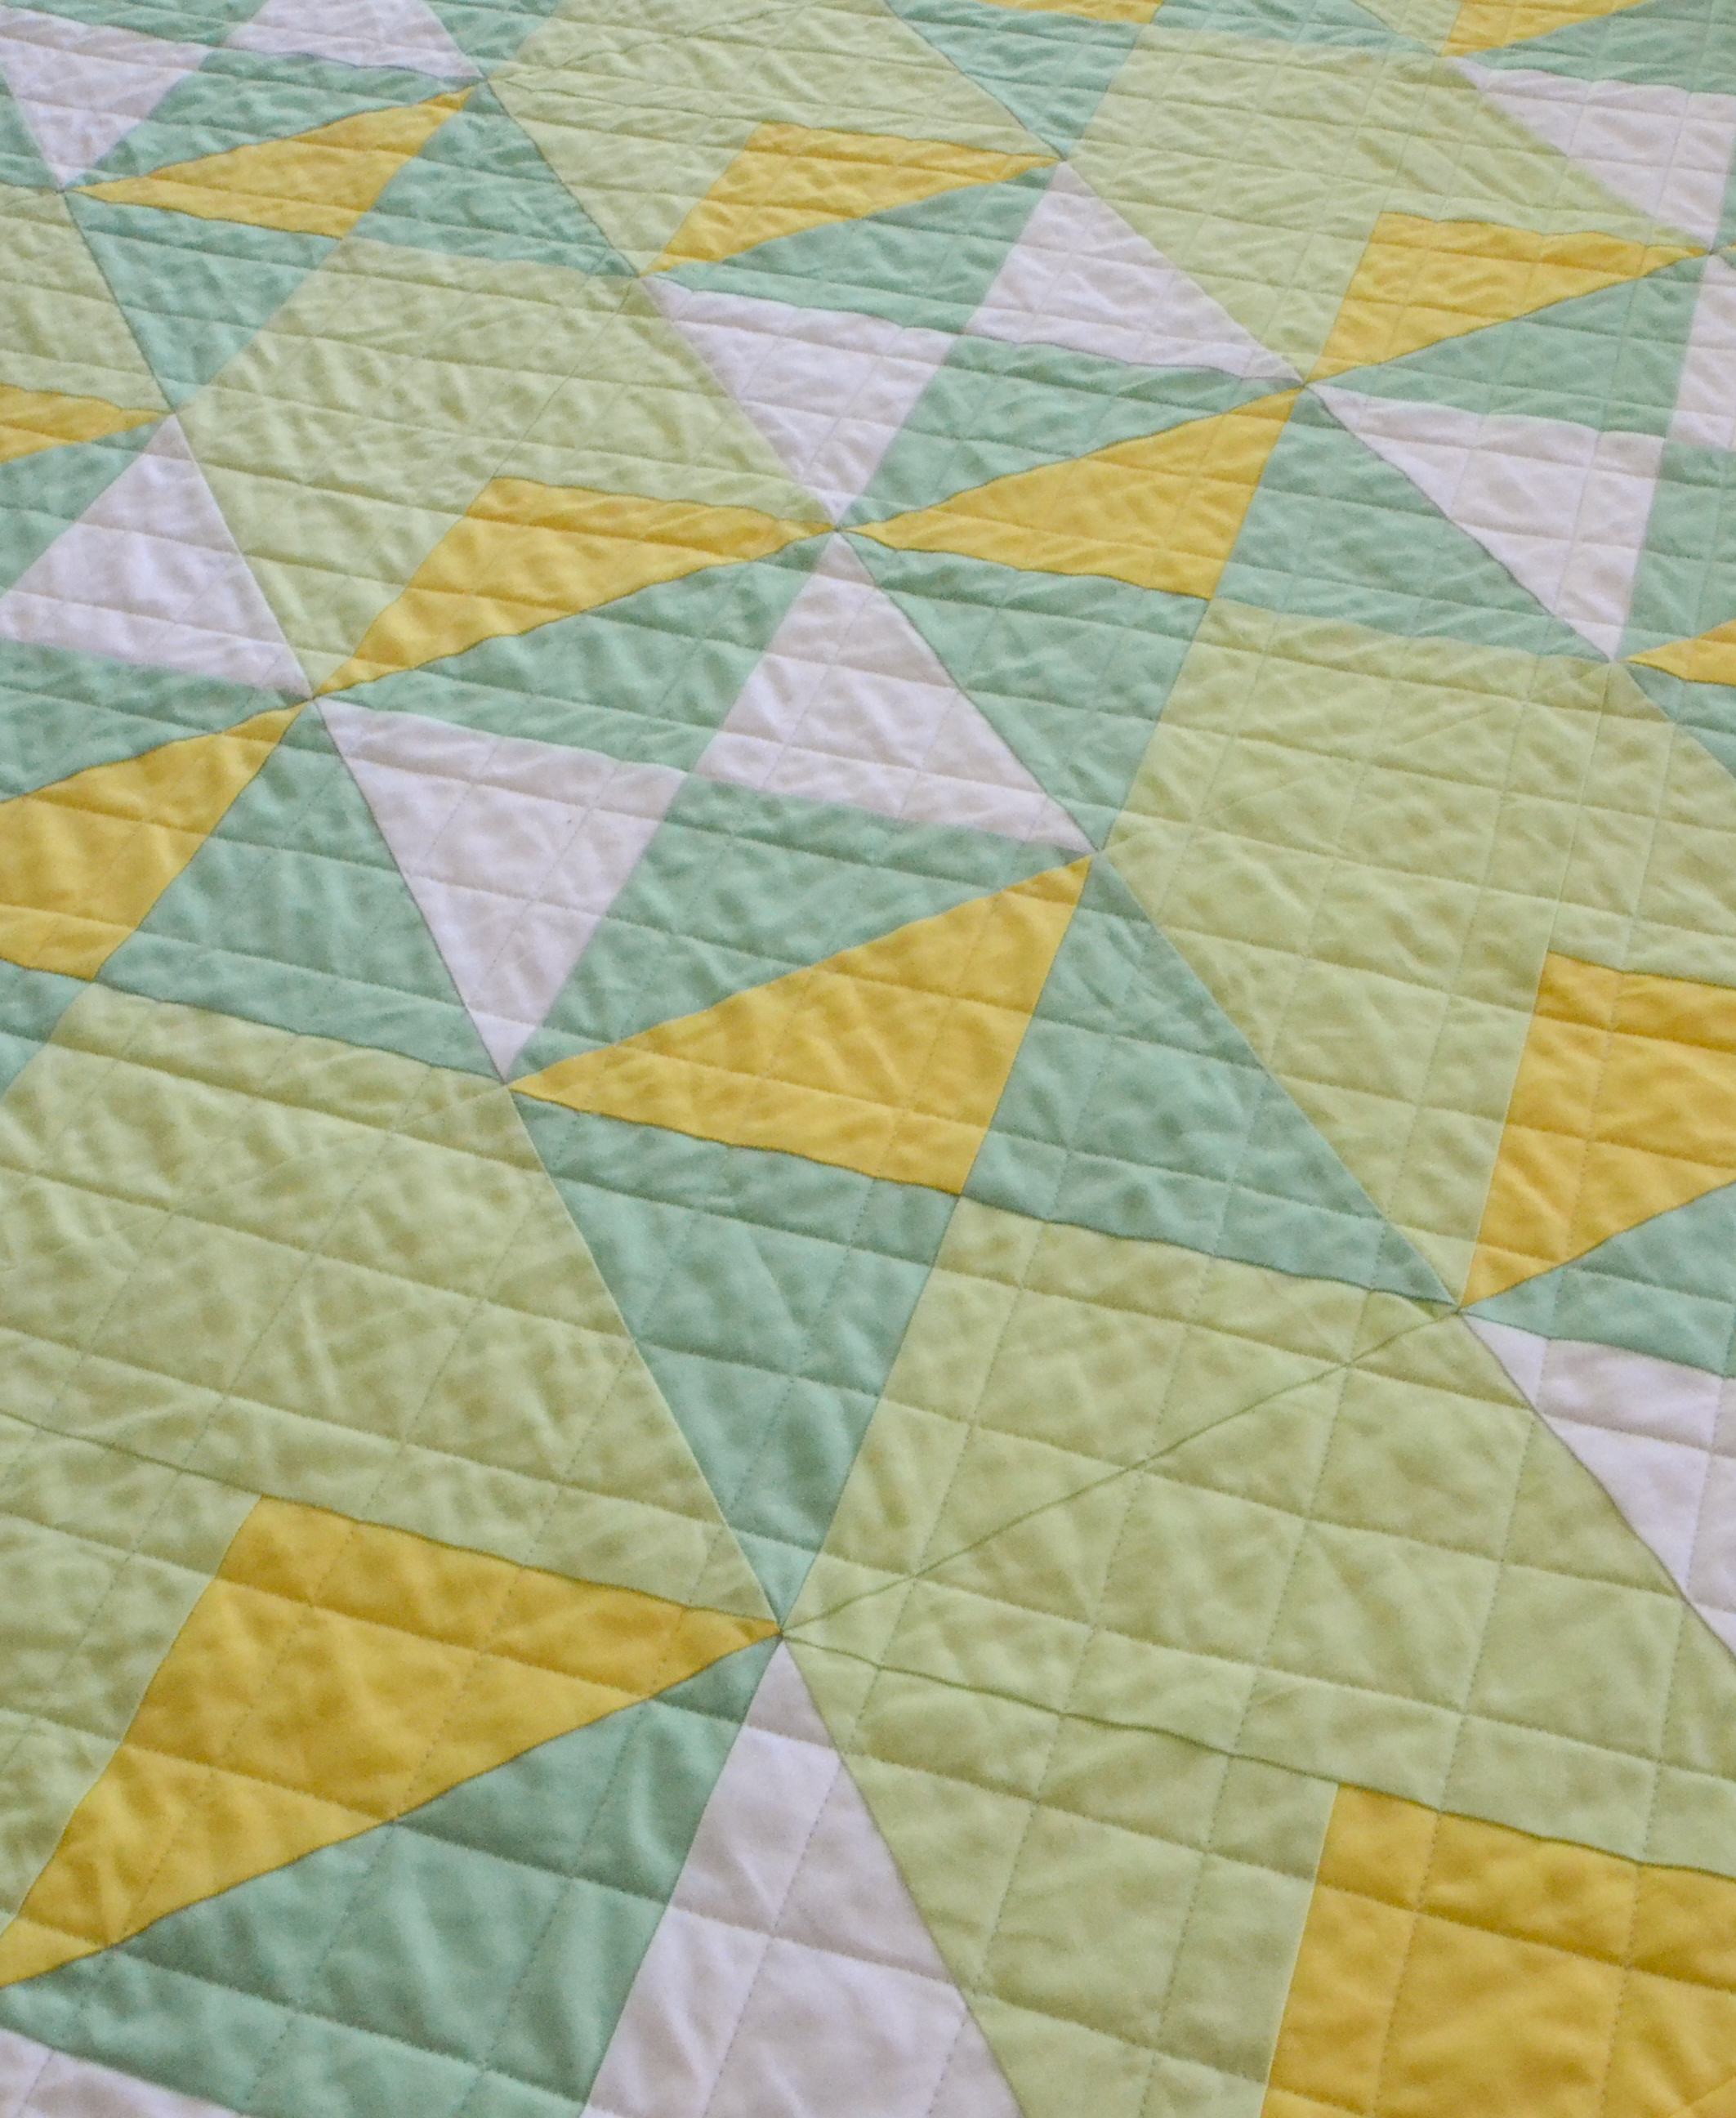
Usually this is where I start to get a little discouraged and put the project away while I wait for inspiration. Fortunately, another idea struck and I decided to try it out. I have a large shelf of neutral fabric and I thought it might be fun to piece those together in random strips as the contrast triangle. MAGIC. I was in love. The strip triangles go together SO fast, I had them all done in a matter of days.
Lessons Learned
Public Service Announcement: Do NOT, I repeat, DO NOT follow my lead and do equal strips for your print triangles and your contrast triangles, if you have any desire to hold onto your sanity. I would go with an even number of strips for one set, and an odd number for the other. Then you don’t have to match seams on a diagonal. I speak from experience, this is stressful and not-so-fun. I’ve given instructions for even and odd strips below.
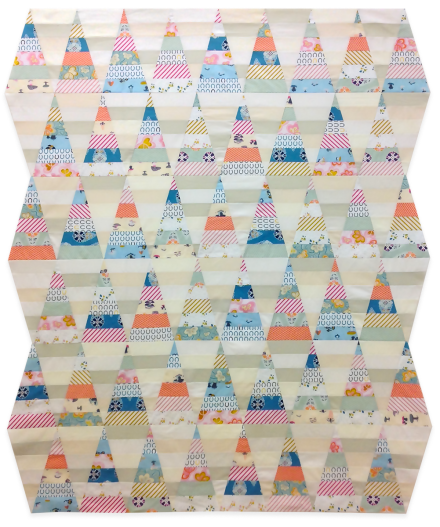
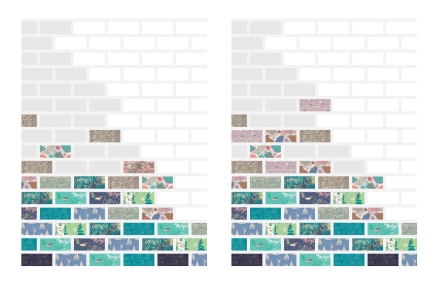
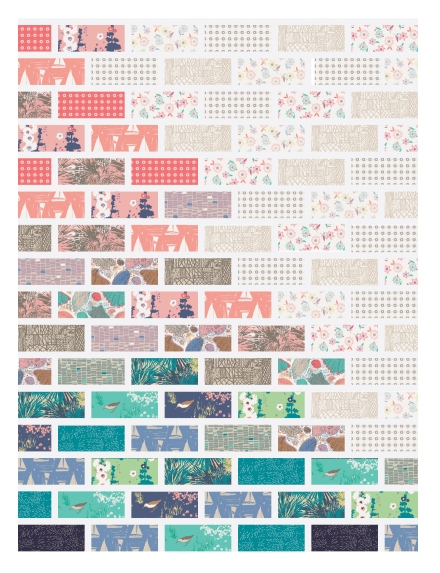
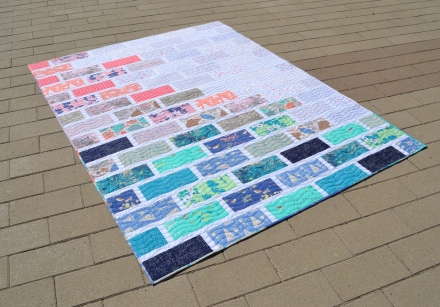
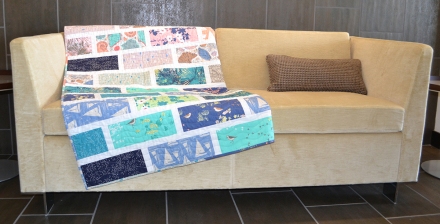
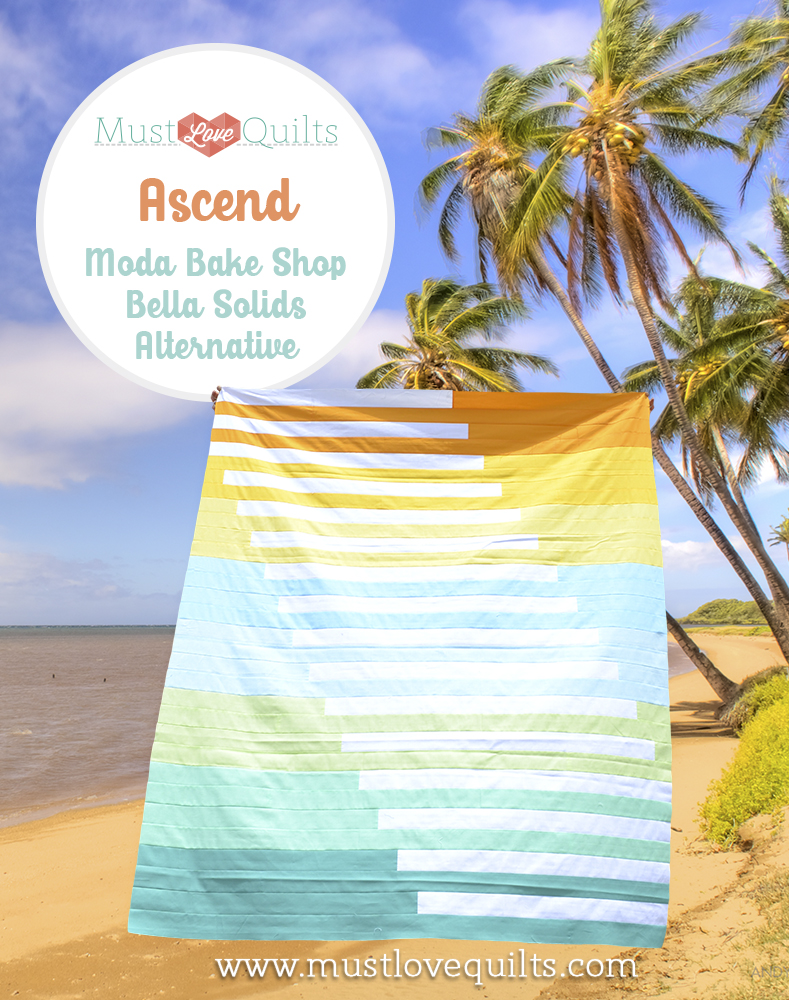
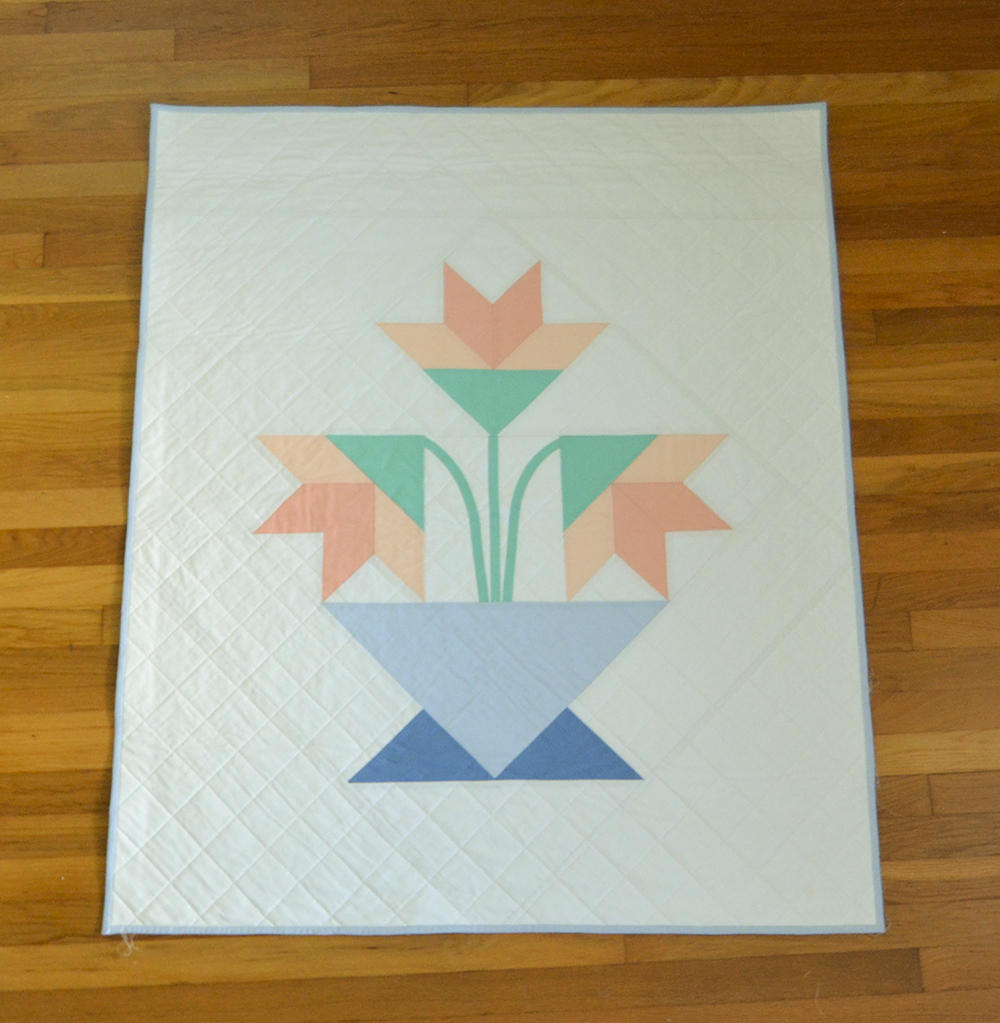
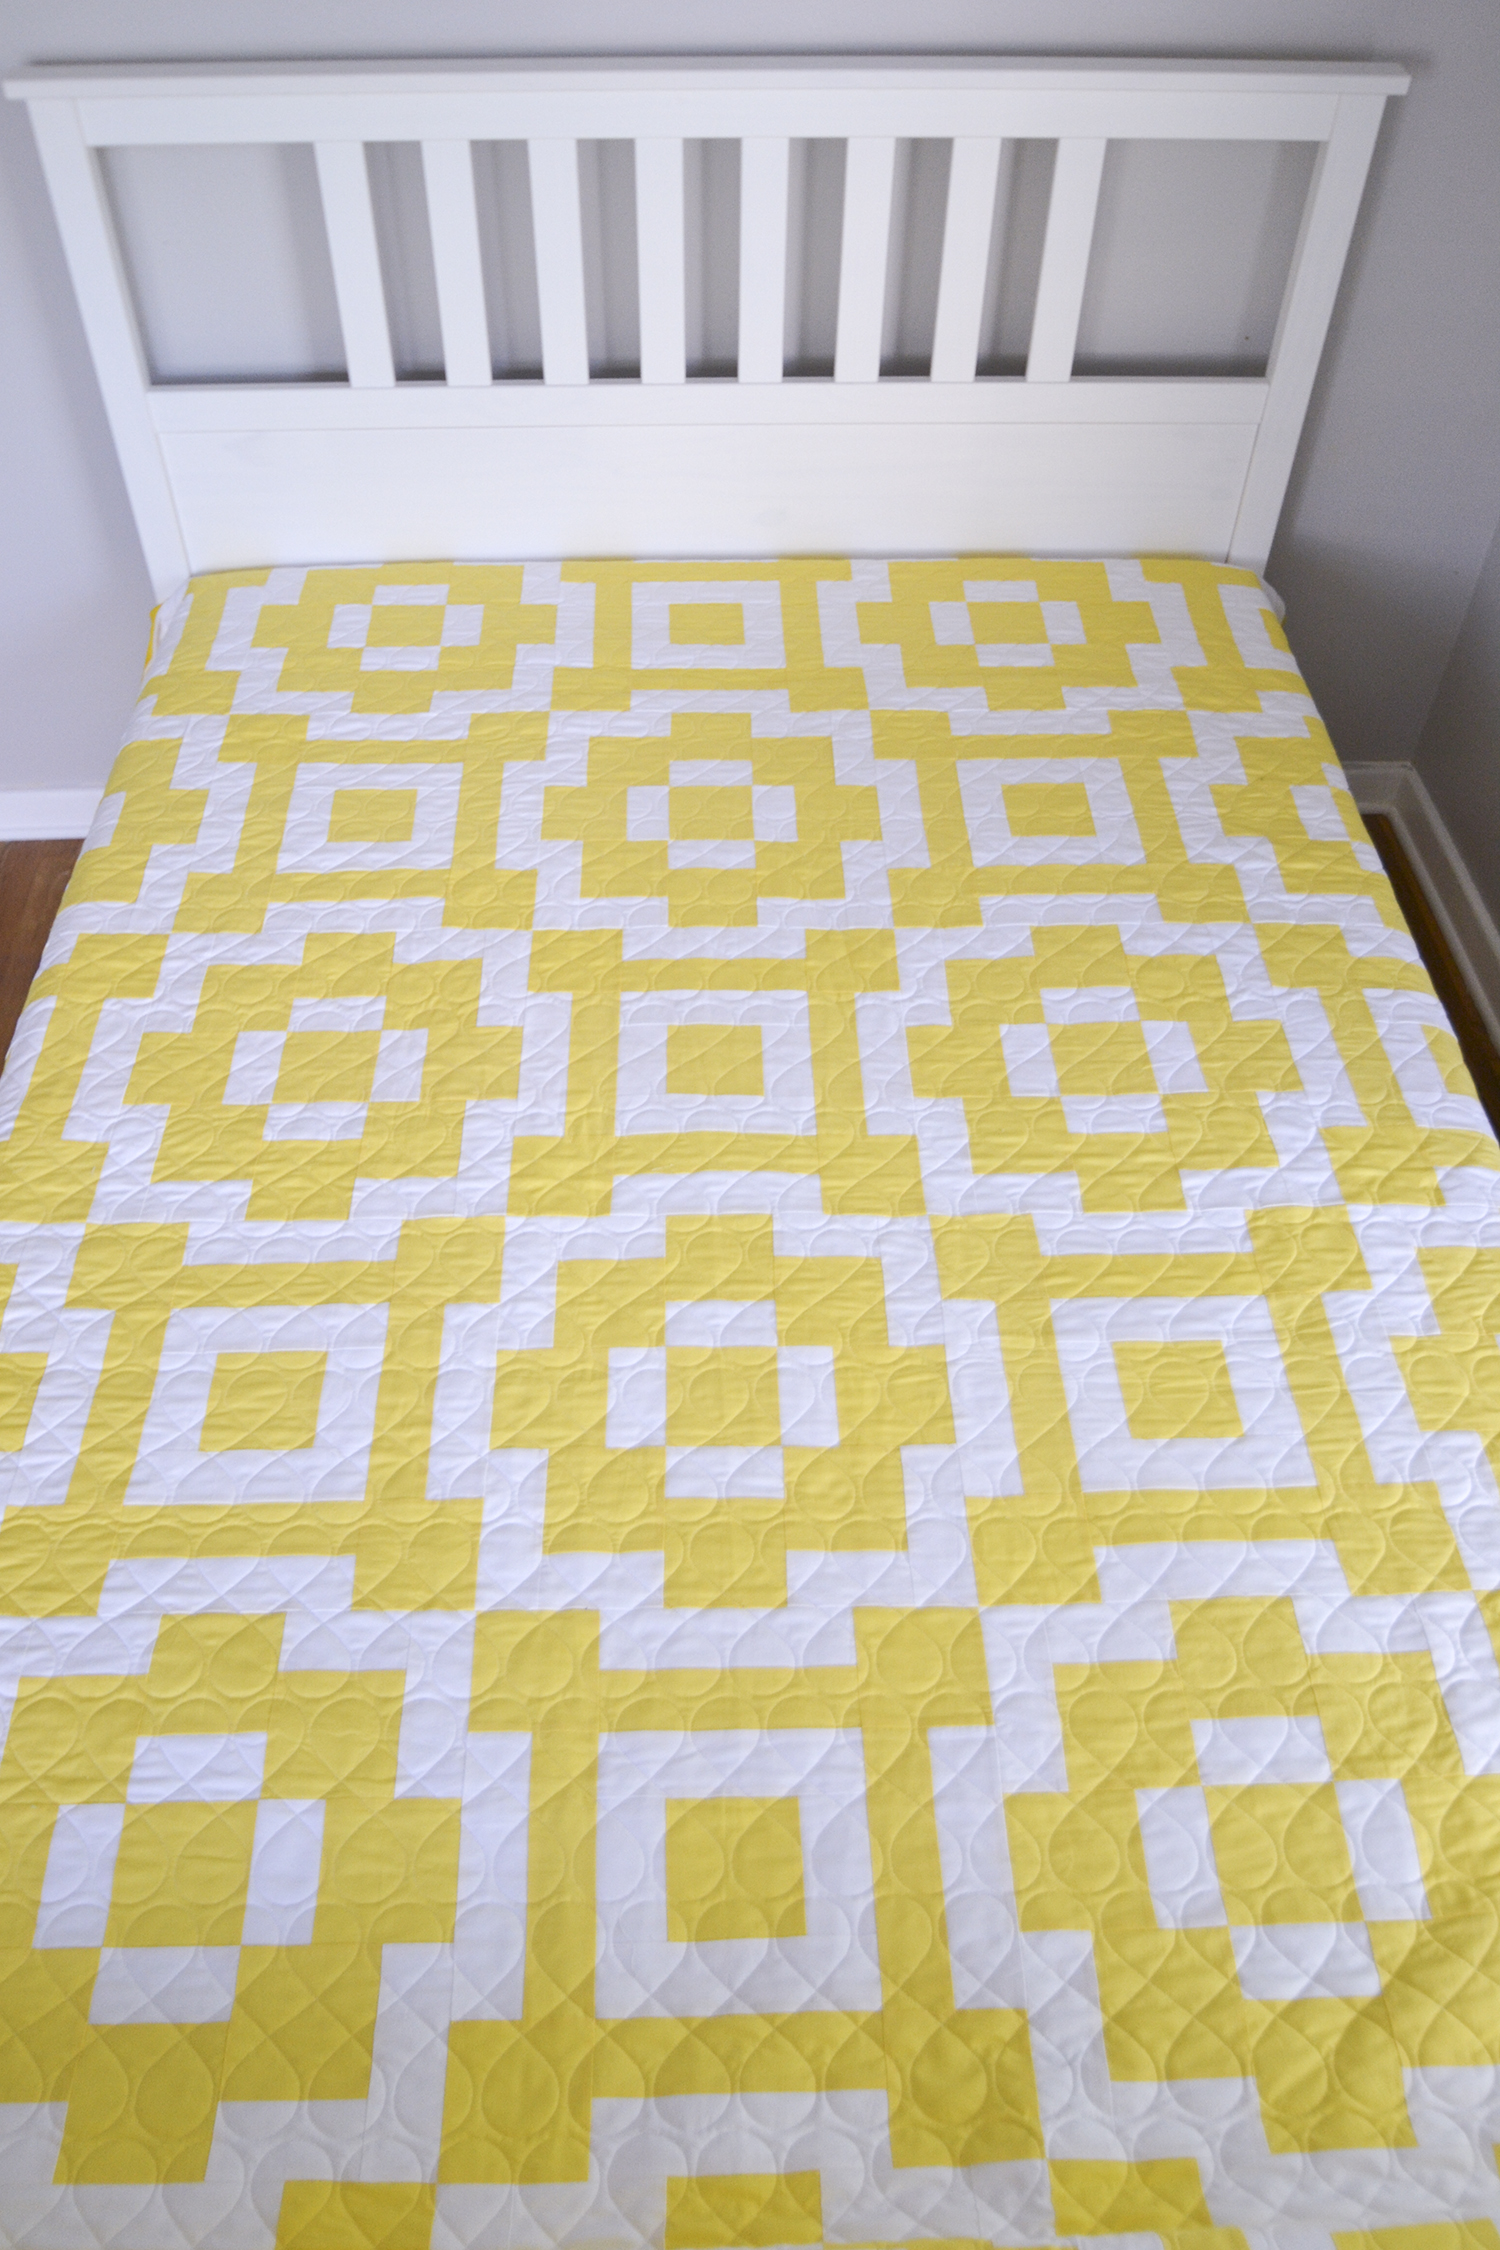
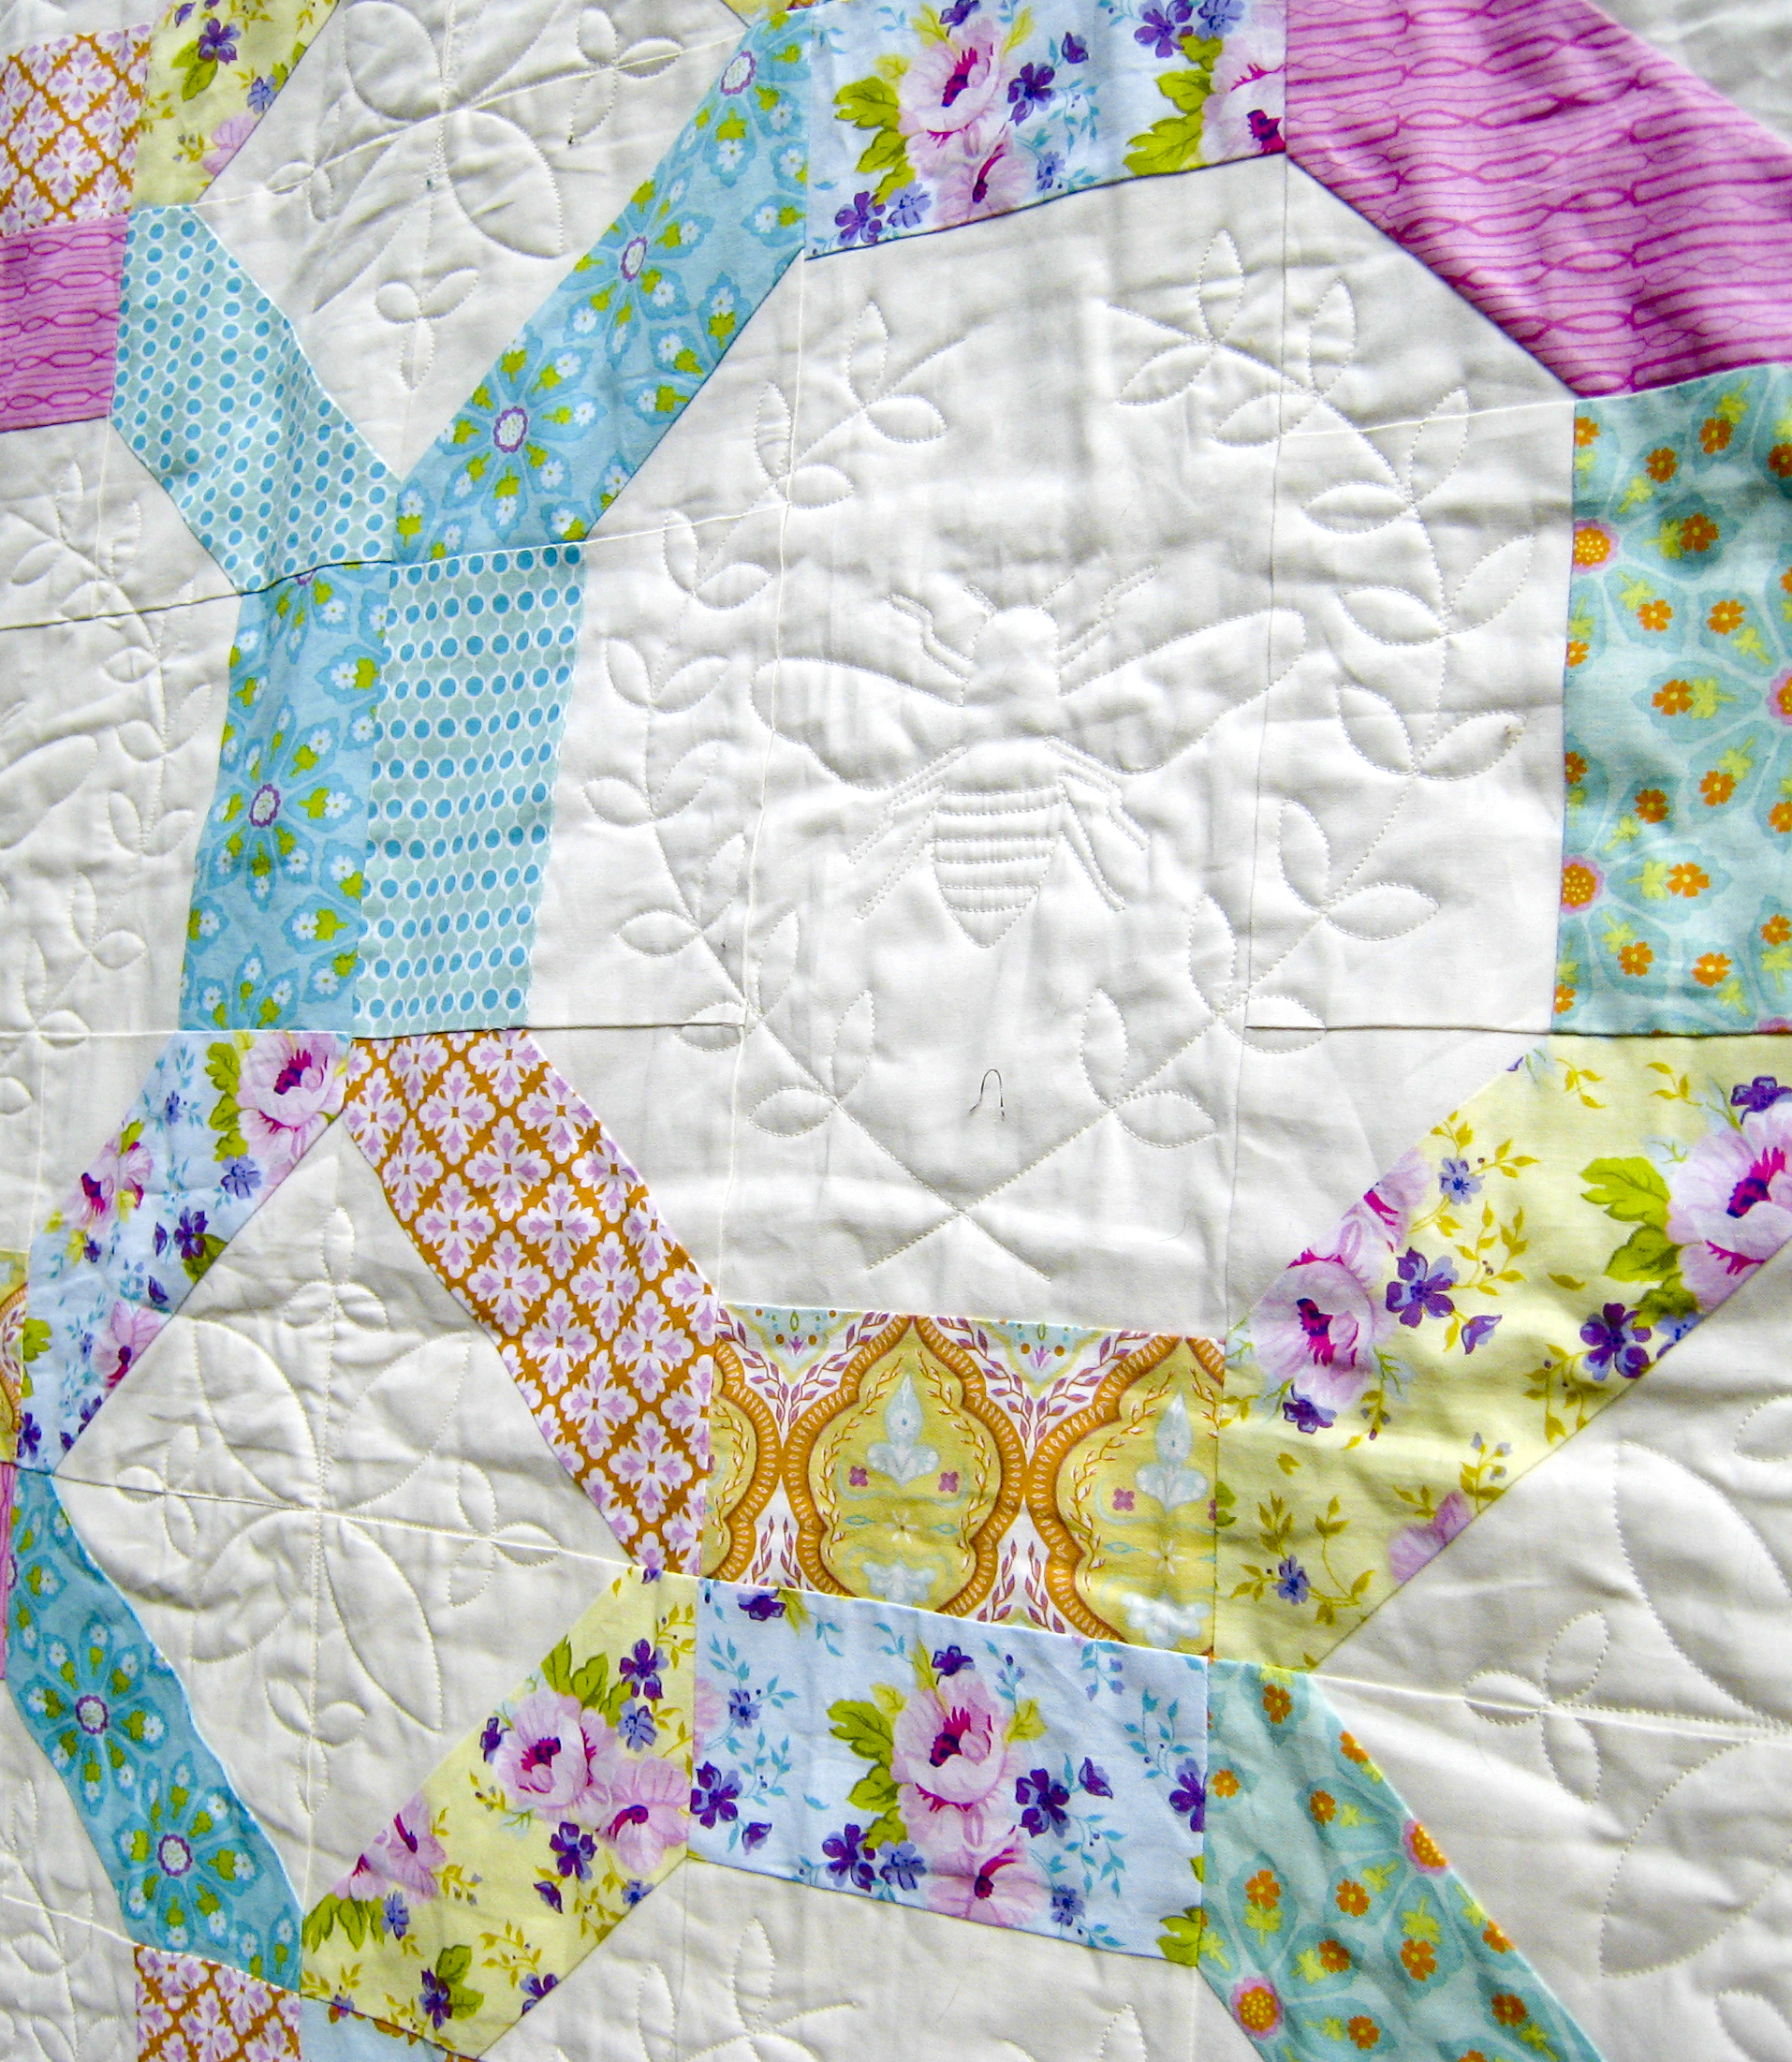
I’m planning to order some of the fabric below for the backing, and want to bind in the striped hot pink fabric. I’m going to quilt on both diagonals to achieve a cross-hatch. It might take a while, but I’ll be sure to post more pics once I’m done. The size of the top is lap/couch sized at 60×80.” I’m leaving the angular edges, I think it’s kinda fun.

The Tutorial
I’m going to explain how I made my quilt using 2.5″ strips for the print fabric and 3″ strips for the neutral fabric. I’ll also explain how I put together the print and contrast triangles.
Step One: Make your Triangles
1) Cut 2.5″ strips from your print fabrics. I used fat quarters and cut along the 18″ edge. I was able to get 3-4 triangles out of each strip set.
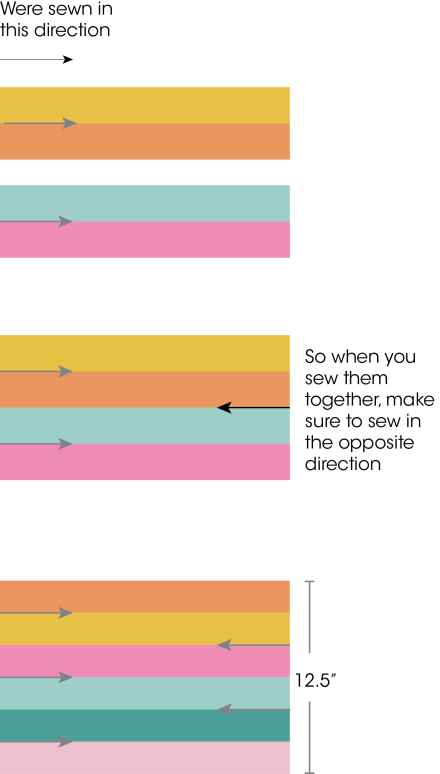
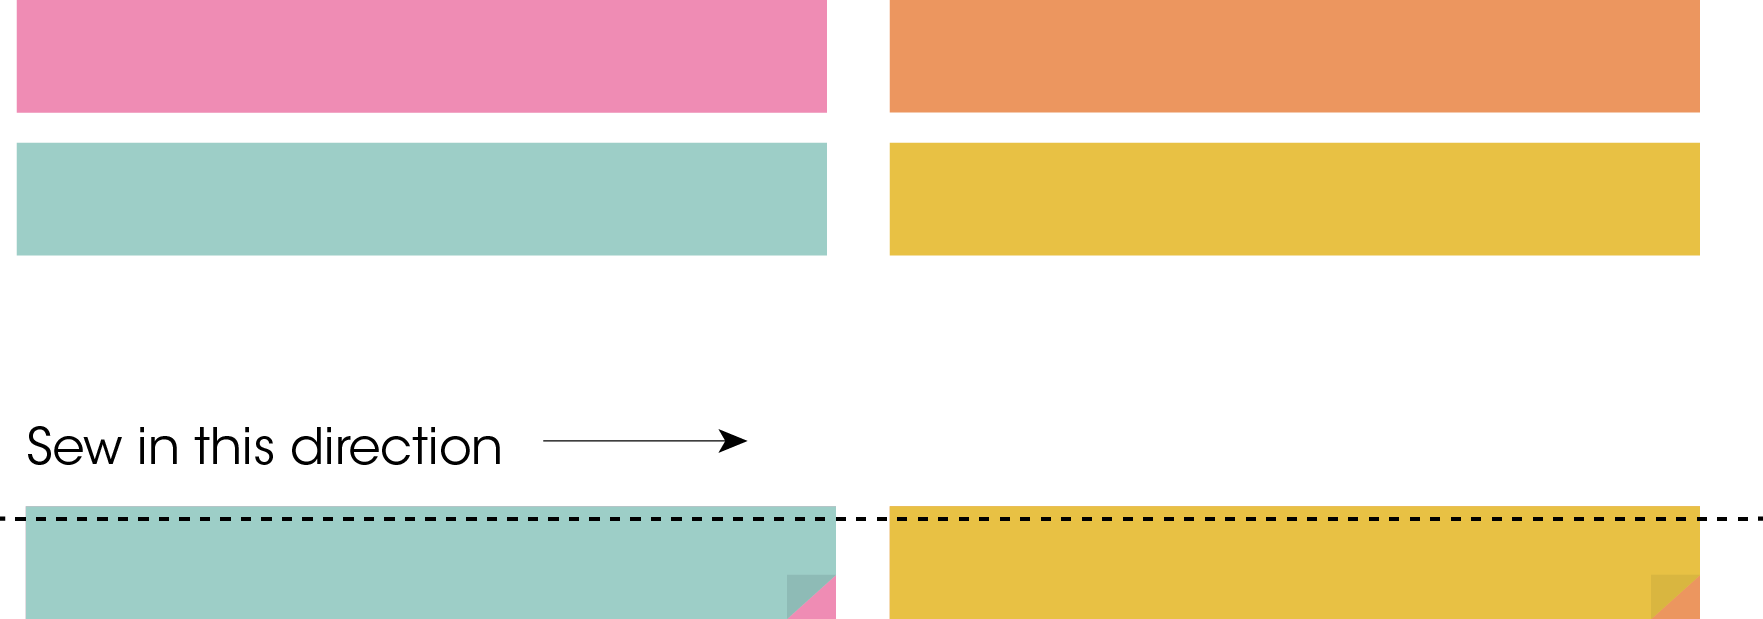
2) Group your strips into sets of 6 different prints. The key to strip piecing is to sew in opposite directions as you put them together, explained visually below. This is to prevent the strips from bending or forming a large arc due to your feed dogs. I’ve also been known to be a rebel and use my walking foot to piece strips and bias edges.

First I finger-press my seams to one side to avoid stretching or distorting the seams as I use my iron. I then press the seams with my iron. Be careful not to push your iron along your fabric (ironing). Instead, press your fabric by putting the iron down, let it do it’s job, and then lift the iron to move it to the next area. This will help you keep your fabric nice and straight.
When you add the strips together, make sure to sew in the opposite direction, as seen below. Continue to add strips until your unit is comprised of 6 strips. It should measure 12.5.”
Step Two: Cut your Triangles
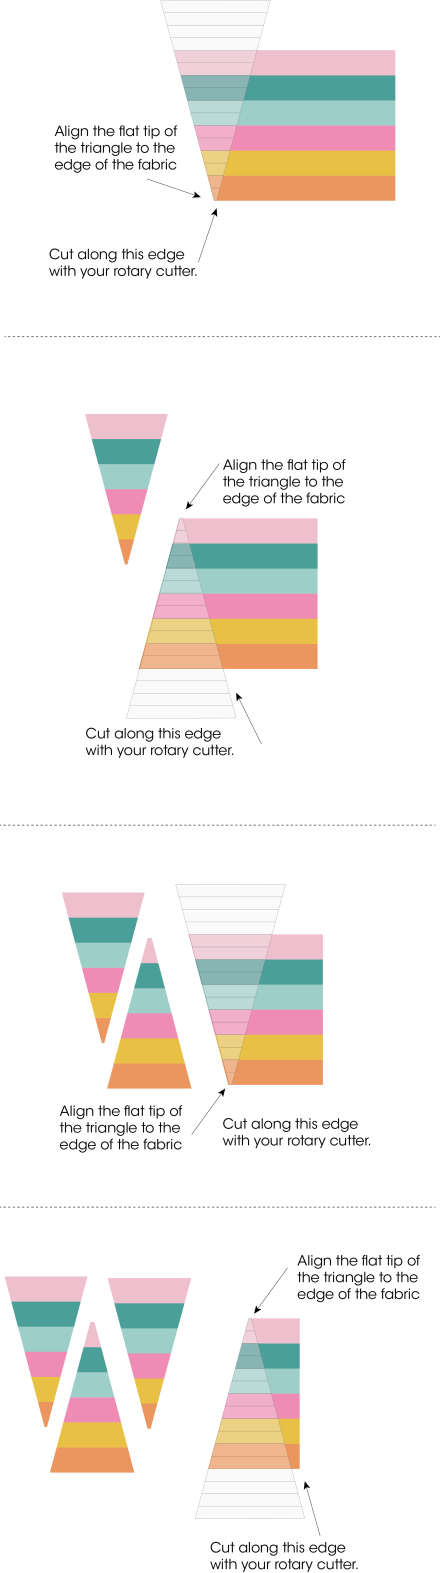
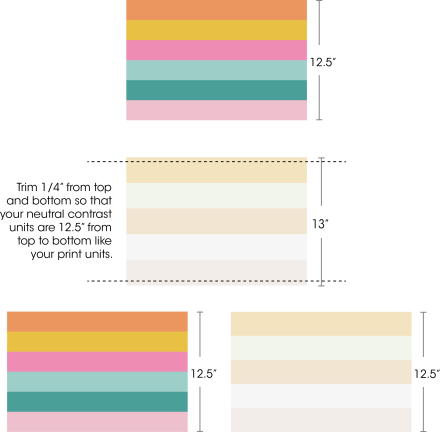
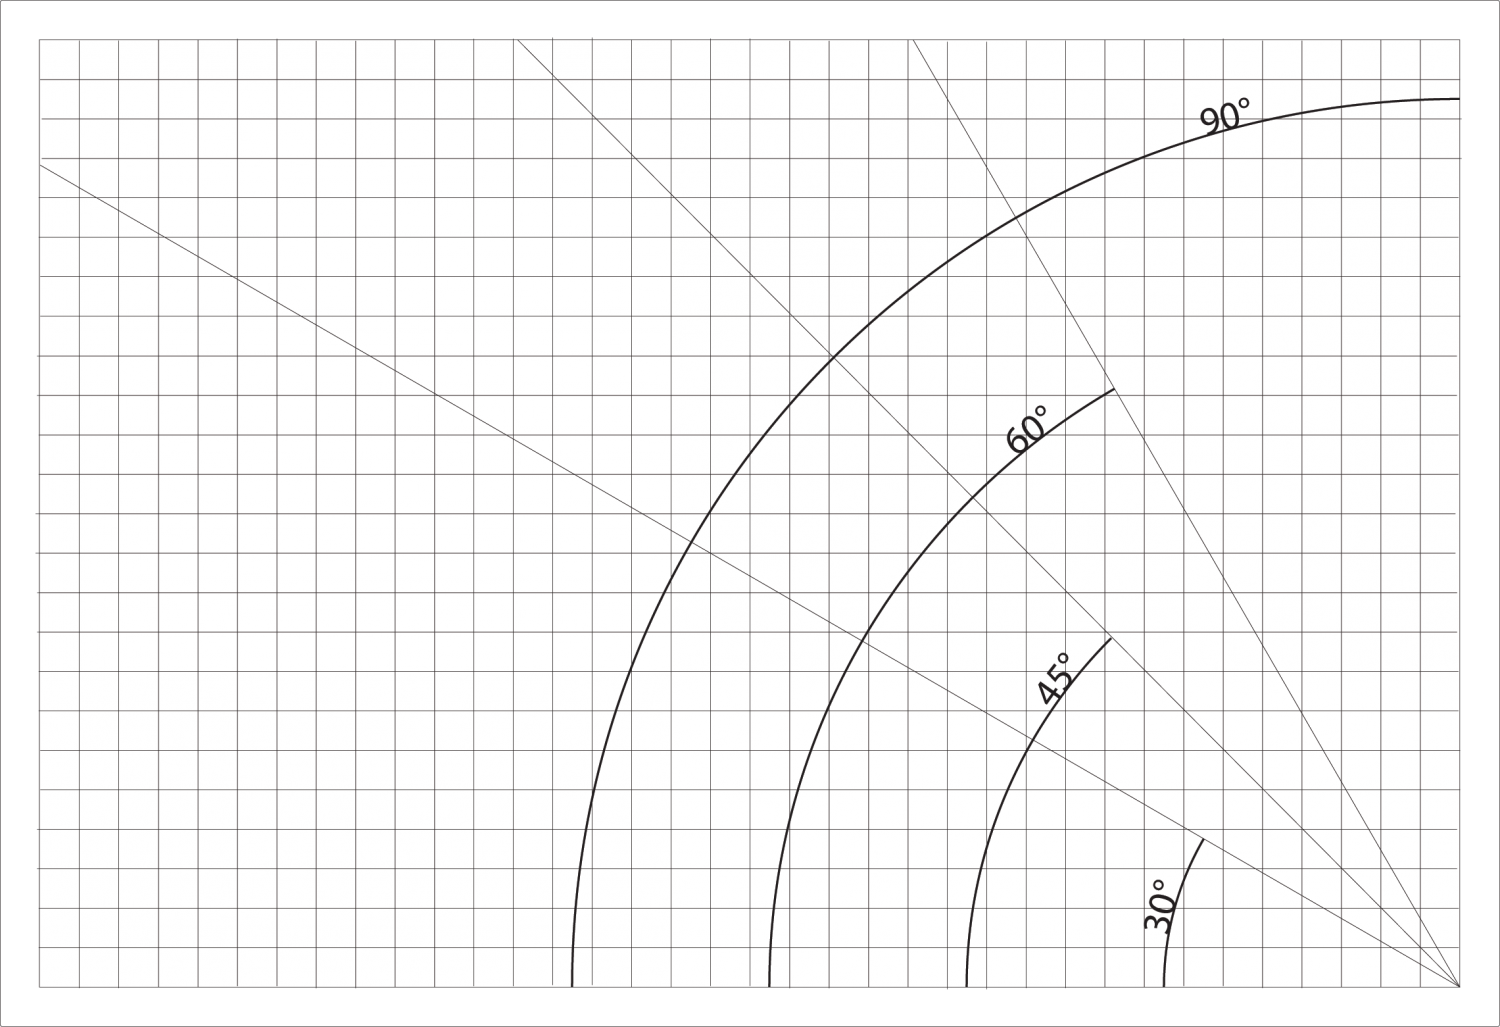
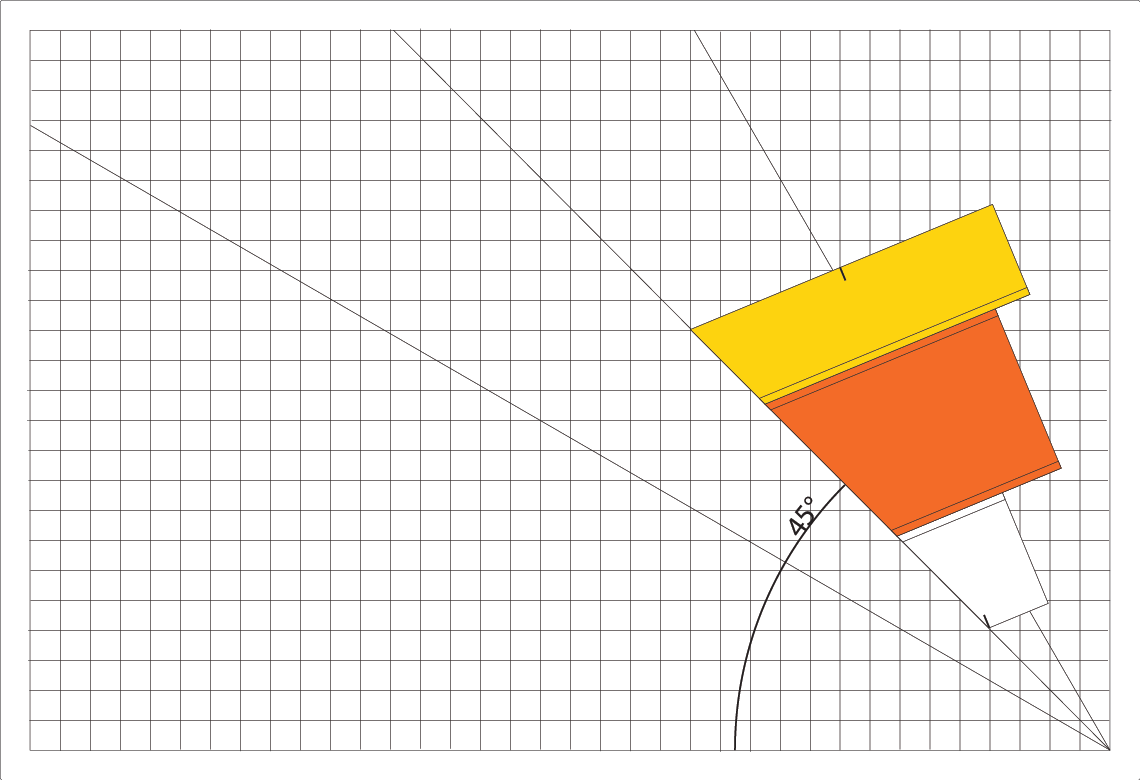
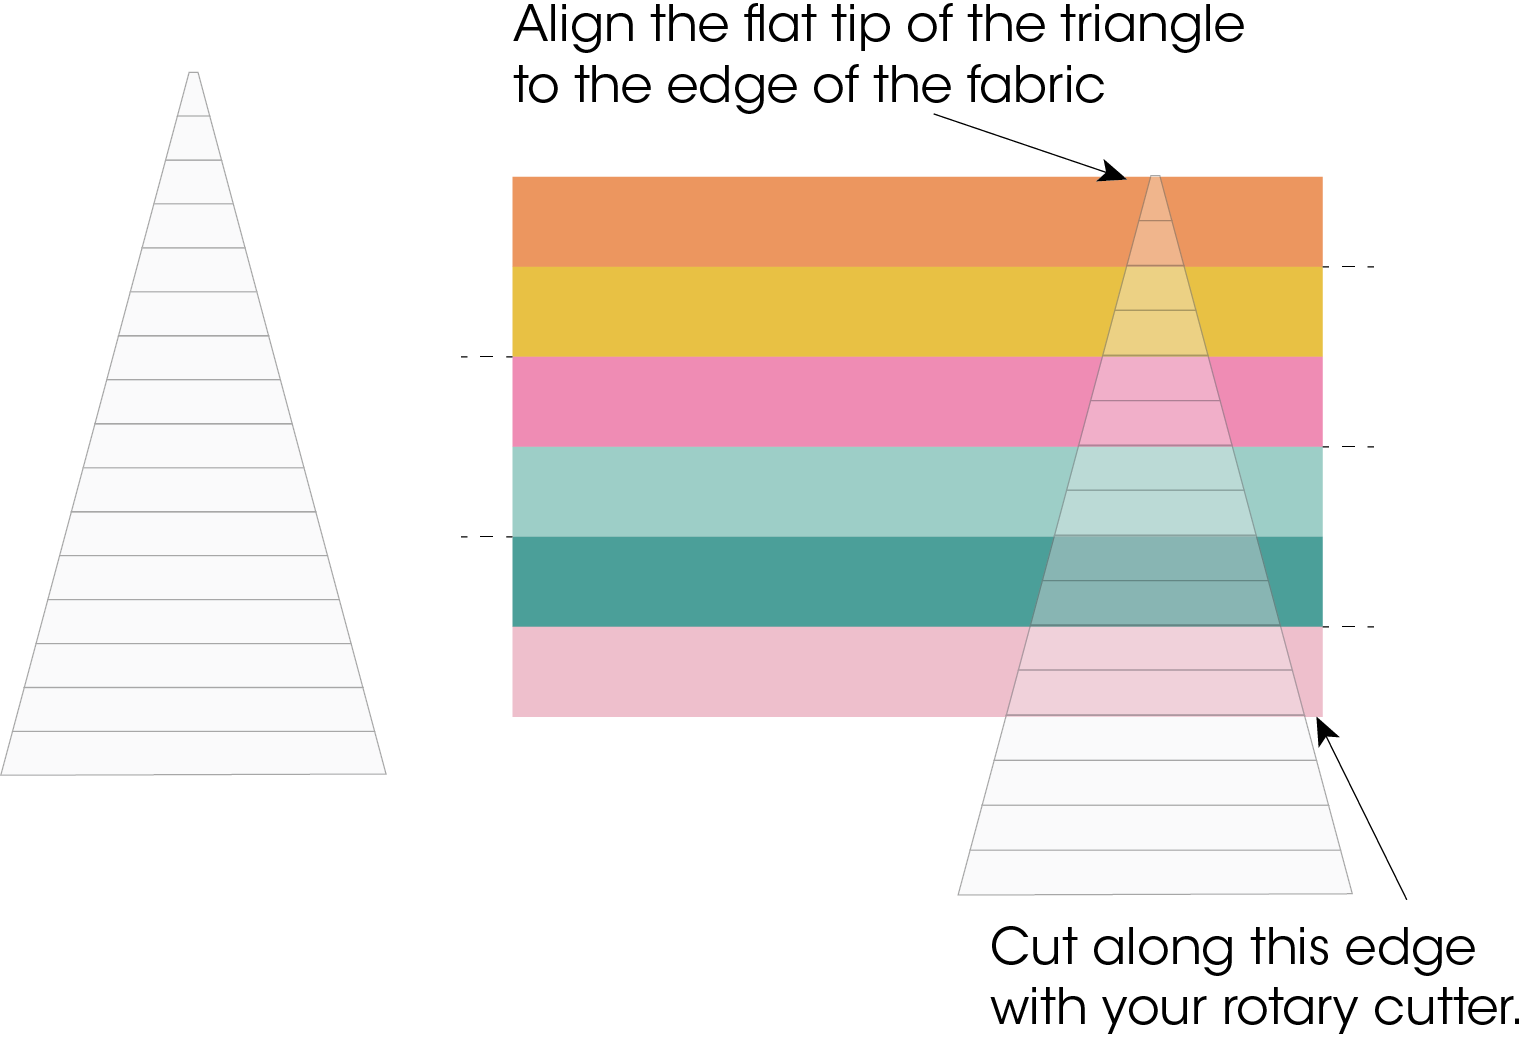
The Creative Grids 30 degree ruler has a flat tip at the top of the triangle as opposed to a pointy tip. Use this as your guide to align it to the top of your fabric. Your fabric should be 12.5″ from top to bottom.

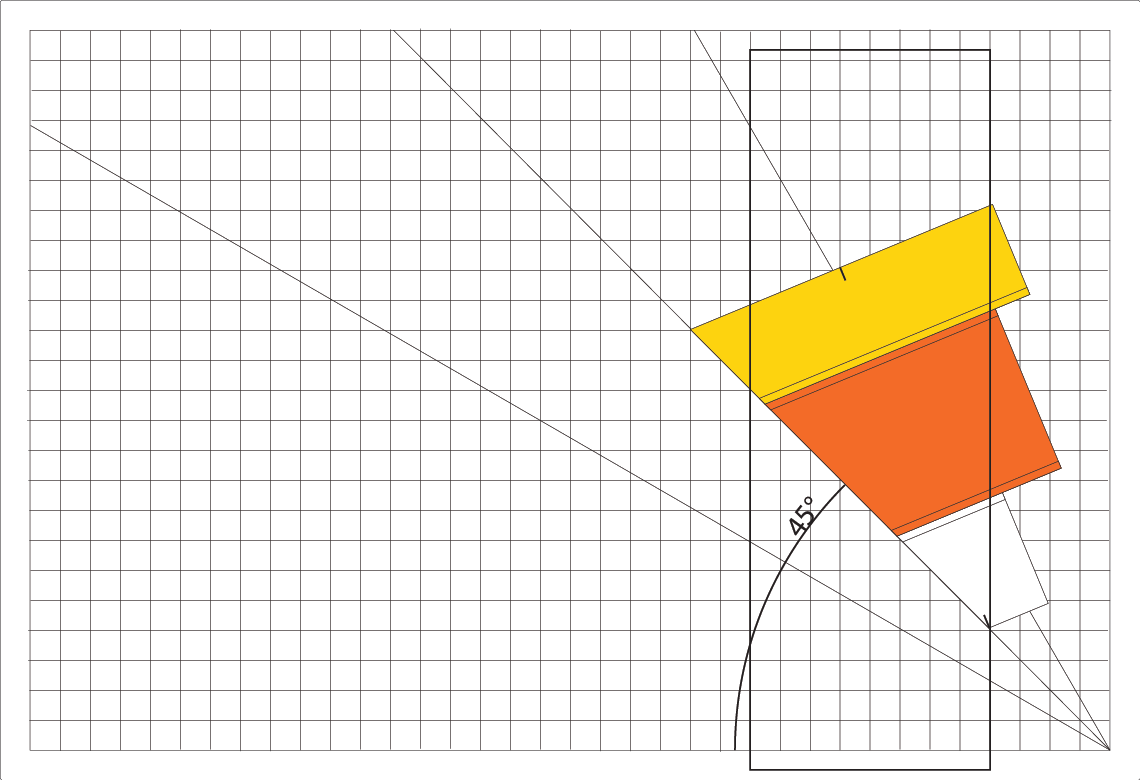
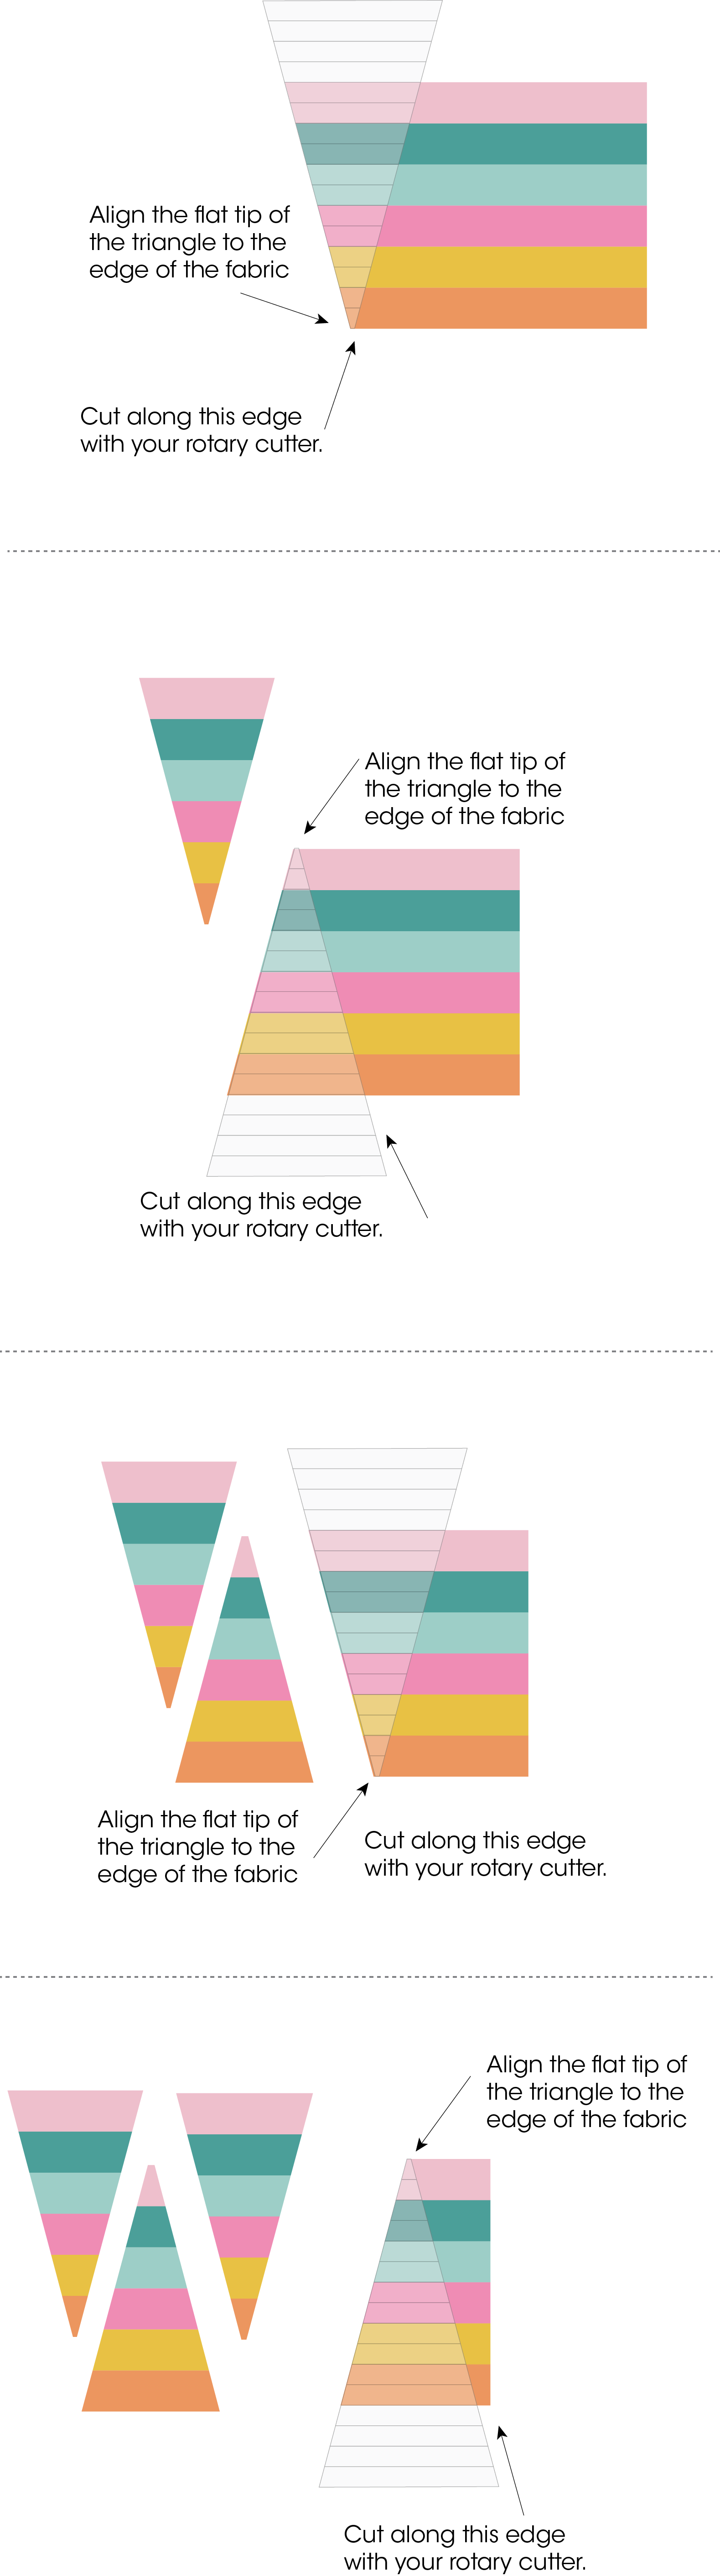
Flip your fabric and ruler around, align the ruler again to cut along the edge, as seen below. Continue to flip the ruler to cut your remaining triangles (you only have to flip your fabric once). Keep going until you run out of fabric.
Contrast/Neutral Triangles
Do the same with your neutral colors. Since we used an even number of strips for the print fabric, I suggest using an odd number of strips for your contrast triangles. If you use (6) 2.5″ strips of fabric for your print triangles, try using (5) 3″ strips of fabric for your neutrals. IMPORTANT: Once your neutral strips are sewn together they will be 13″ from top to bottom, as opposed to your print strips which are 12.5″ top to bottom. You will need to trim 1/4″ off of the top and bottom so that your neutral strip set is the same size as the print strip set (12.5″).
Step Three: Sewing your triangles together
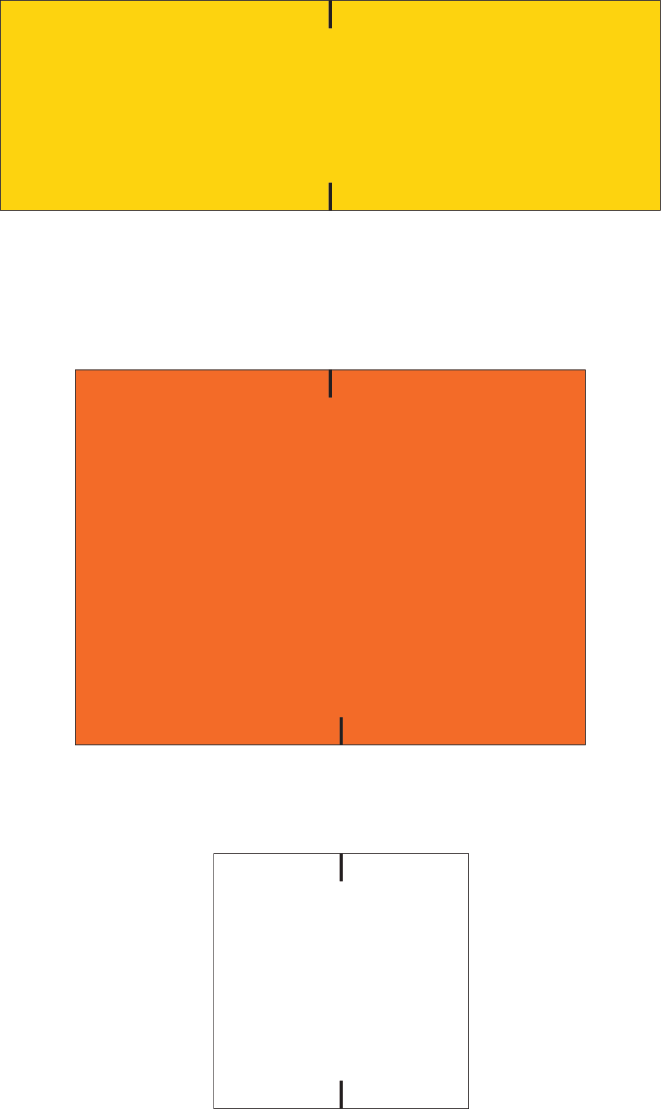
I’m going to use solid triangles to show you how to sew your 30 degree triangles together.
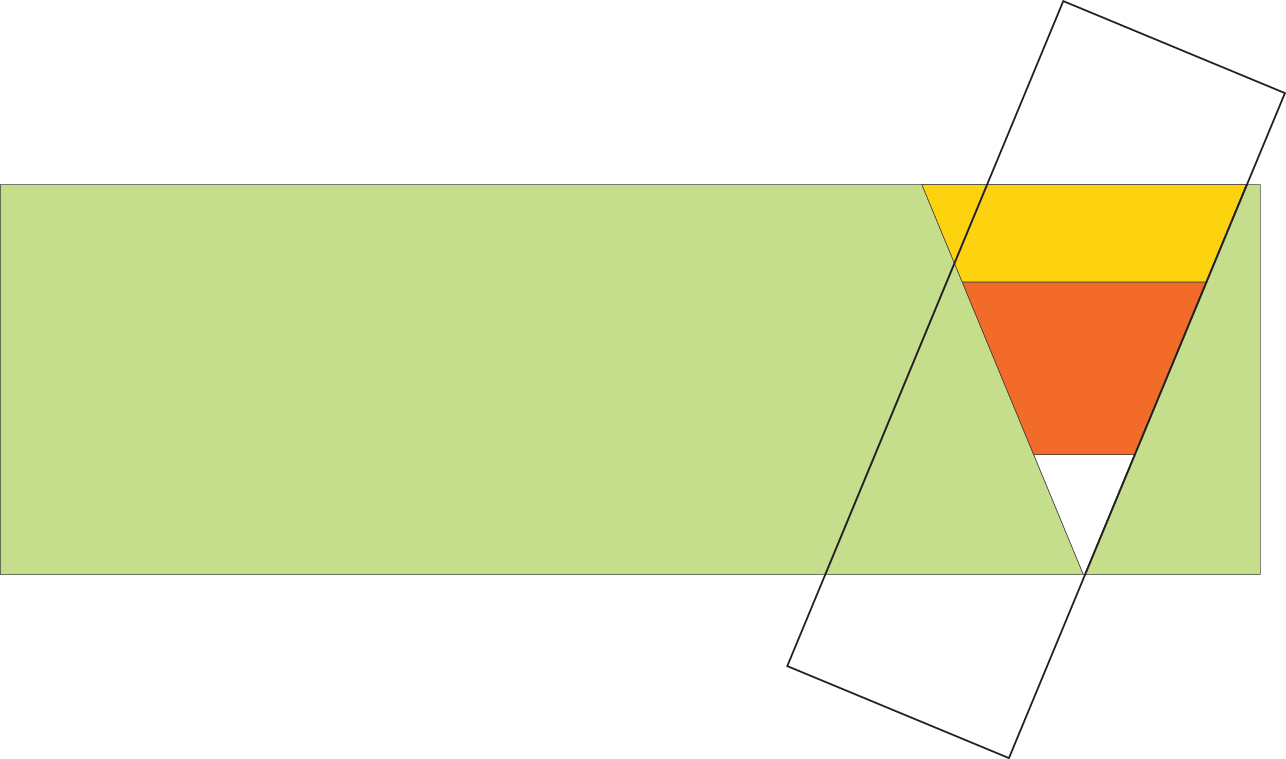
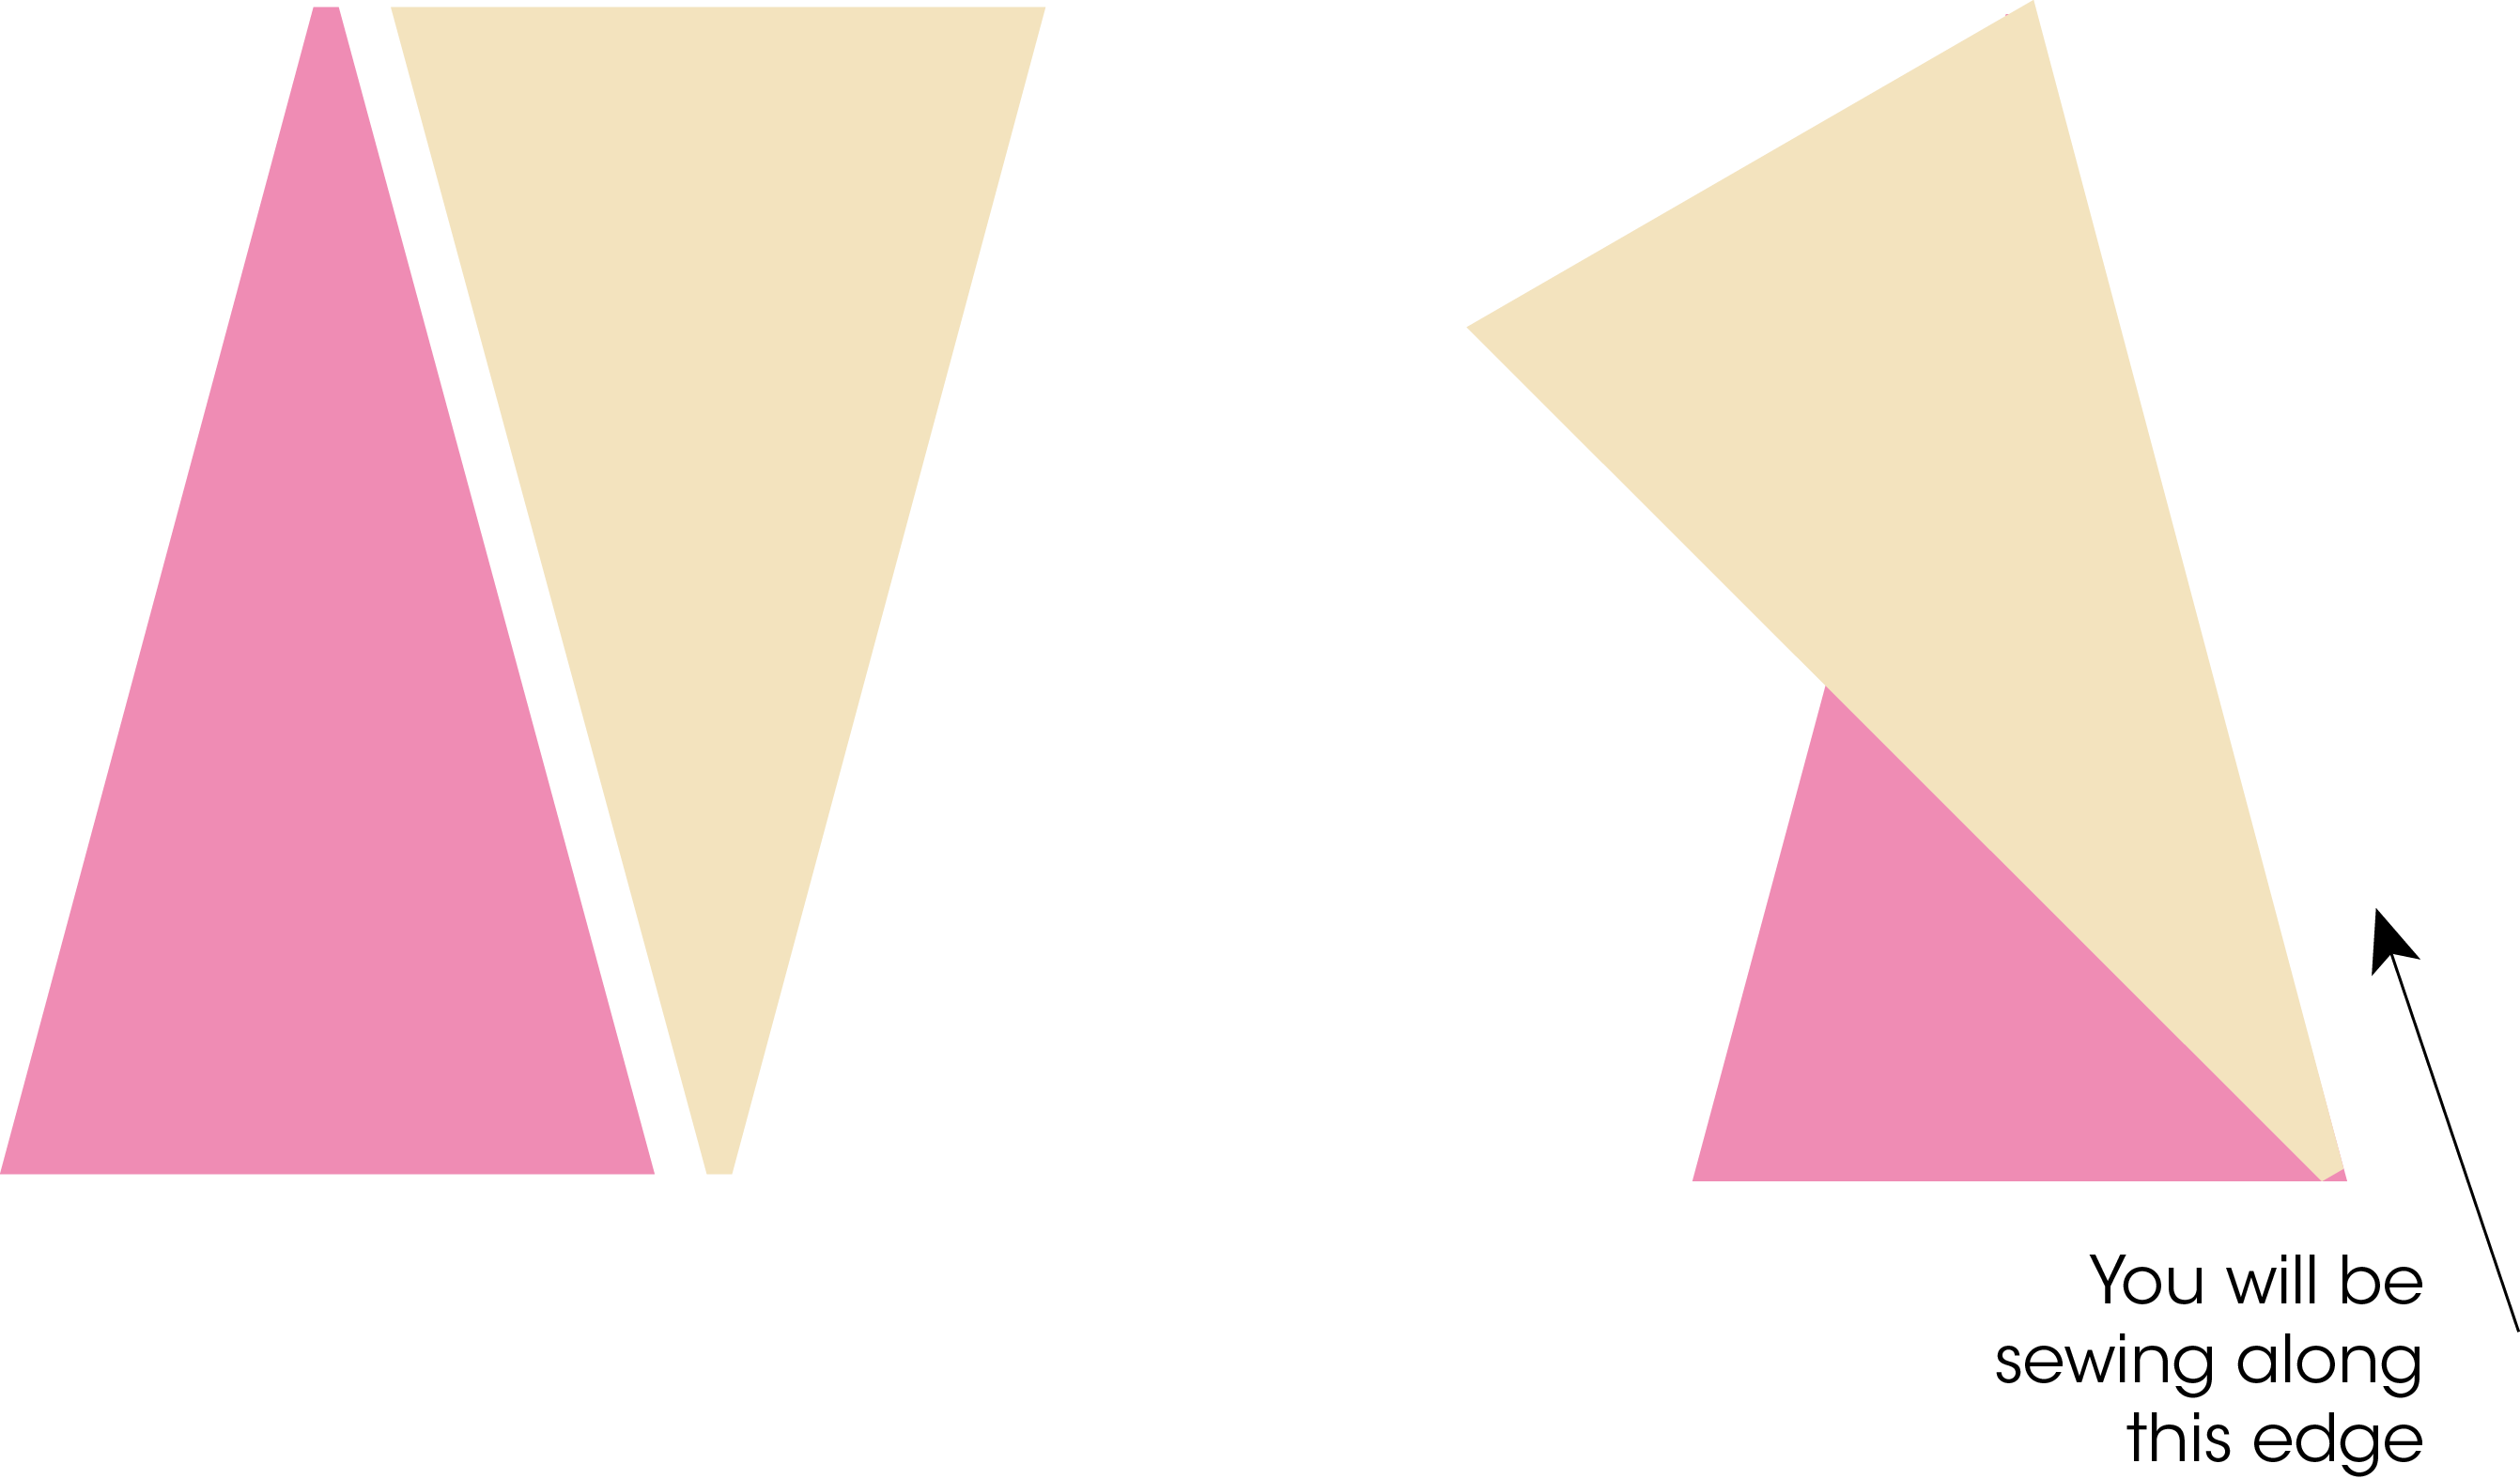
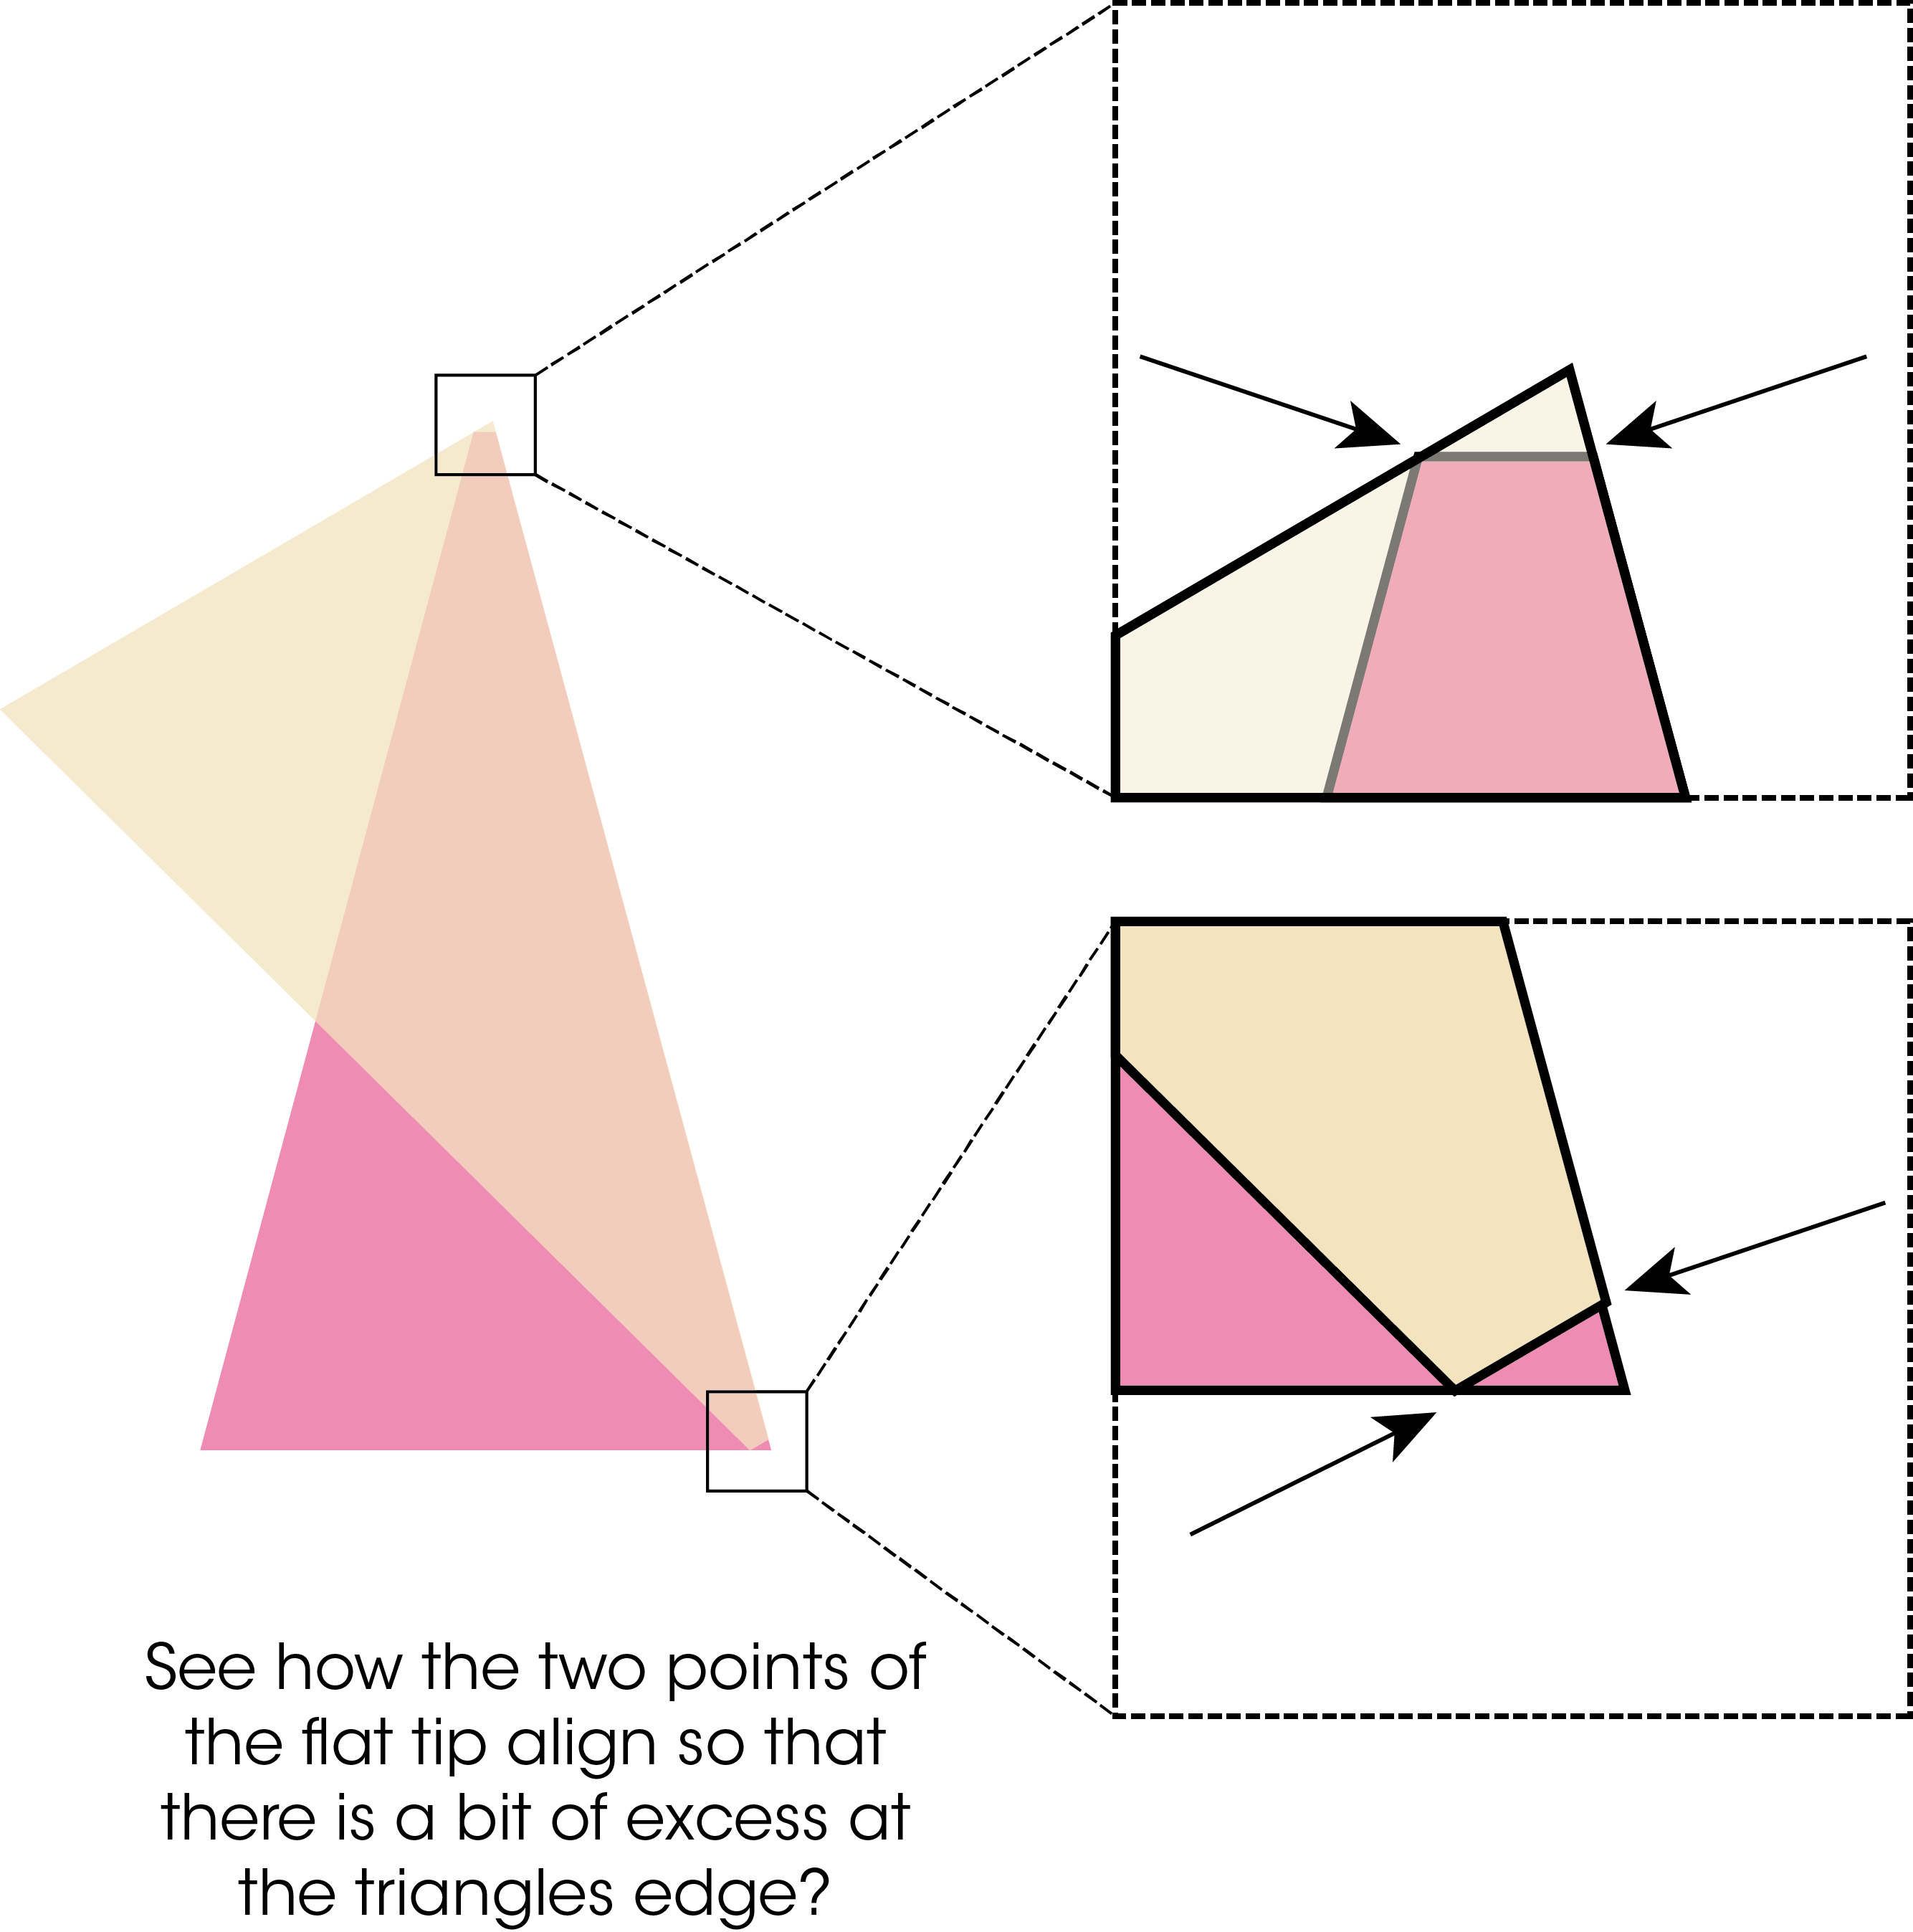
1) Take one of your print triangles and one of your neutral triangles. Lay them out as they will appear in the quilt. Place them right sides together and align them along the edge you will be sewing along.

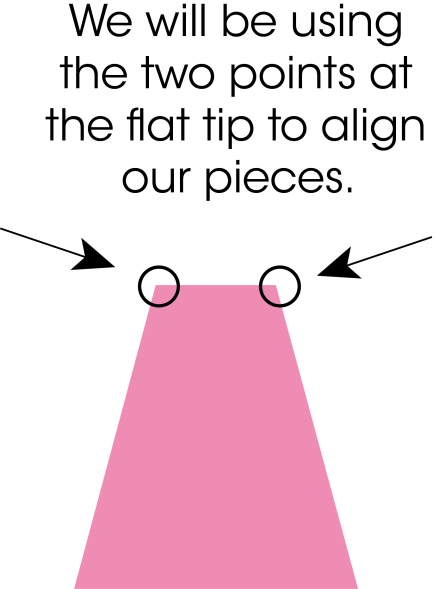
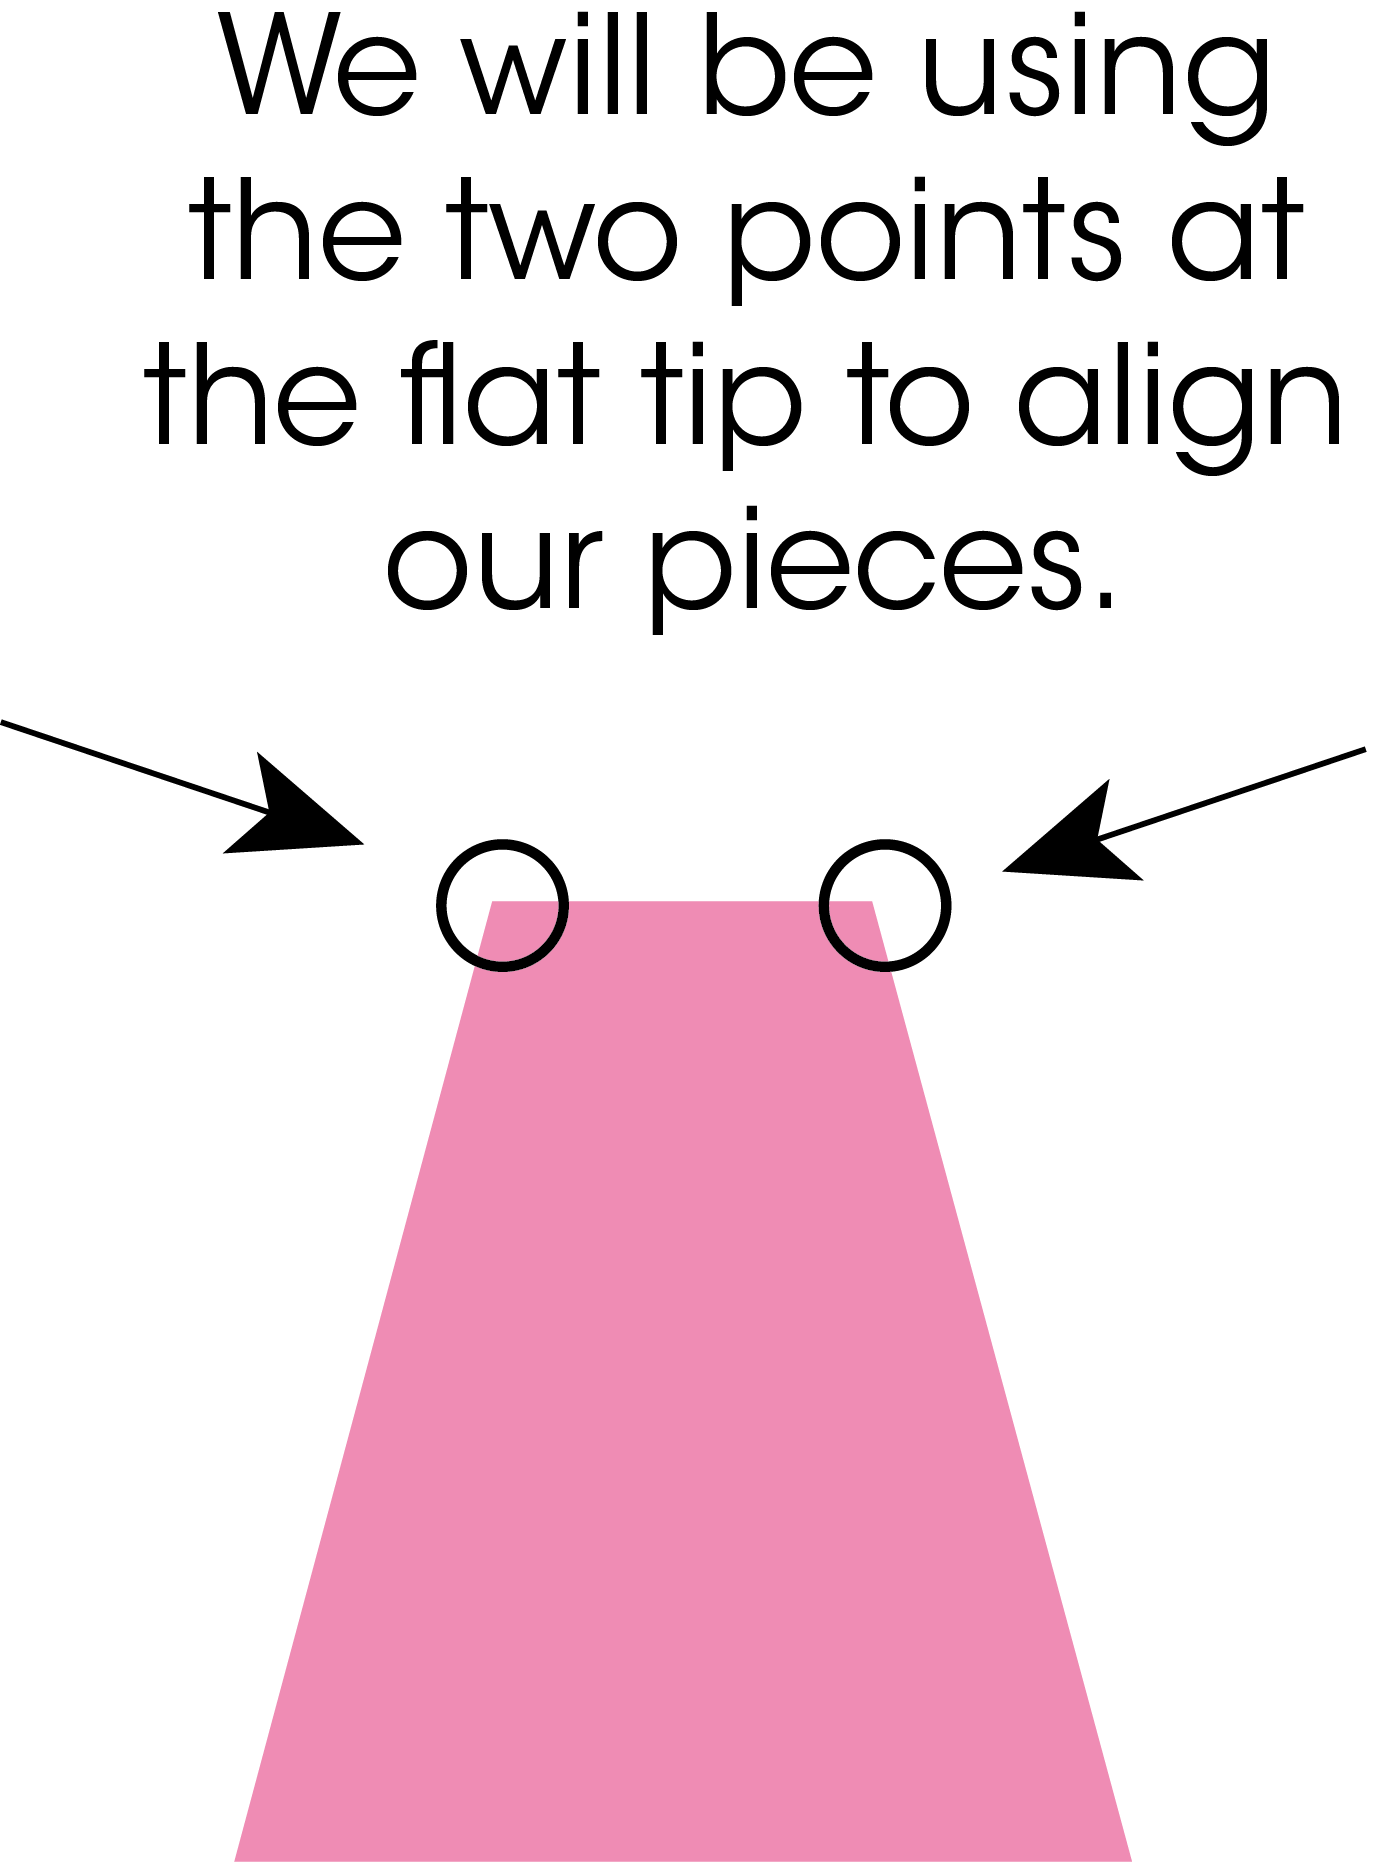
Take a look at the image below. You are going to use the flat tip of your triangle to line up your units.
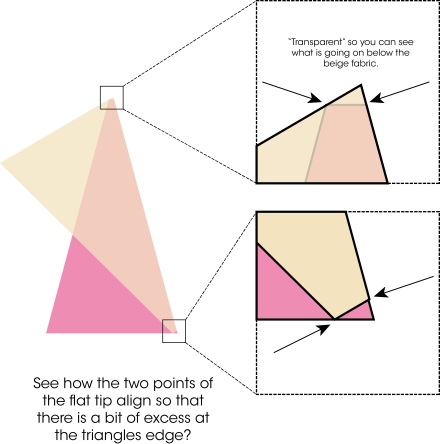
2) Sew your 1/4″ along the edge and then press your seams. Continue to add Triangles using the flat tip to make sure you are properly aligned.
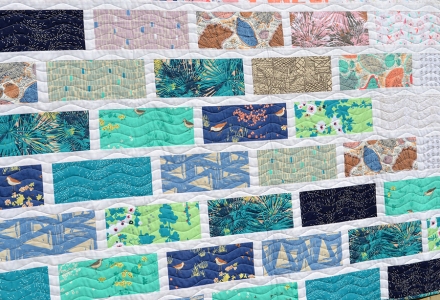
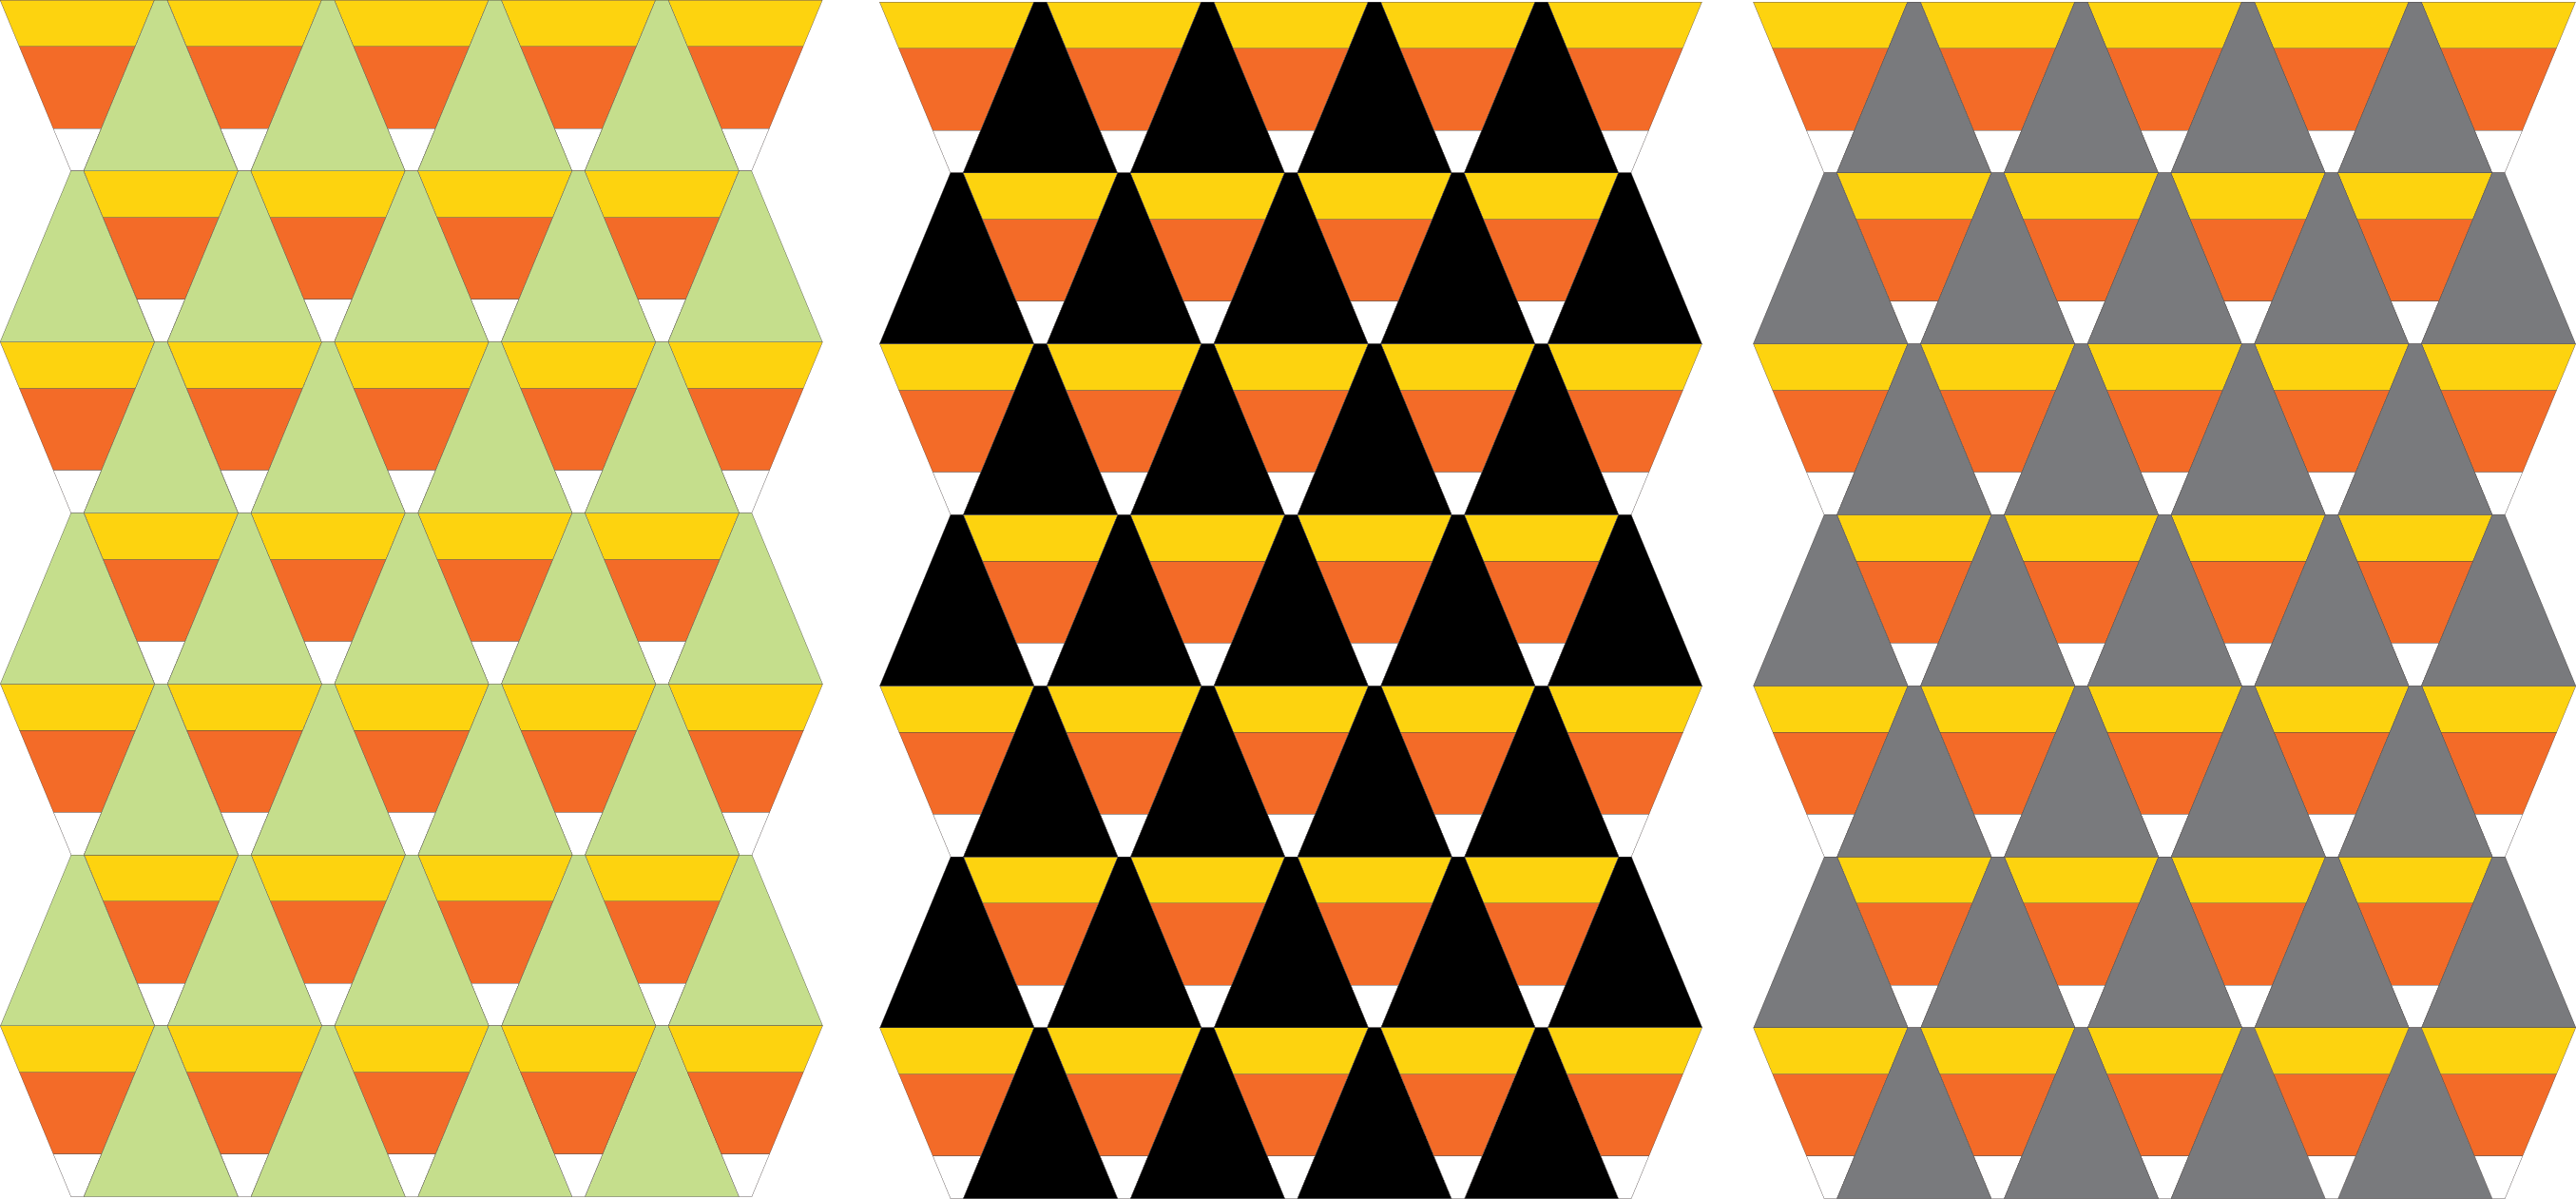
Get your rows together and you’ve got yourself a Striped Triangle Quilt! Thanks again to Sara Lawson for the amazing Fantasia Fabric. Go pick some up today!
Linking up to Freshly Pieced and Bee Social. 🙂
Piece Out!
Corinne


