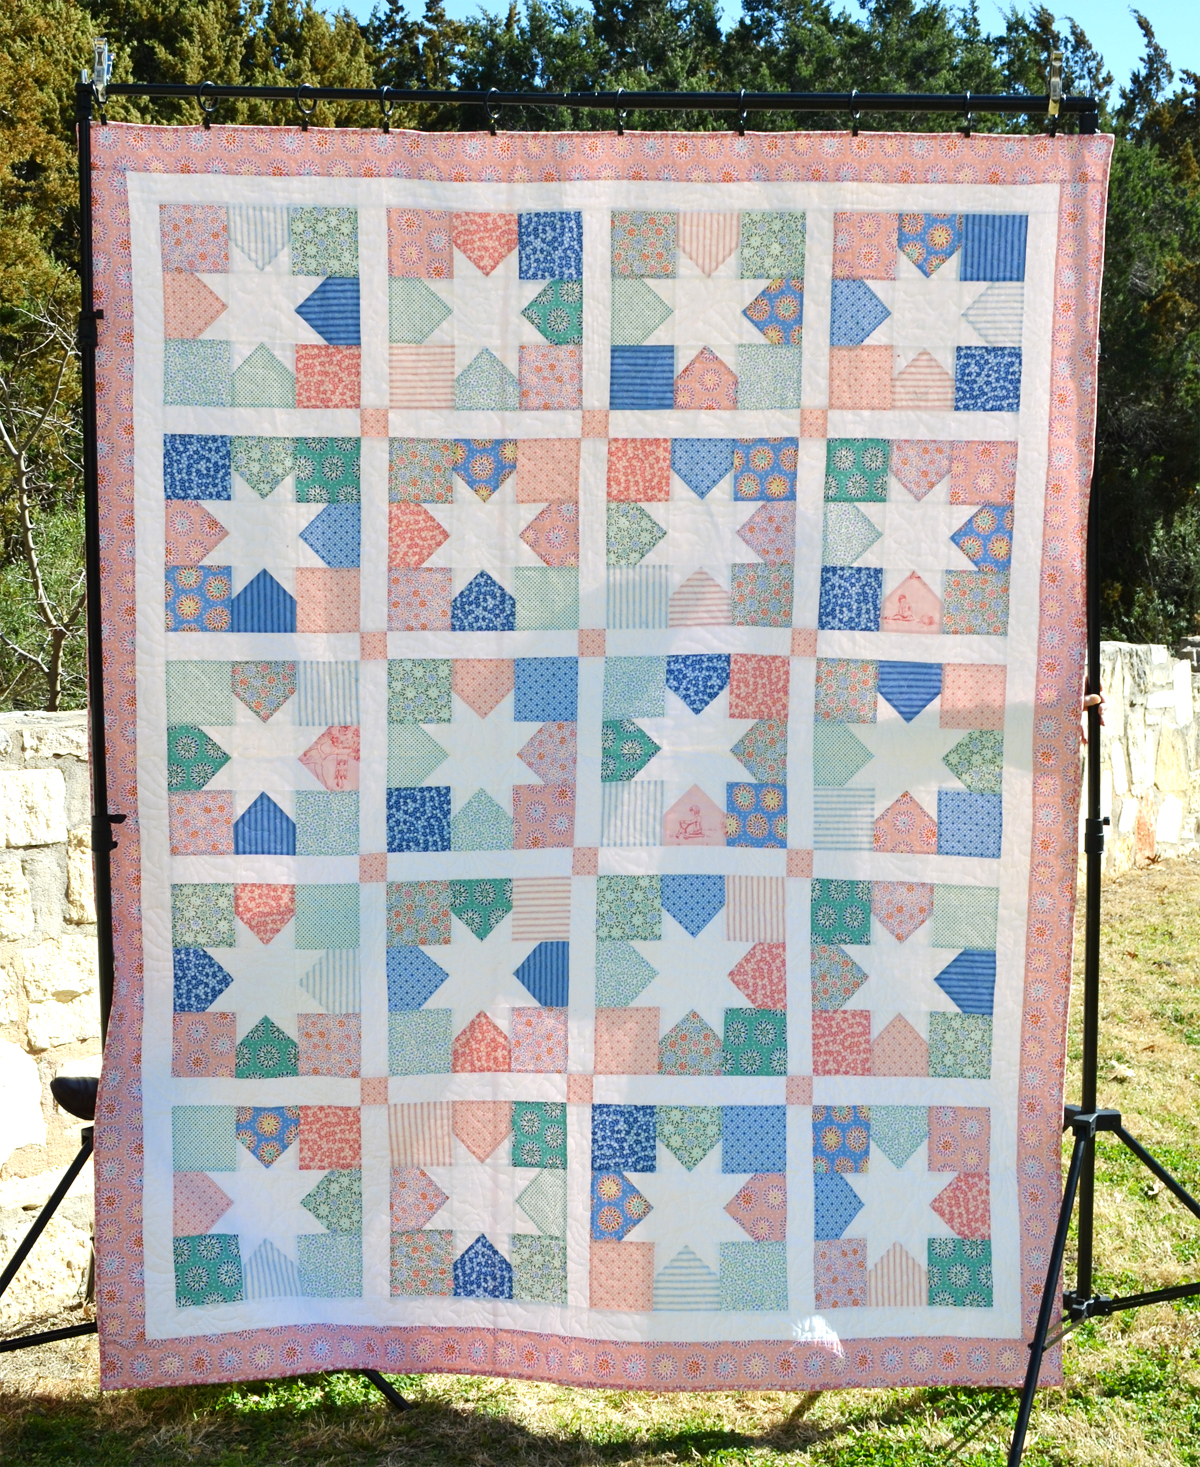
I have been wanting to make a pixel heart quilt, a scrappy quilt, and an equilateral triangle quilt for a while now. I ultimately decided to combine the three and now I have my very own equilateral scrappy heart quilt! I painstakingly cut 3 small triangles out of 60% of my stash (in a particular colorway of course, I’m still too uptight to go too scrappy) and came up with the quilt below. I initially had an entirely different quilt in mind, but after playing on my design wall, decided this was the best option. I think it is my favorite quilt I’ve made! I still need to quilt it, but wanted to post it in time for Valentine’s Day. Here it is!!! Big thanks to my lil sis for holding it up for one of the photos. (Linking up to Freshly Pieced for WIP Wednesday)
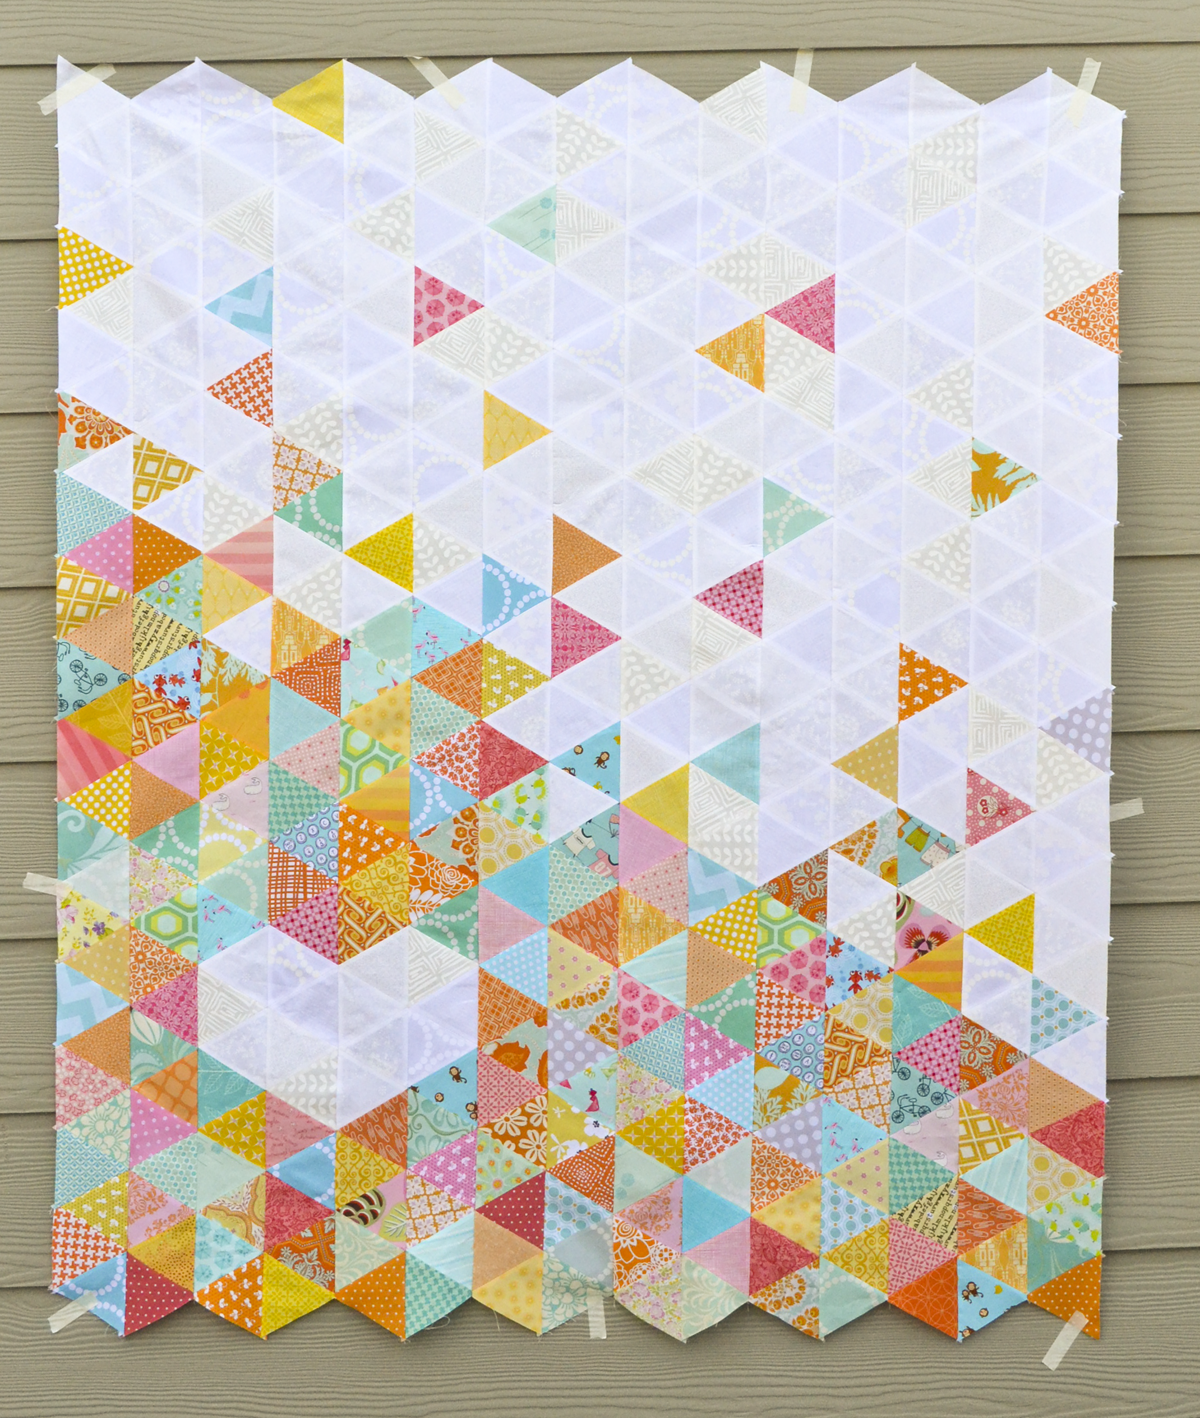


The quilt ended up measuring around 50 inches by 60 inches. I haven’t yet decided if I’m going to trim the top and bottom rows off to make the quilt square, or leave the jagged edges.
Are you ready to make one of your very own!?! First head on over to Fresh Lemons for her tutorial on cutting out equilateral triangles. My triangles started out as 4 inch strips, so the math even works out!
First up…How to piece the triangles together
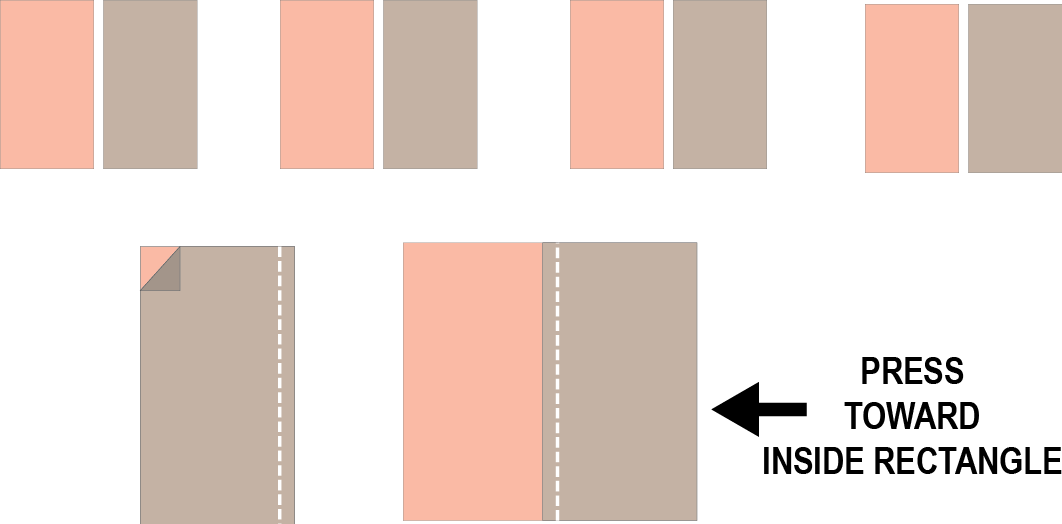
Full disclosure: I am usually a press the seam to the side kinda gal. I personally think its easier to match points if they nest. That said, this quilt is far easier to make if you press your seams open. As long as you machine quilt the life out of it, after you are done the quilt should stand up fine over time. Before we look at how the whole quilt is constructed, let’s review how I pieced my triangles.
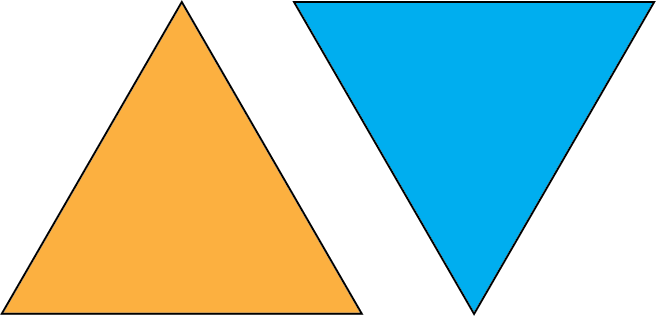
You are going to start off by placing two of your triangles together, right sides facing. Sew a quarter inch up one side.
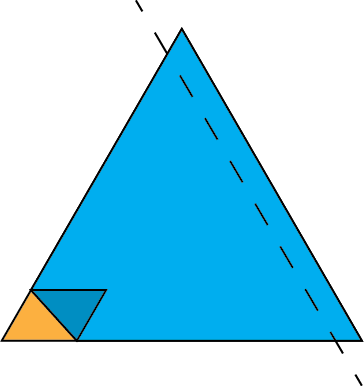
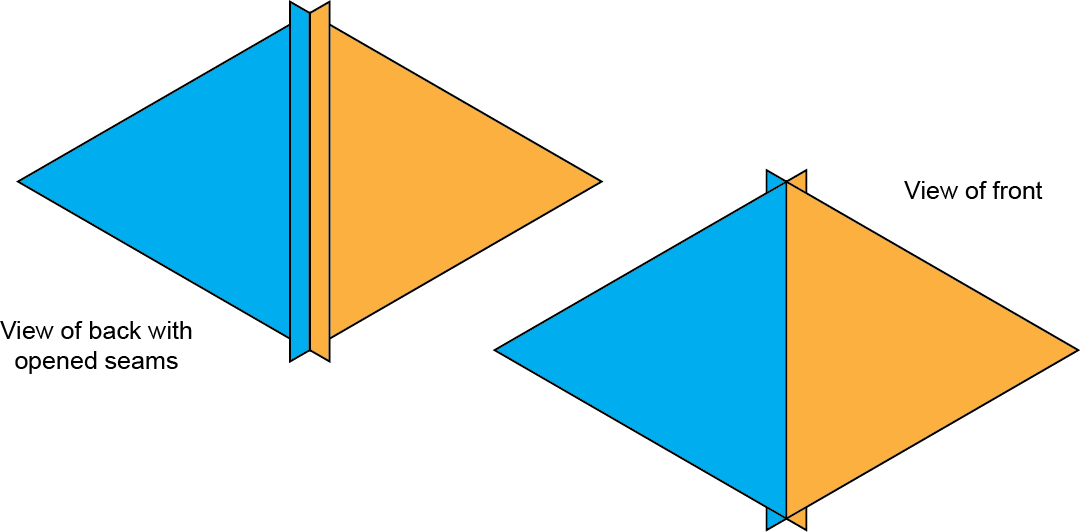
Time to press! As I said before, I think its easier to sew these types of triangles together if you can use the corners of the pressed open seams as guides. Take a look at how the piece should look from the front and back:
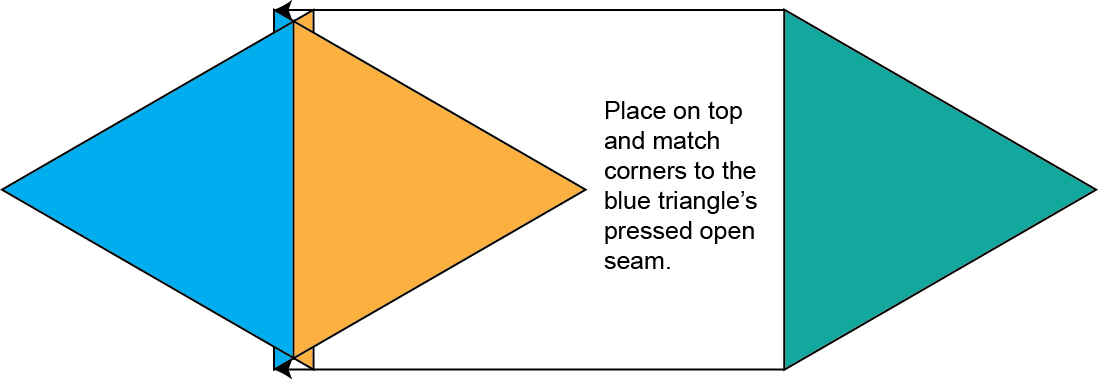
Now that you have the seams pressed open, you will use those corners as guides. You are going to place the next triangle, right sides together, one on top of the other, just as before. Instead of worrying whether or not you’ve offset the triangle enough, use the openly pressed seam as your guide.
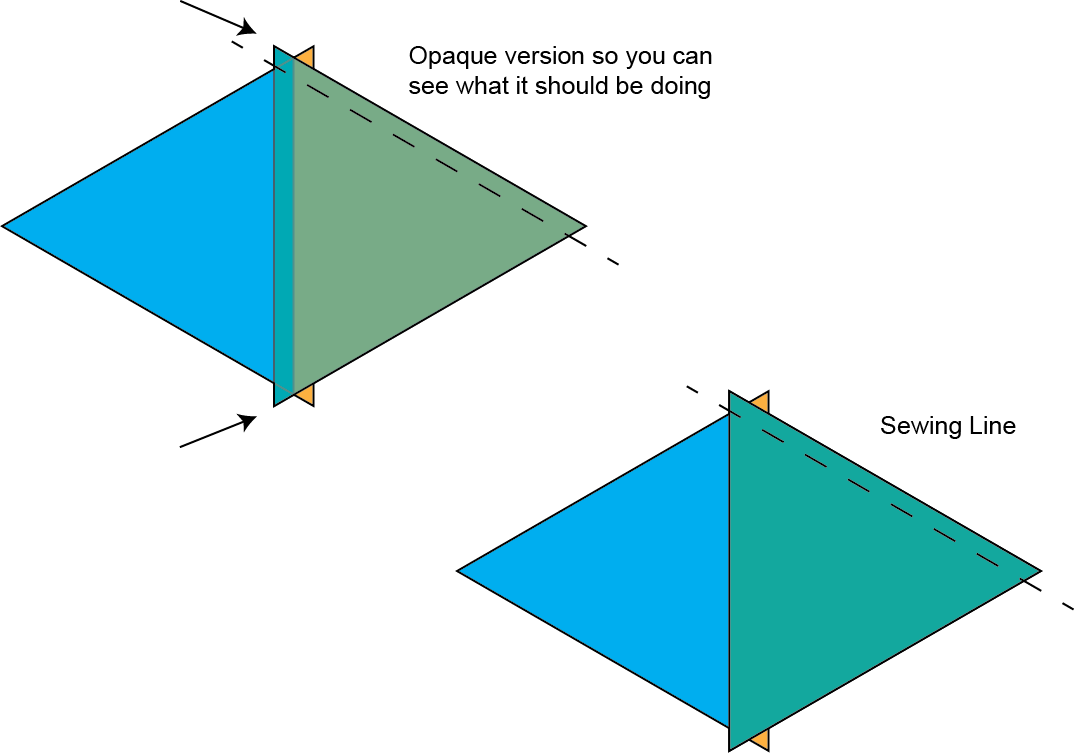
Voila! You have three triangles sewn together and you can keep adding on. I like chain piecing, so I will sew triangles together in sets of two, and then put sets together to make into sets of four, etc. Goes a lot faster that way!

Quilt Configuration
Okay, now that we know how to piece the triangles, let’s look at how the quilt actually pieces together. This quilt is made up of columns instead of rows. For my quilt I made 15 columns of 29 triangles each. Essentially you are sewing together rows of 29 triangles and then turning them on their side to form columns.
Sew your triangles together like this:
![]()
Then turn them on their side and line them up as columns like this:

Finally, sew together your rows and you have your quilt!
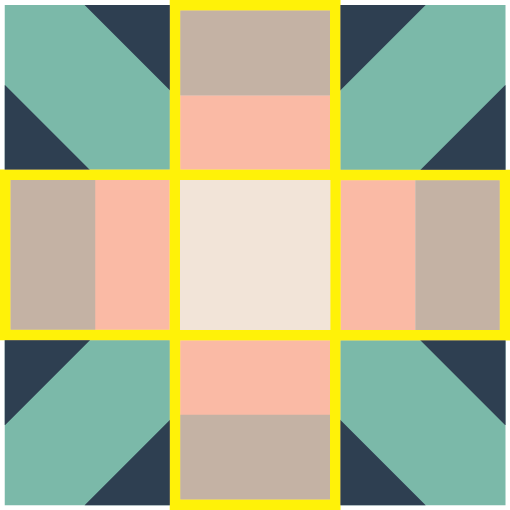
The Heart
The heart is made up of 14 triangles that span 4 of your rows/columns. Use the coloring diagram at the bottom of this post to figure out where you want to place your heart, and pay close attention as you piece!

The possibilities are endless!
Initially I started out wanting the triangles to be white, every other triangle, like the two options below (forgive the colors, these were quickly illustrated files). Ultimately the heart just wasn’t visible enough, which is how I ended up with the cascading triangles.


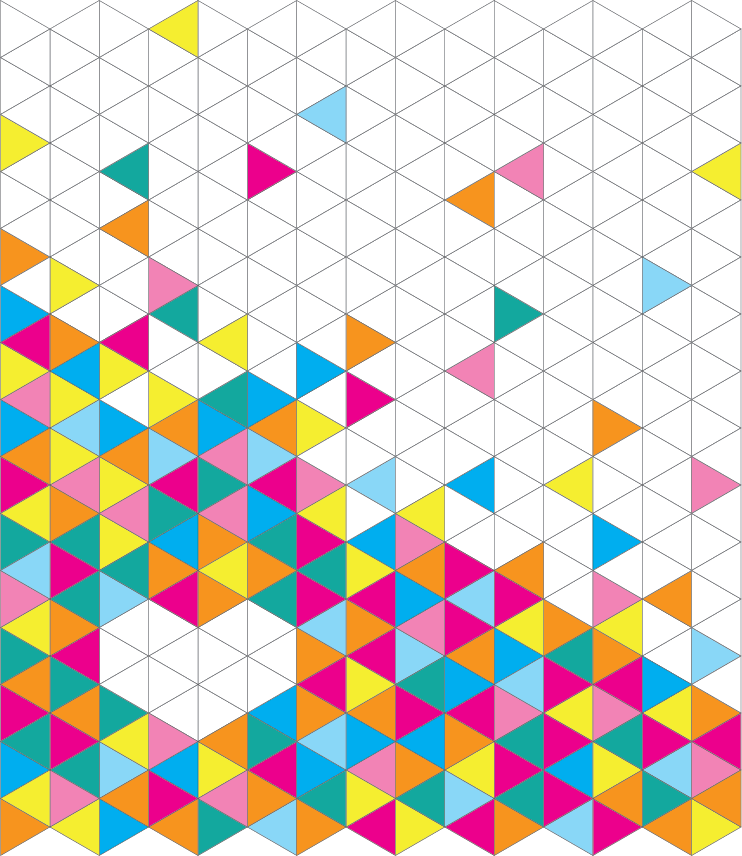
I’ve included a diagram below so you can color your own heart quilts and use them as a reference when piecing your triangles. I also came up with a couple of other fun colorways in Illustrator I thought I’d share. Here is a rainbow version:

My favorite is a gradient heart quilt. I think I might make this one and enter it in our local quilt show…if I do I’ll be sure to post pics!

Coloring Diagram 🙂 Just click on the picture and print! Hopefully it prints out properly on 8.5 x 11 inch paper. Like with Water/Waves, I included more rows and columns just in case you want to make your version larger. You can also adjust the size of your triangles to make it bigger.